- You are here:
- Home »
- Blog »
- Power BI »
- Power BI DA-100 Exam Tips
Create and manage workspaces
Apply sensitivity labels to workspace content

Power BI DA-100 Exam Tips
Create and manage workspaces
Apply sensitivity labels to workspace content
In this series of blog posts, we will be examining some of the key features of Power BI Desktop, Power Query and the Power BI Service needed to pass exam DA-100: Analyzing Data with Microsoft Power BI.
In this Power BI training post, we will examine DA-100 exam – Create and manage workspaces: Apply sensitivity labels to workspace content.
1406-Apply sensitivity labels to workspace content
Sensitive sensitivity labels enable organisations to classify and protect sensitive data on an object by object basis. Applying sensitivity labels to objects, enables organisations to specify how sensitive the data in that object is. In order to use sensitivity labels within Power BI, there are a couple of things that have to be put in place by administrators.
Creating Sensitivity Labels
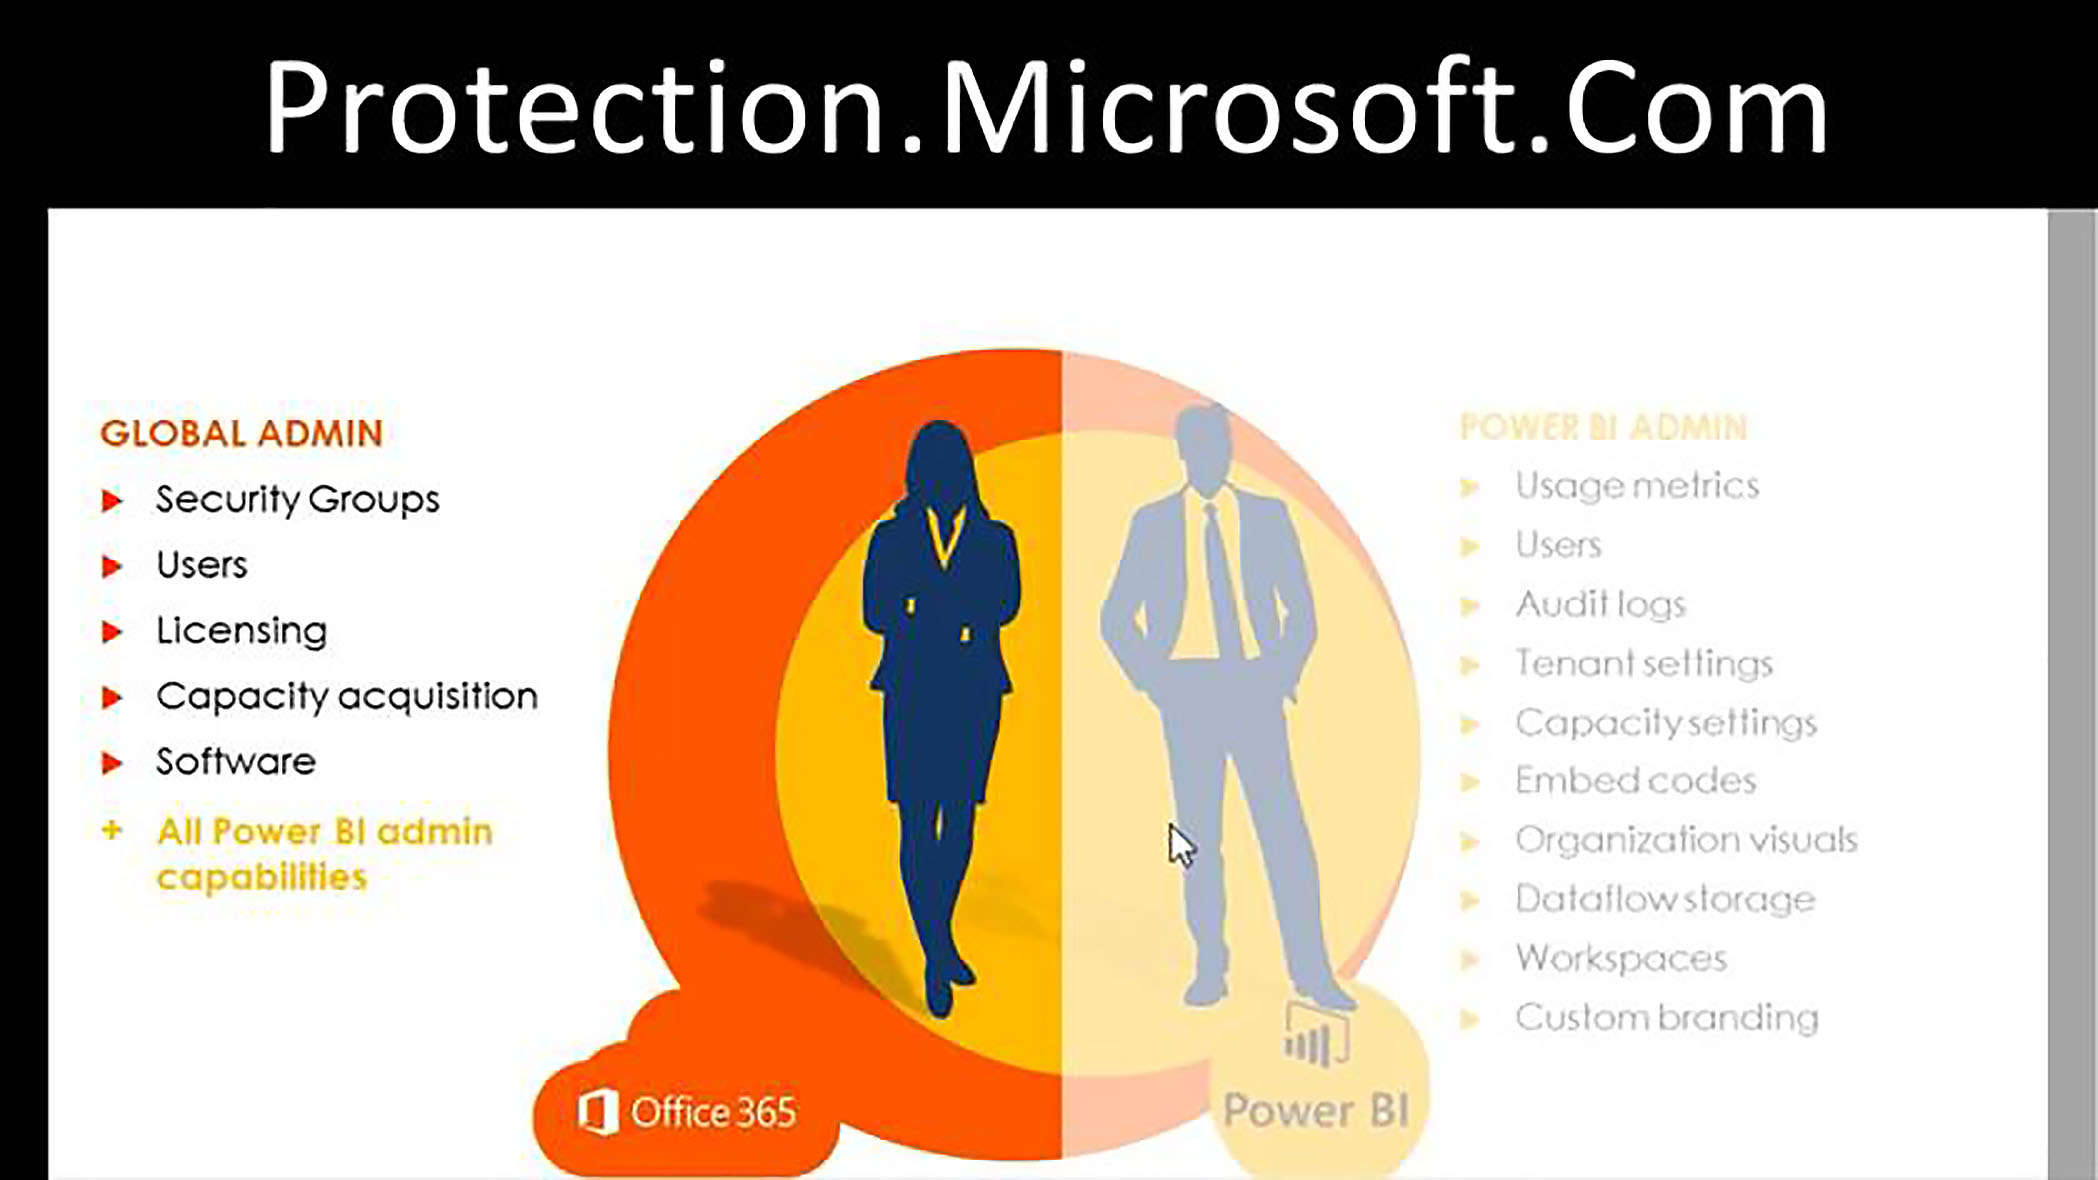
The first is the creation of sensitivity labels, and this is a Microsoft or Office 365 task rather than a Power BI task. So, it can only be done by a global admin. It cannot be done by someone who only has Power BI administration rights. To create sensitivity labels, a global admin needs to go to the office 365 security and compliance centre by visiting protection.microsoft.com.
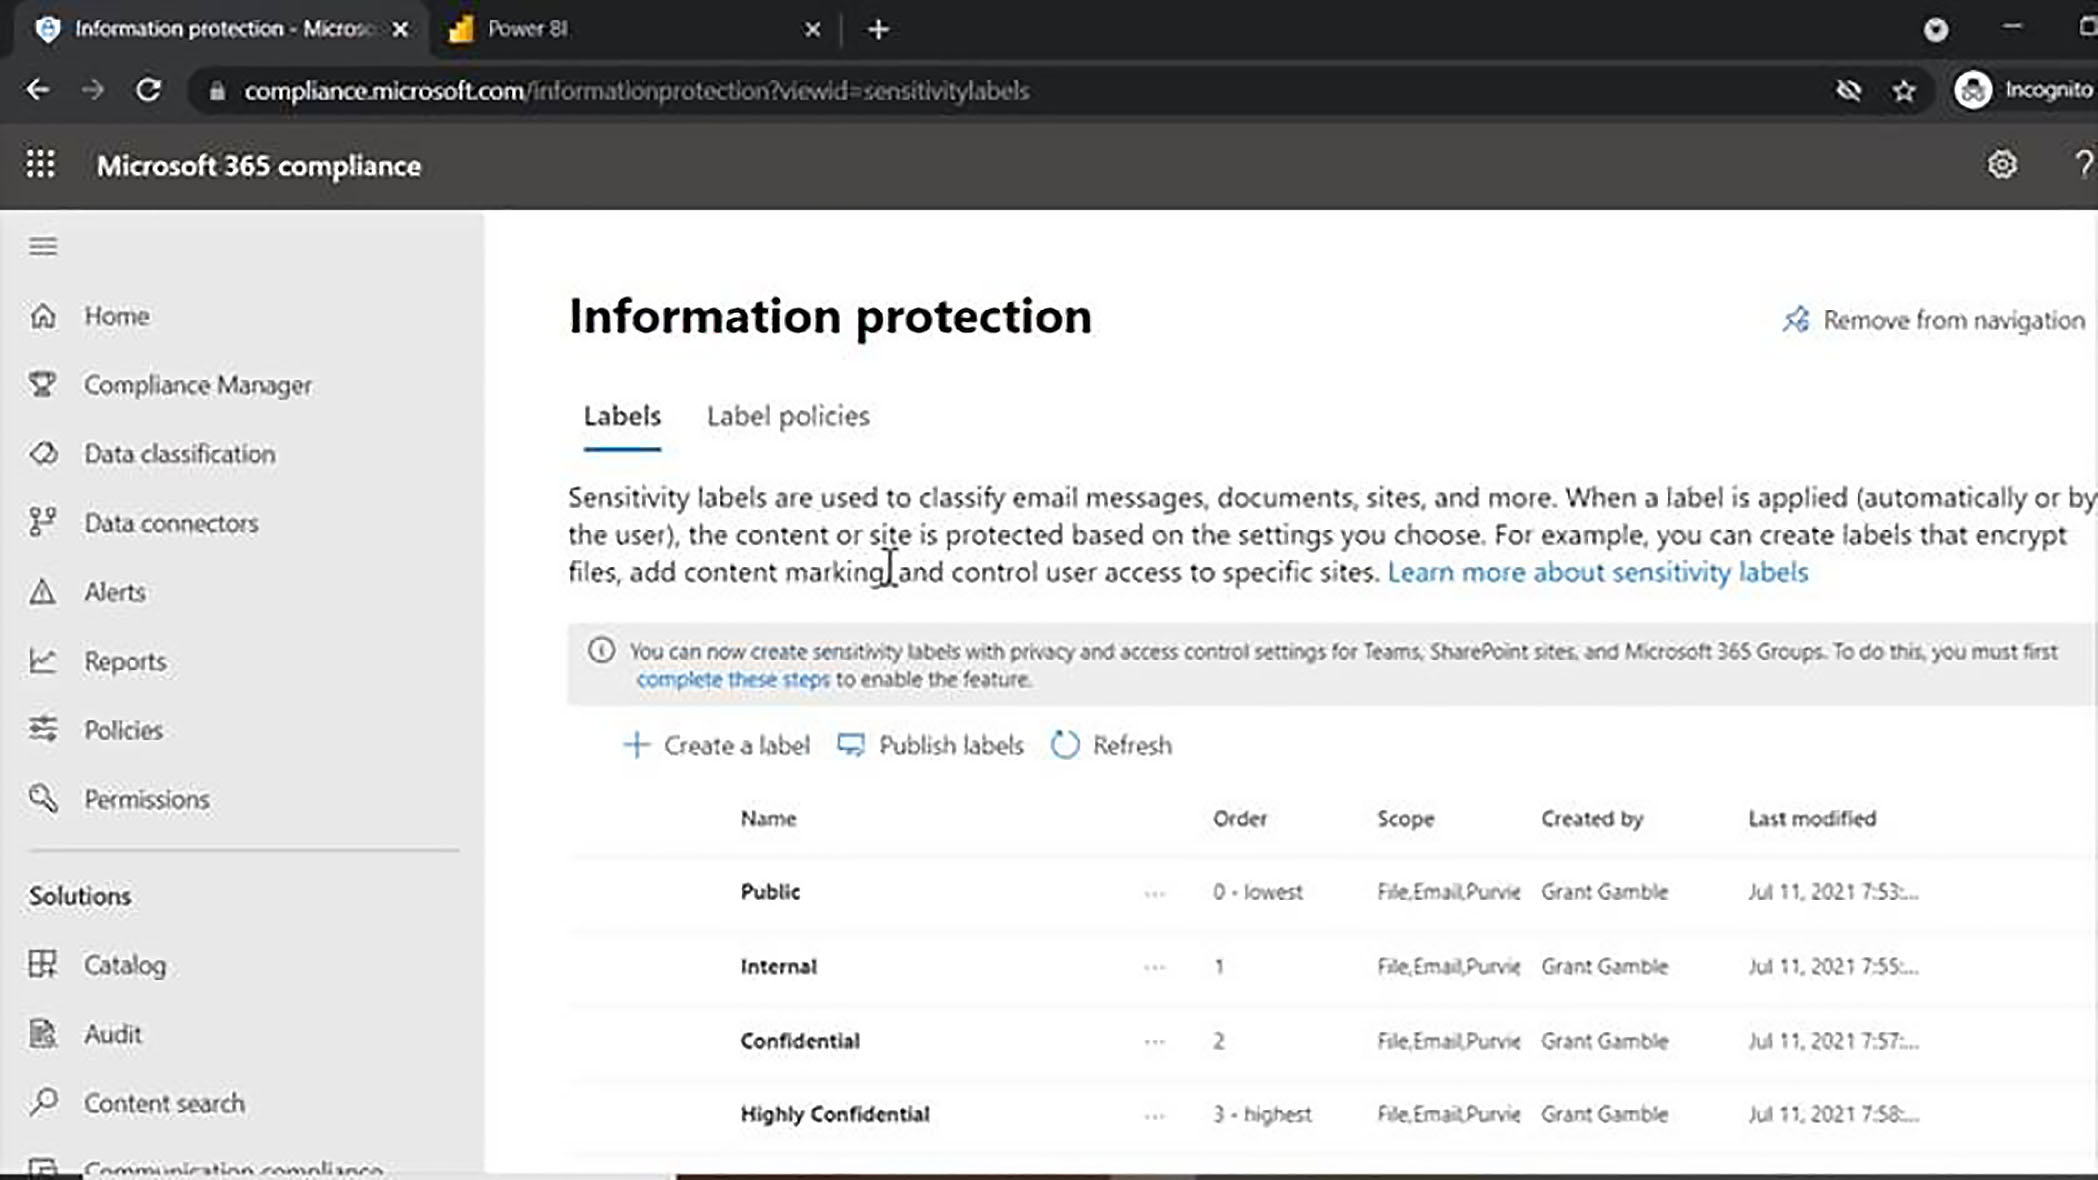
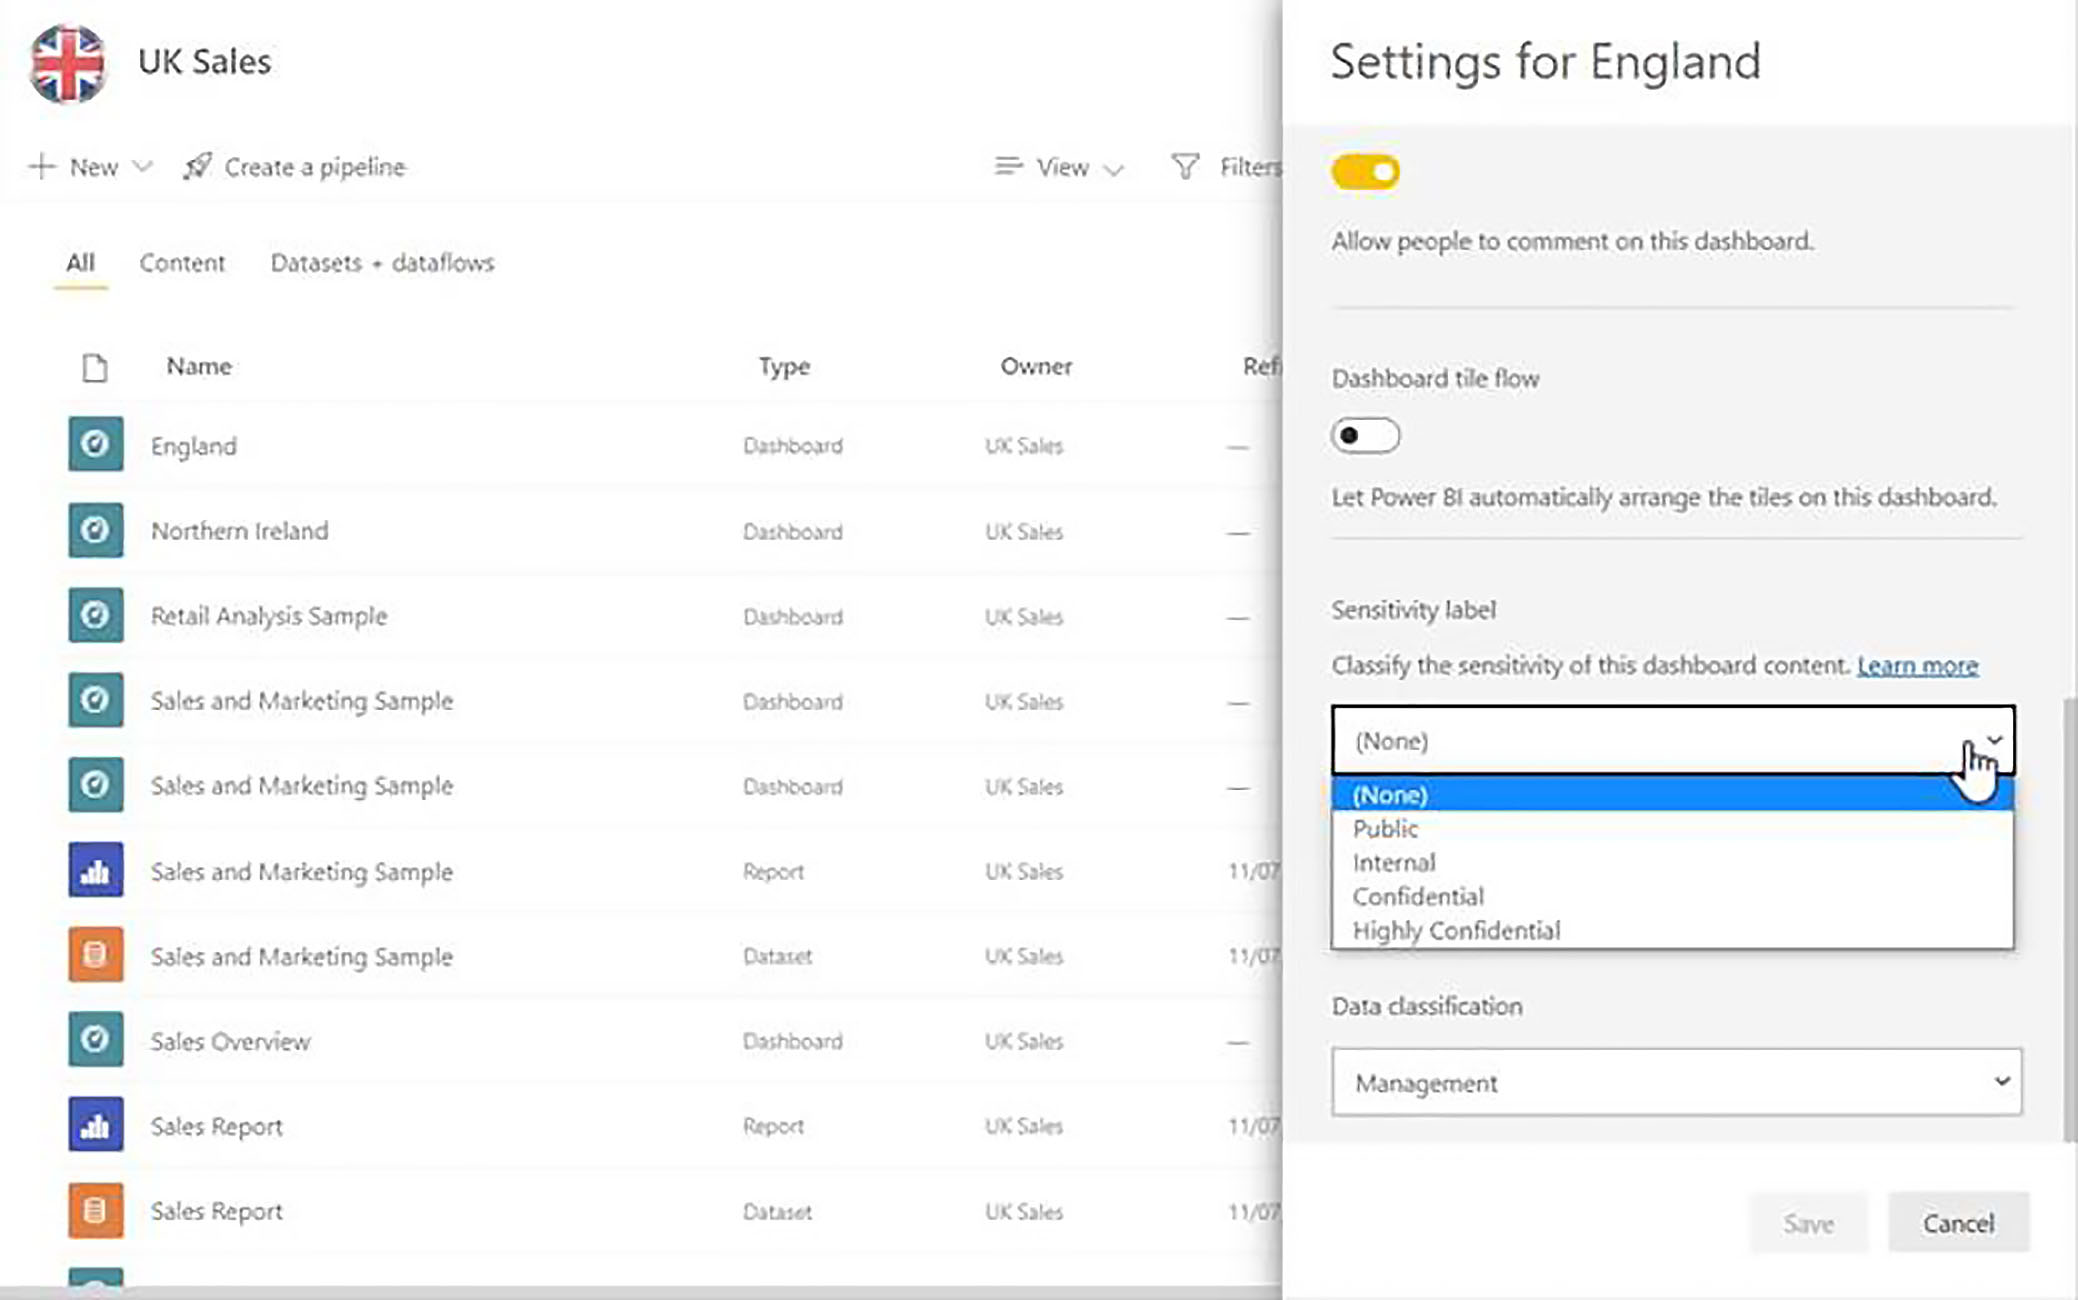
Here, we click on Classification, and then Sensitivity Labels, and we then click on Create a label and go through the process of creating each of the sensitivity labels that we need. So, as you can see, in this tenant, we have created four sensitivity labels, public internal, confidential, and highly confidential in order of sensitivity.
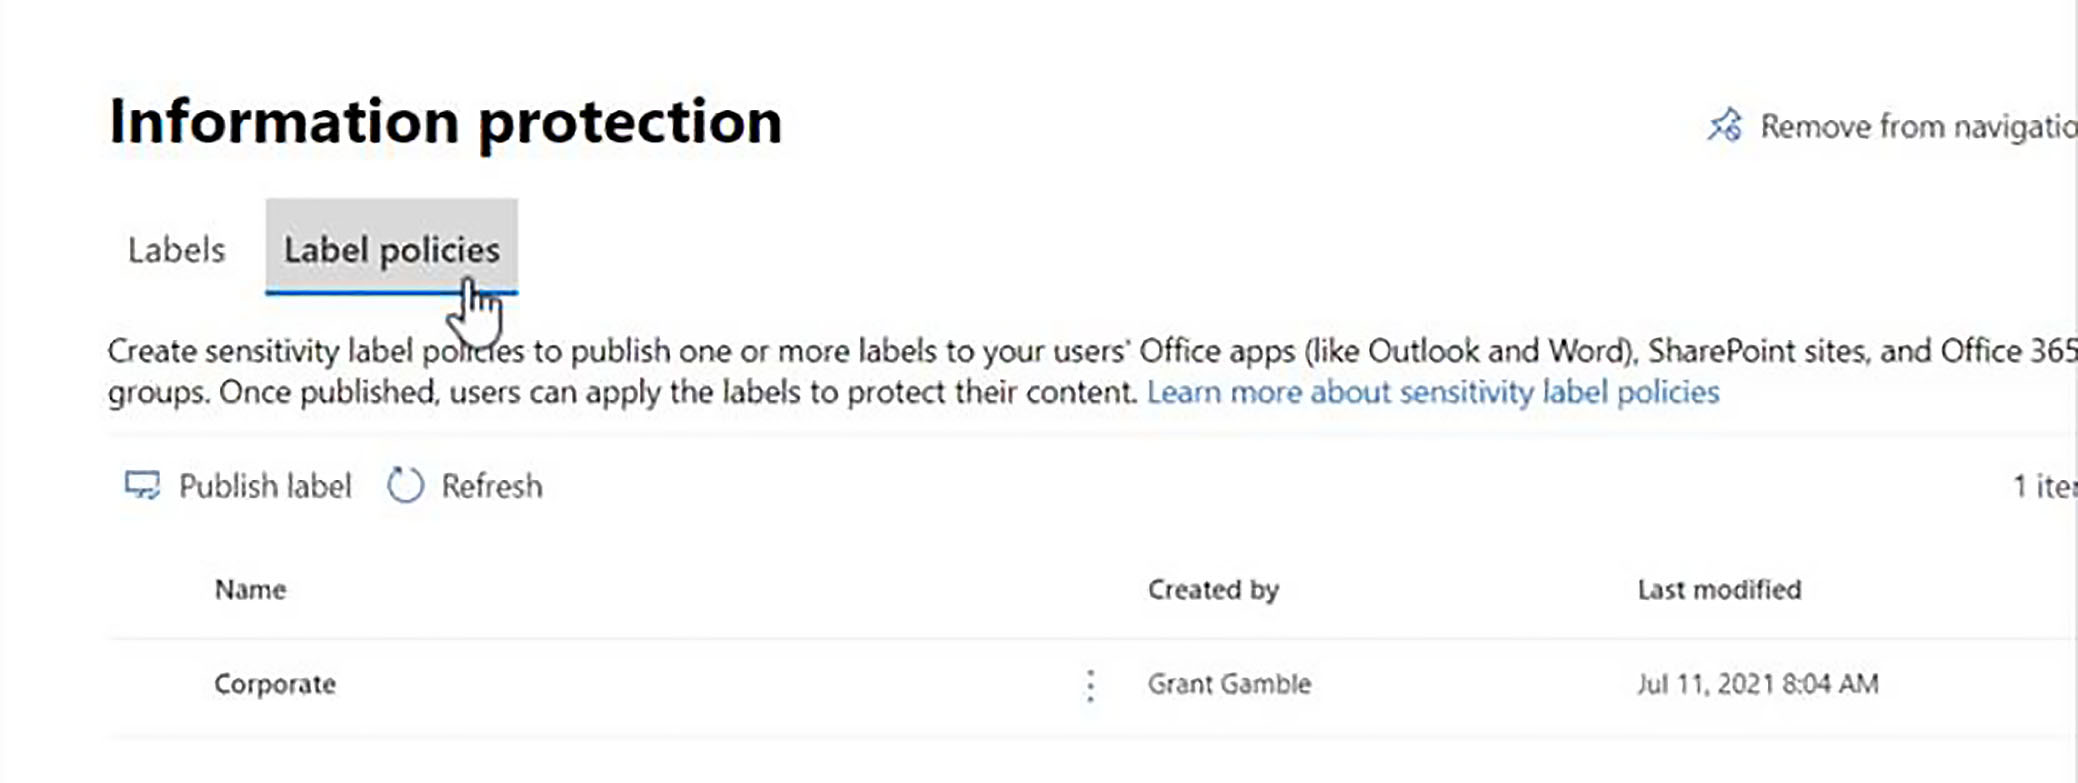
And then the final thing we need to do is to publish our labels and associate them with a label policy. We can see below that, in this tenant, we published our labels using a policy called corporate.
Sensitivity Label Settings in the Power BI Service
Once we have created and published sensitivity labels, the next administrative step is to enable the use of sensitivity labels within the Power BI tenant, and since this is a Power BI specific activity, it can be done either by a global admin or by a Power BI admin.
So, in the Power BI service (Settings > Admin Portal > Tenant Settings), we move down to the Information Protection section.
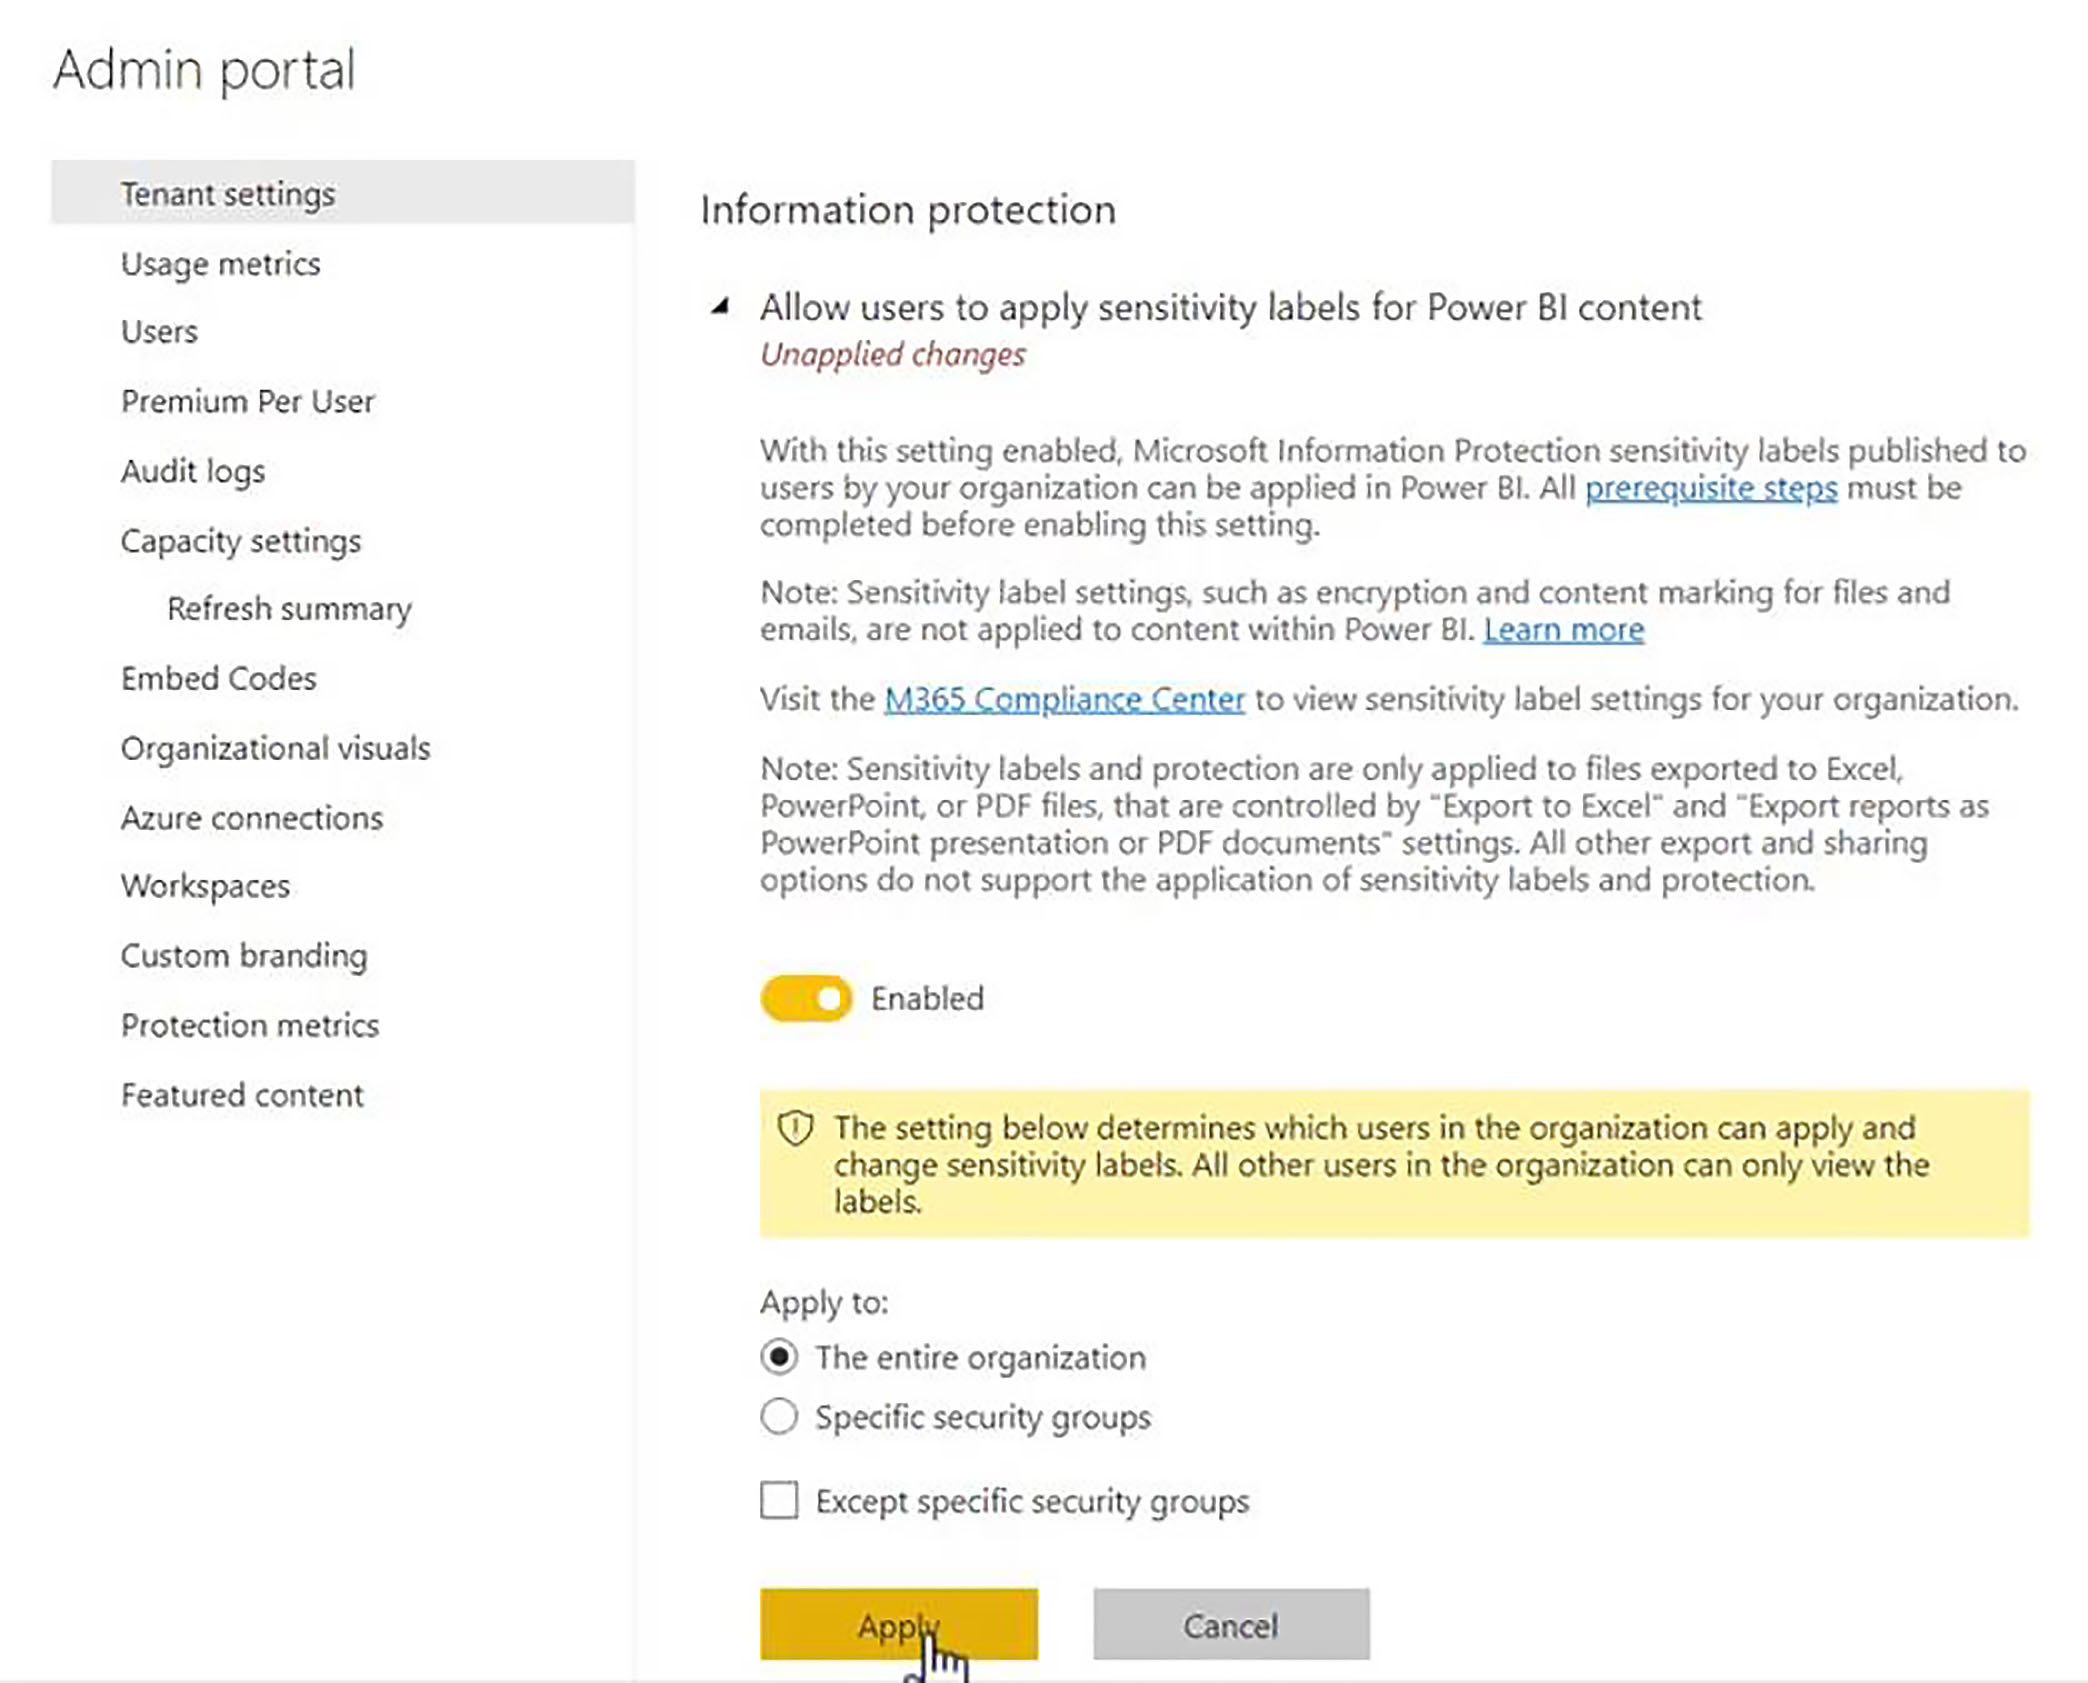
Allow users to apply sensitivity labels for Power BI content
The very first setting in this section (Allow users to apply sensitivity labels for Power BI content) is the one that we need to activate first of all. Until you switch this on, all of the other settings have to remain disabled.
This first setting can either be enabled for the entire organisation, or for specific security groups, and most of the time, to get the most out of this feature, you want to deploy it on a corporate-wide basis. So, typically, we would activate this feature for the entire organisation.
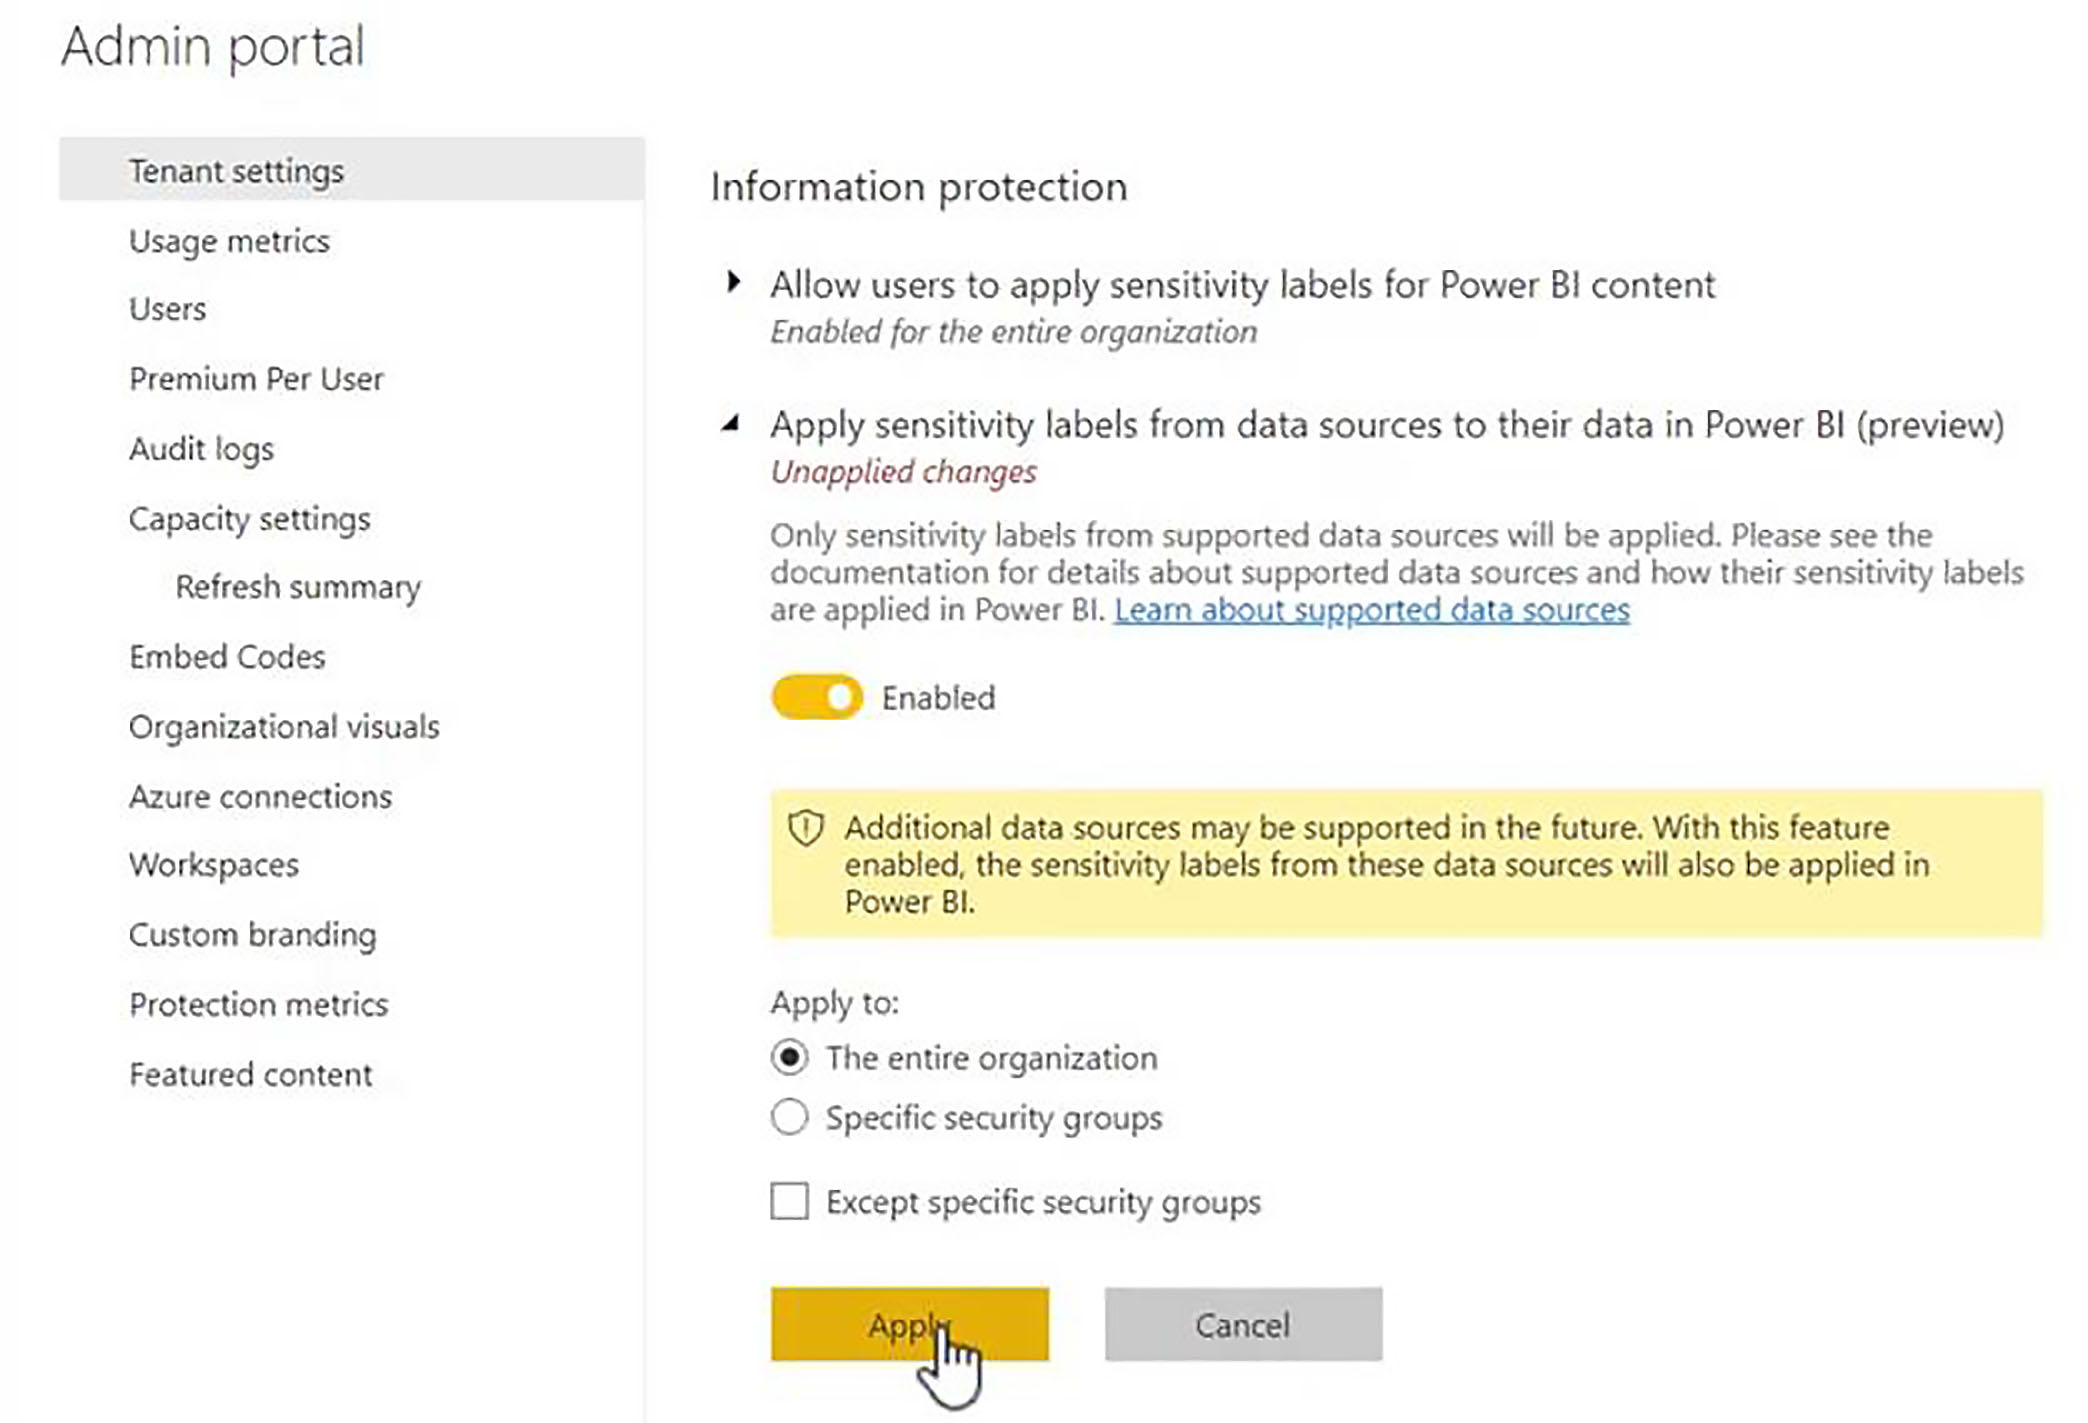
Apply sensitivity labels from data sources to their data in Power BI
The second option (Apply sensitivity labels from data sources to their data in Power BI) allows the inheritance of settings which have been put in place prior to data being imported into Power BI.
So, for example, if you have sensitivity labels applied to columns within SQL Server, then those settings will simply be imported into Power BI, and again, this has obvious benefits. So, we would typically activate that for the entire organisation.
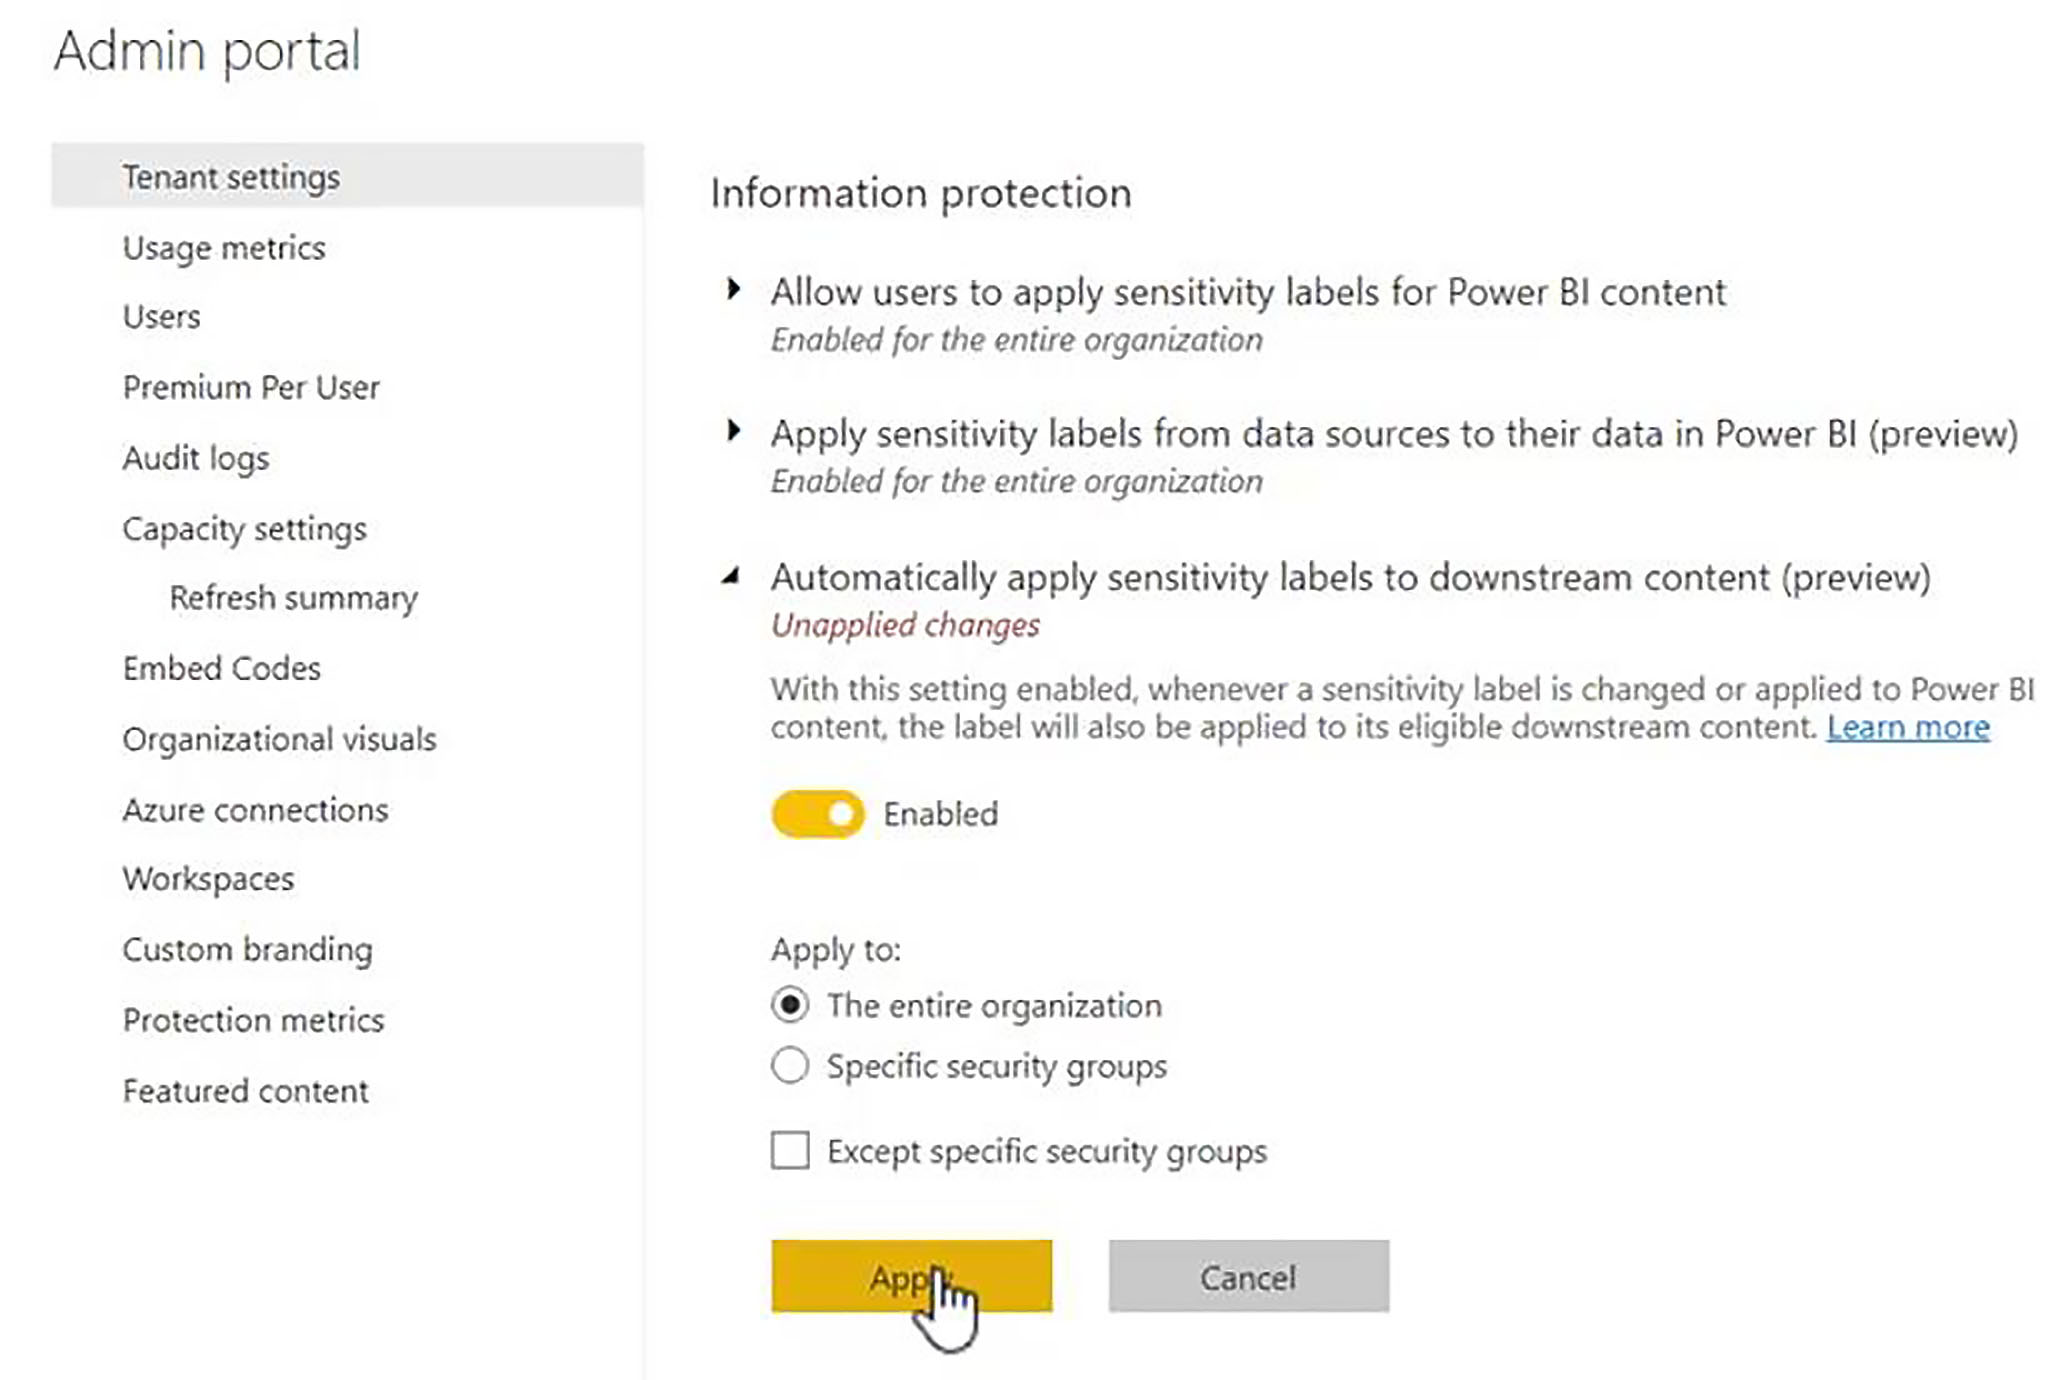
Automatically apply sensitivity labels to downstream content
the third option also allows you to set up inheritance, this time completely within the context of Power BI: Automatically apply sensitivity labels to downstream content.
So, for example, if we apply sensitivity labels to a dataset, and then we have users who create reports from those datasets; by activating this option, the reports will inherit the sensitivity label settings automatically; and then if we create dashboards from those reports, then again the sensitivity labels will follow through.
So, again, this is a very useful feature for ensuring conformity throughout the organisation. So, we would typically want to activate this on a corporate wide basis.
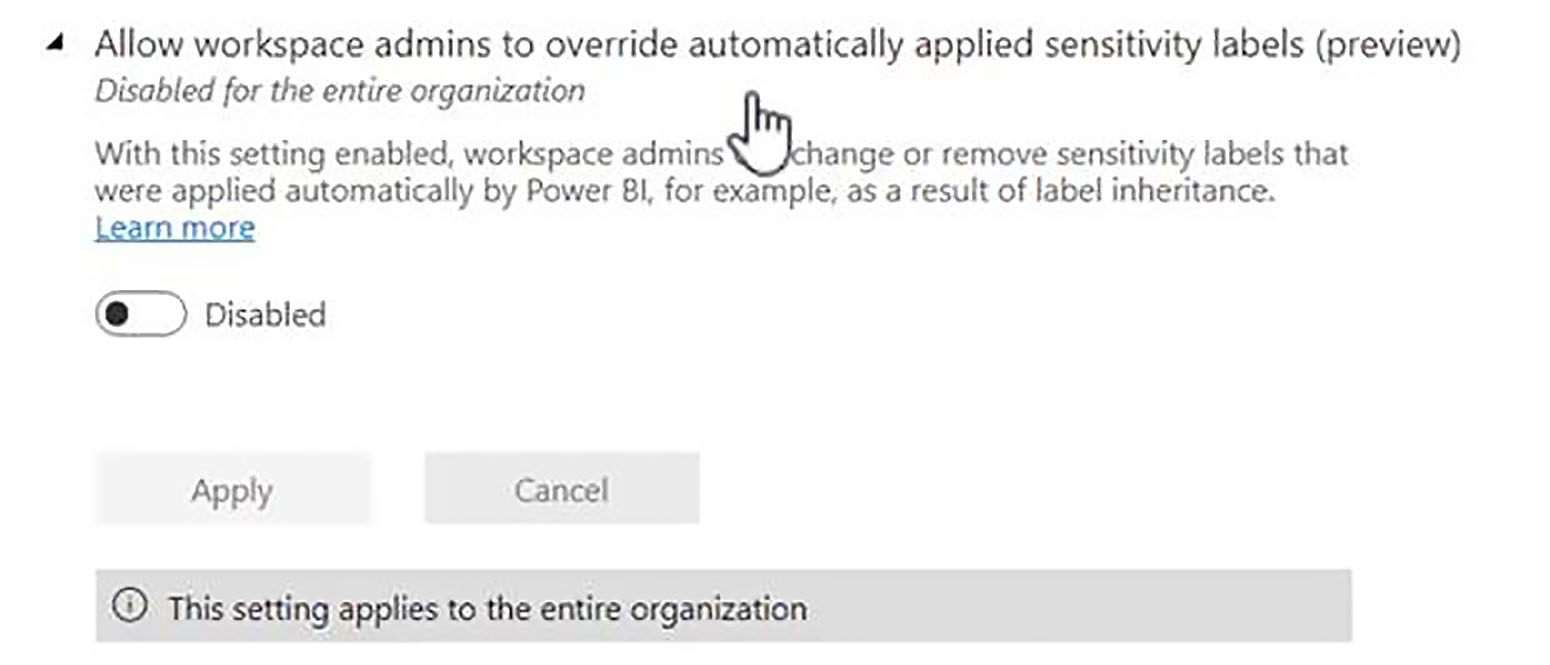
Allow workspace admins to override automatically applied sensitivity labels
The fourth option (Allow workspace admins to override automatically applied sensitivity labels) is probably one that we would want to deactivate. Because this lets people essentially sabotage the process by overriding some of the sensitivity label settings.
This is one of the settings which it may be beneficial to apply only to a minority of people, to administrators, for example, but, at the moment, it has to be applied on an organisation wide basis. So, typically, we would leave this option deactivated.
Restrict content with protected labels from being shared via link with everyone in your organization
The final option is also probably quite desirable (Restrict content with protected labels from being shared via link with everyone in your organisation).
Restricted content applies to things like encryption watermarking. Not all forms of restricted content are recognised at the moment in Power BI. However, obviously, this will change over time. By activating this option, any content that has labels which come under the category of being protected, cannot be shared via a link.
So, again, this is something we would probably want to activate if we have labels which fall into the protected category.
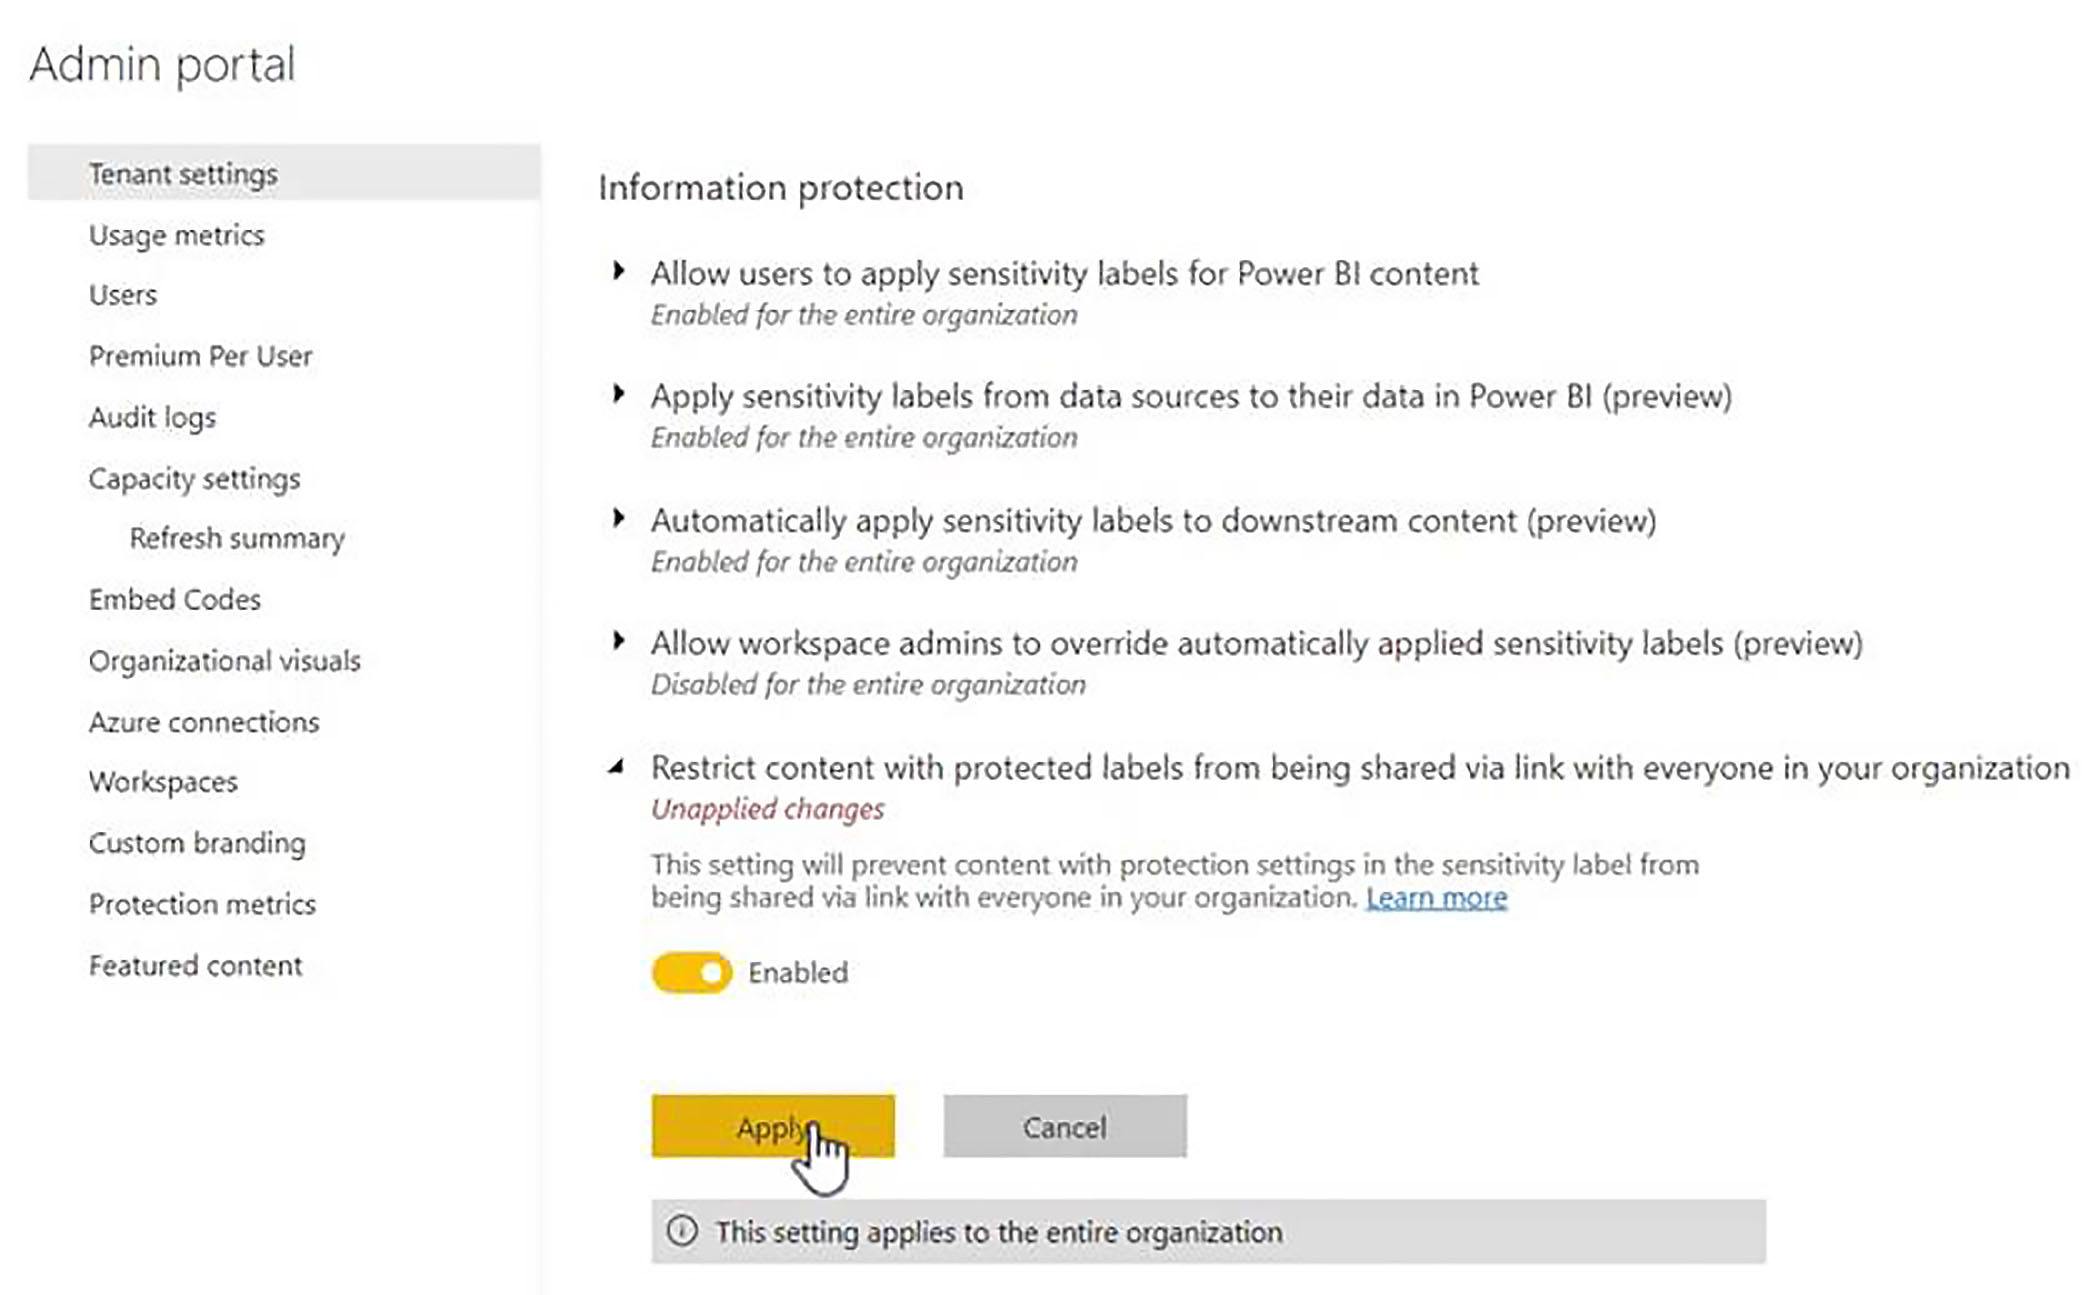
So, those are the five settings which are available for administrators within the Power BI tenant.
Applying Sensitivity Labels
Once all the administration has been taken care of, we can apply sensitivity labels on an object by object basis.
From our workspace listings, we can click on the ellipsis menu next to any object and choose Settings, and then if we scroll down, we have the sensitivity labels section, and we would just choose the label that we want to associate with this item.
However, instead of applying sensitivity labels, to each and every object, we can take advantage of the option in the tenant settings: Automatically apply sensitivity labels to downstream content.
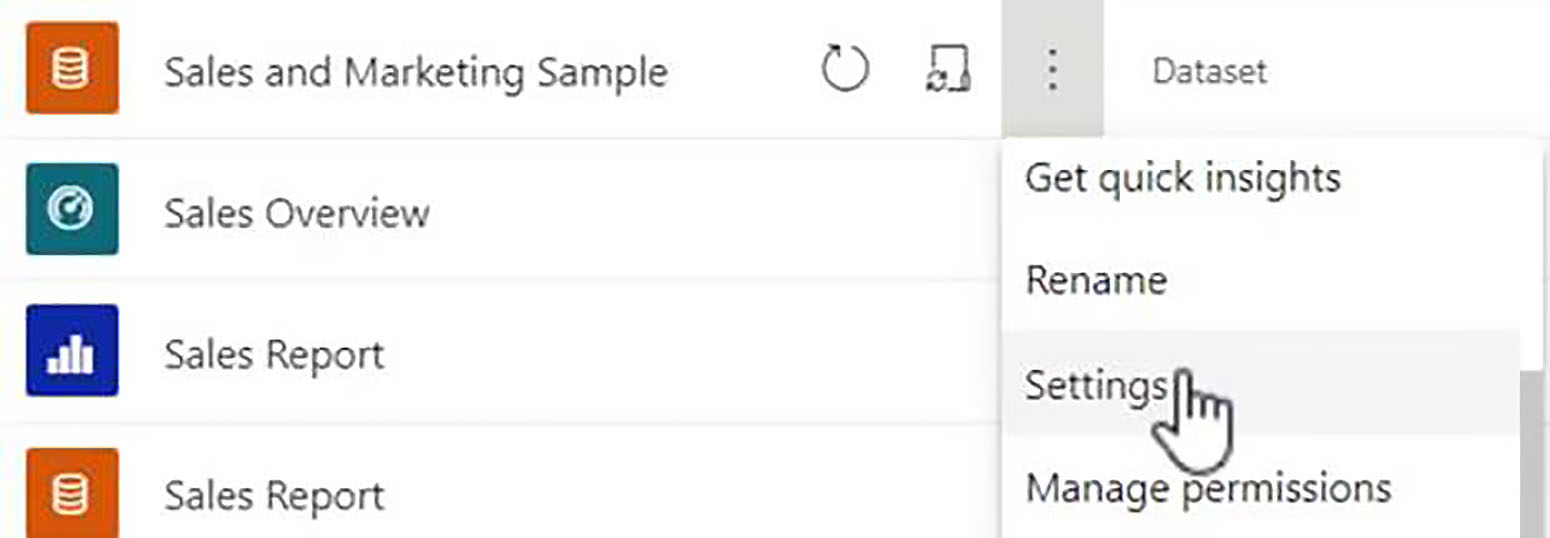
If we have this option enabled, then we can take advantage of this fact and focus on applying sensitivity labels to our datasets. Thus, for example, in the workspace shown below, we have the sales and marketing sample, and we have a dataset; then we have a report, which is based on that dataset, as well as a dashboard.
So, what we can do is to apply a sensitivity label purely to the dataset. So, we choose Settings from the ellipsis menu.
Then, we expand the sensitivity labels section; and, since this is one of the sample datasets provided by Microsoft, it is in the public domain. So, we set the sensitivity label to Public and click Apply.
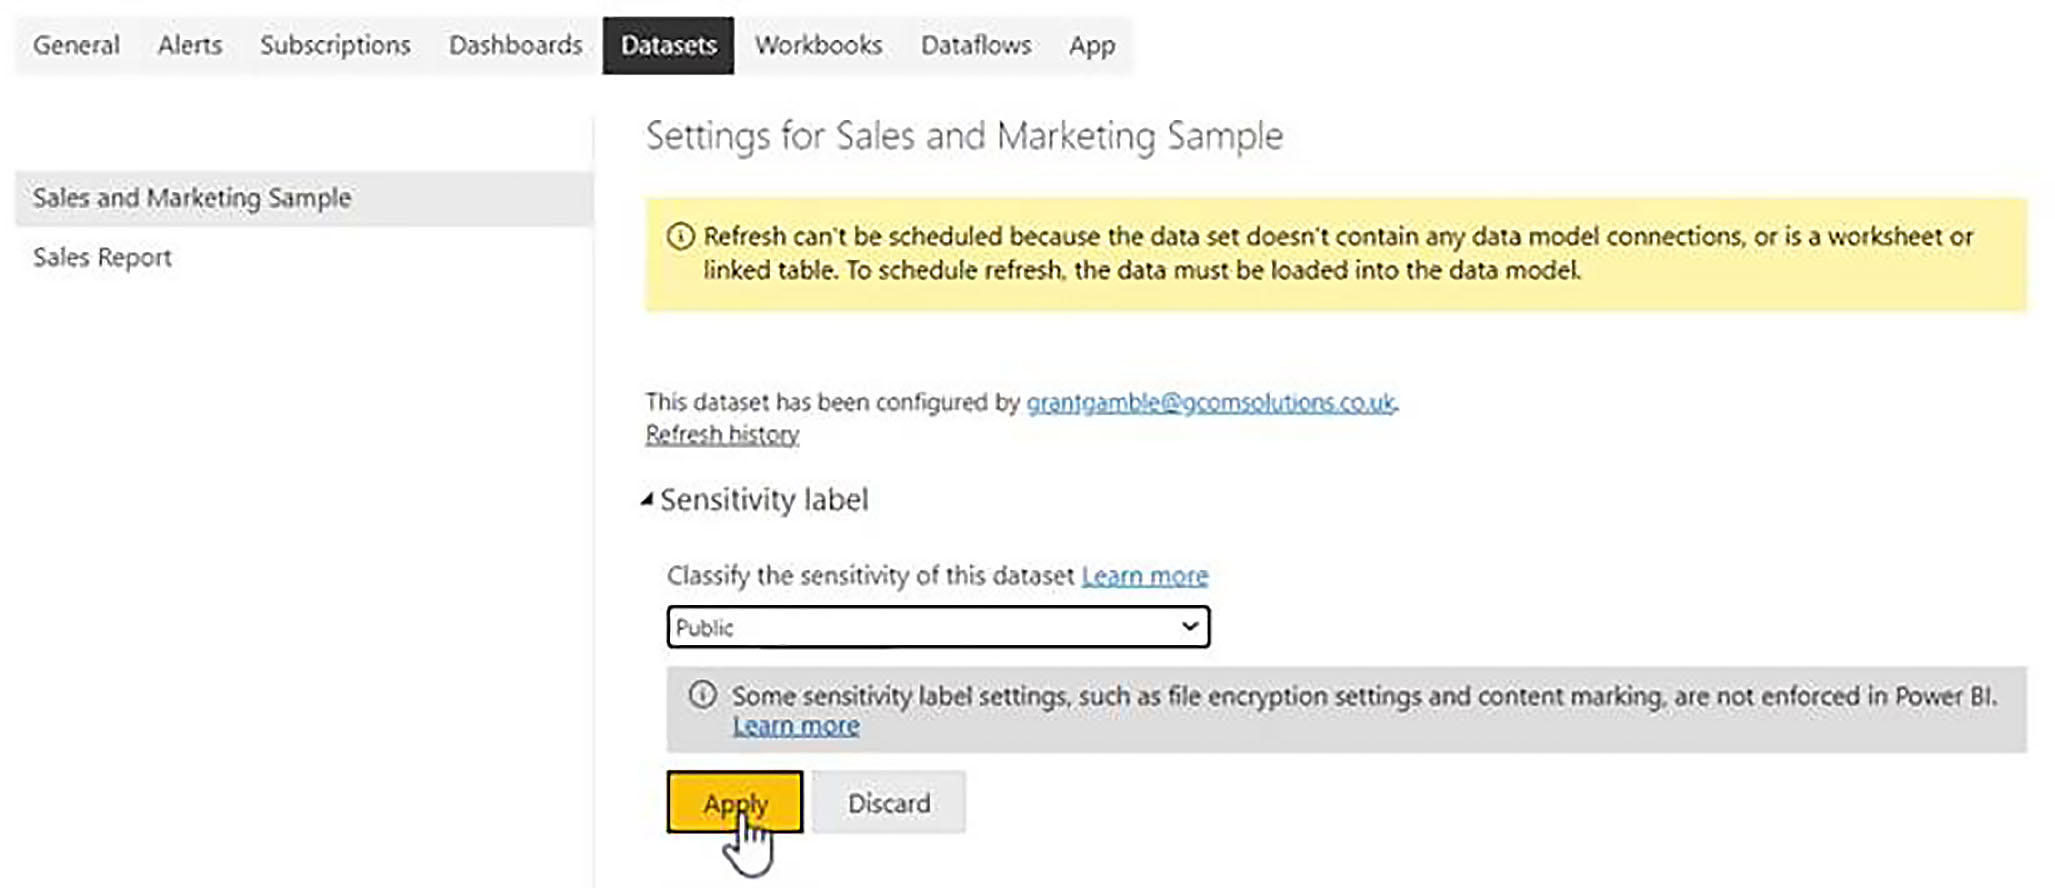
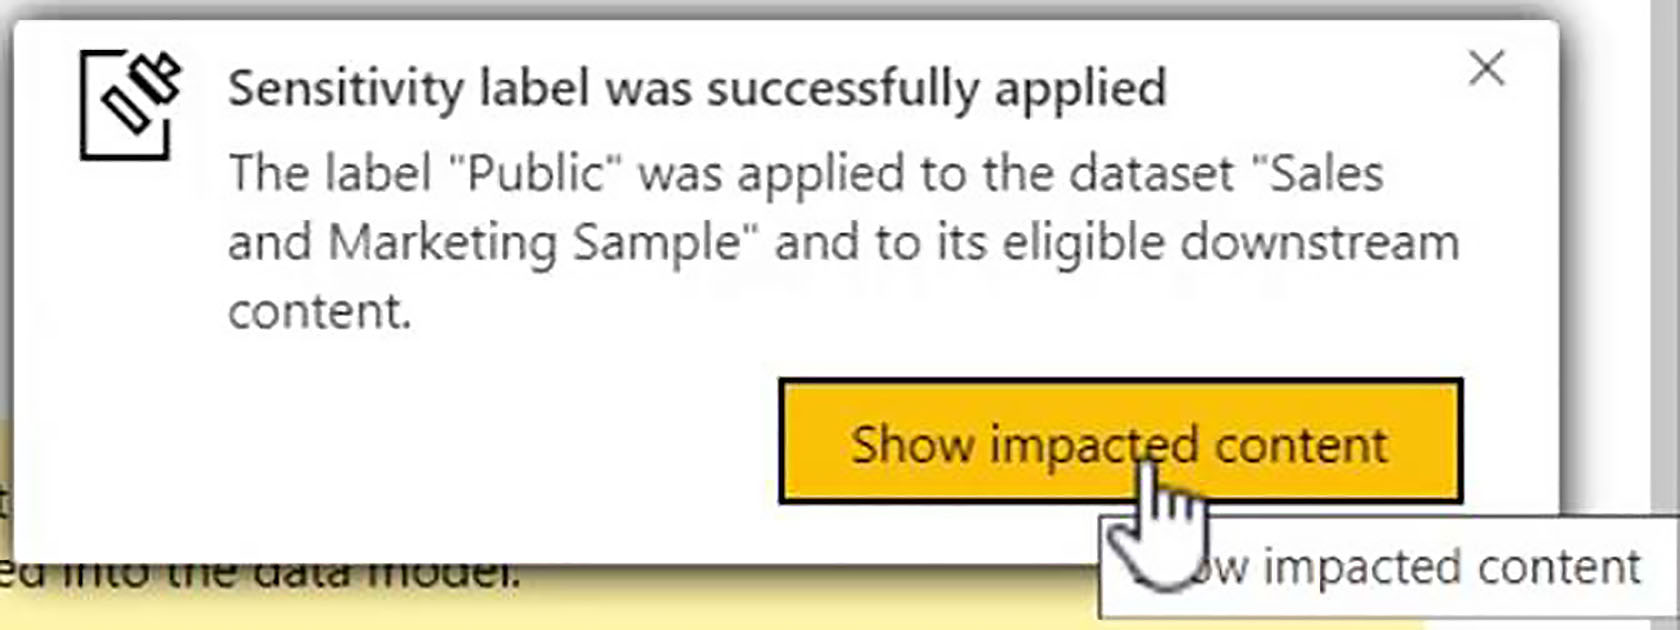
We then get this very useful pop up message: "Sensitivity label was successfully applied. The label public was applied to the dataset sales and marketing sample, and to its eligible downstream content"; and we have a button to show the impacted content.
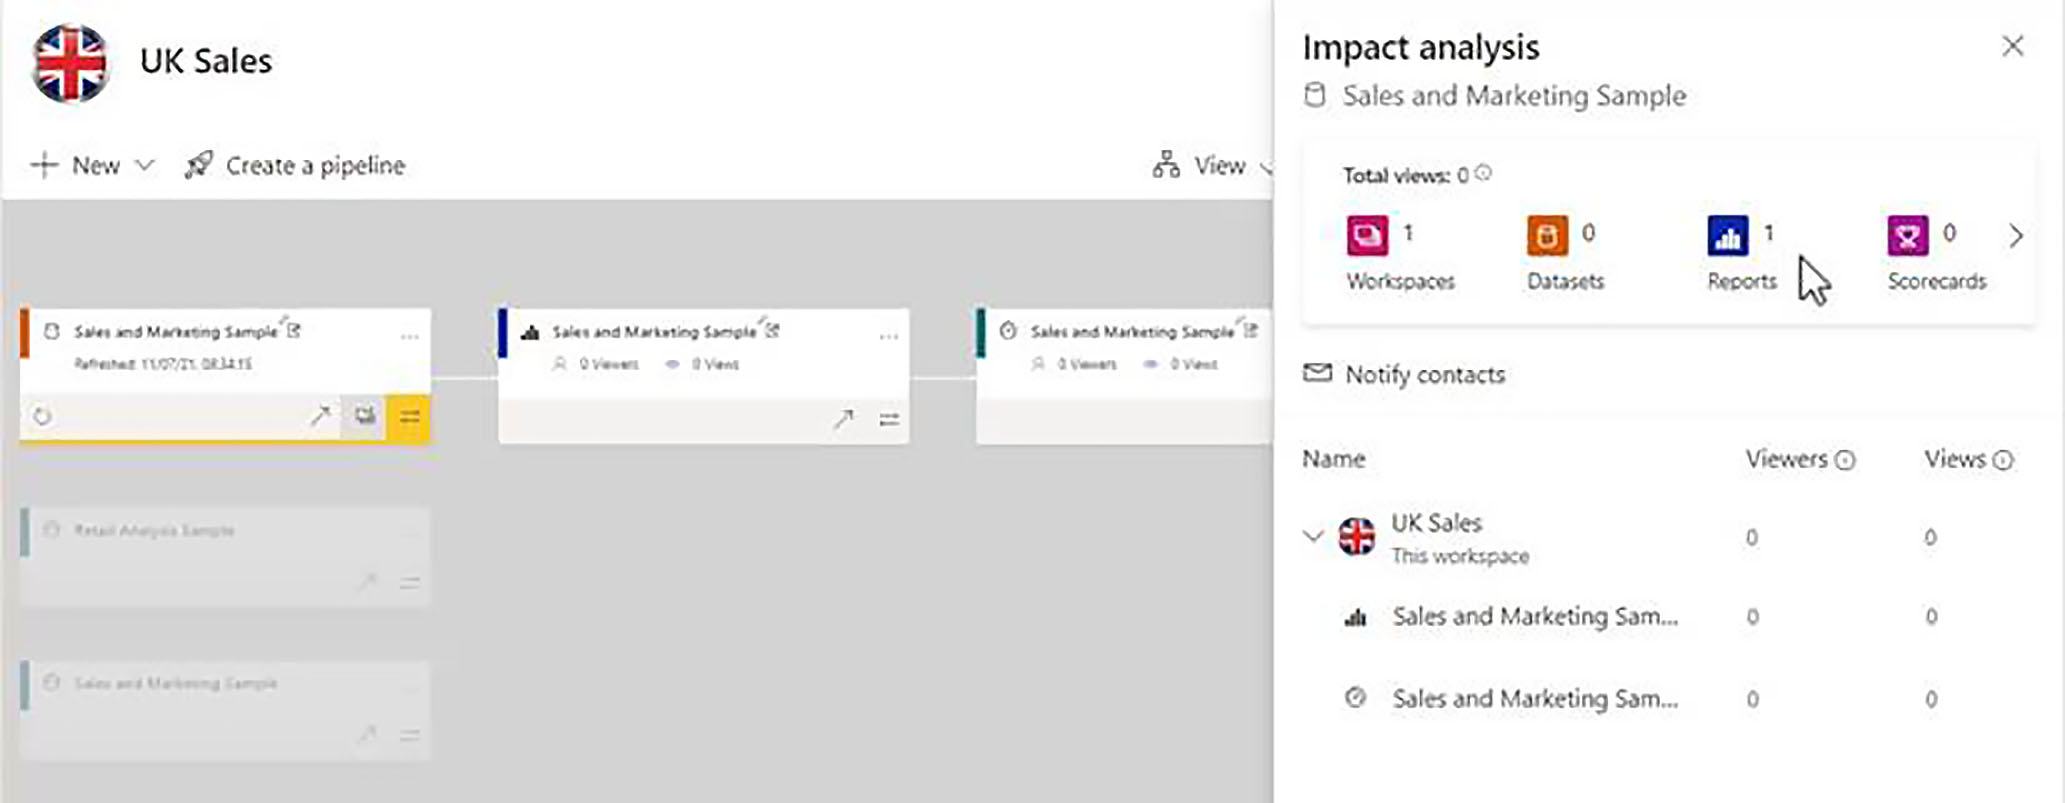
We are then taken to lineage view, where we can see the dependencies between the various objects related to this dataset; and we also have the Impact Analysis pop up with some very useful statistics.
Monitoring Sensitivity Labels
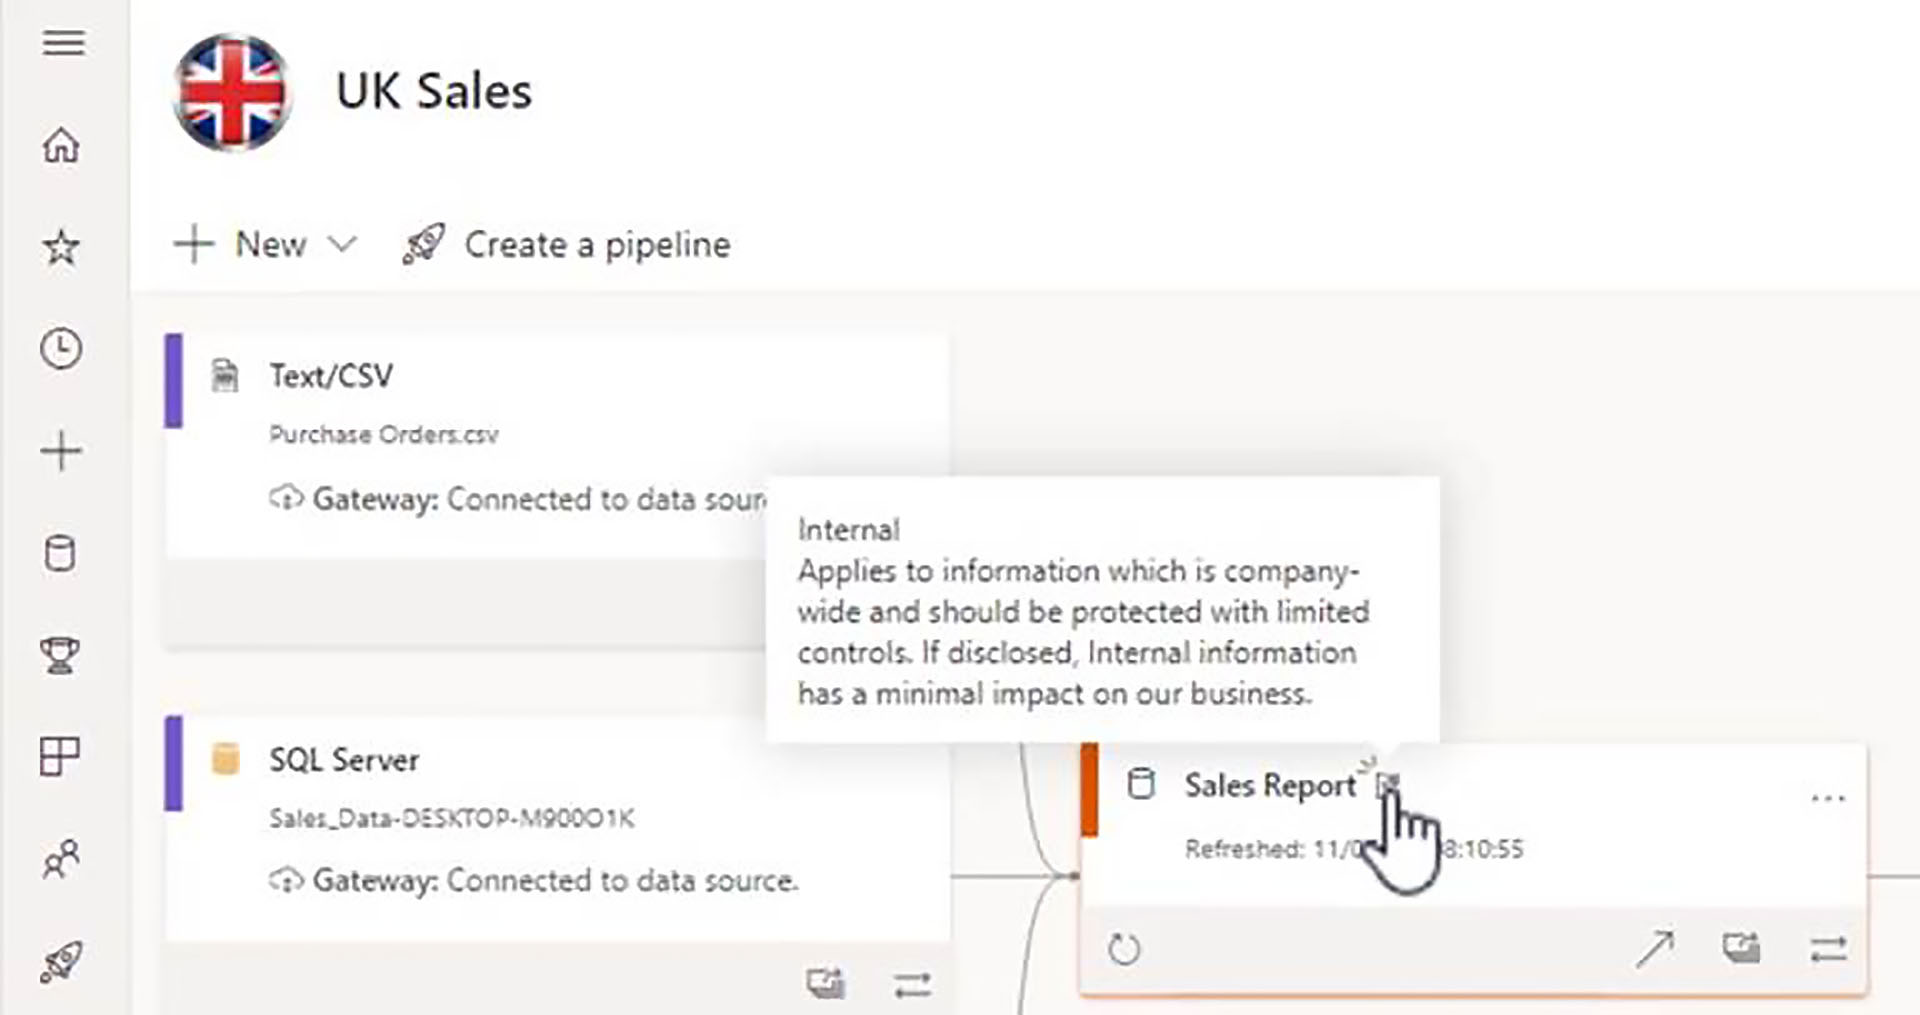
When we are looking at a workspace listing, we now have a Sensitivity column, which confirms the sensitivity label applied to each of the objects within the workspace.
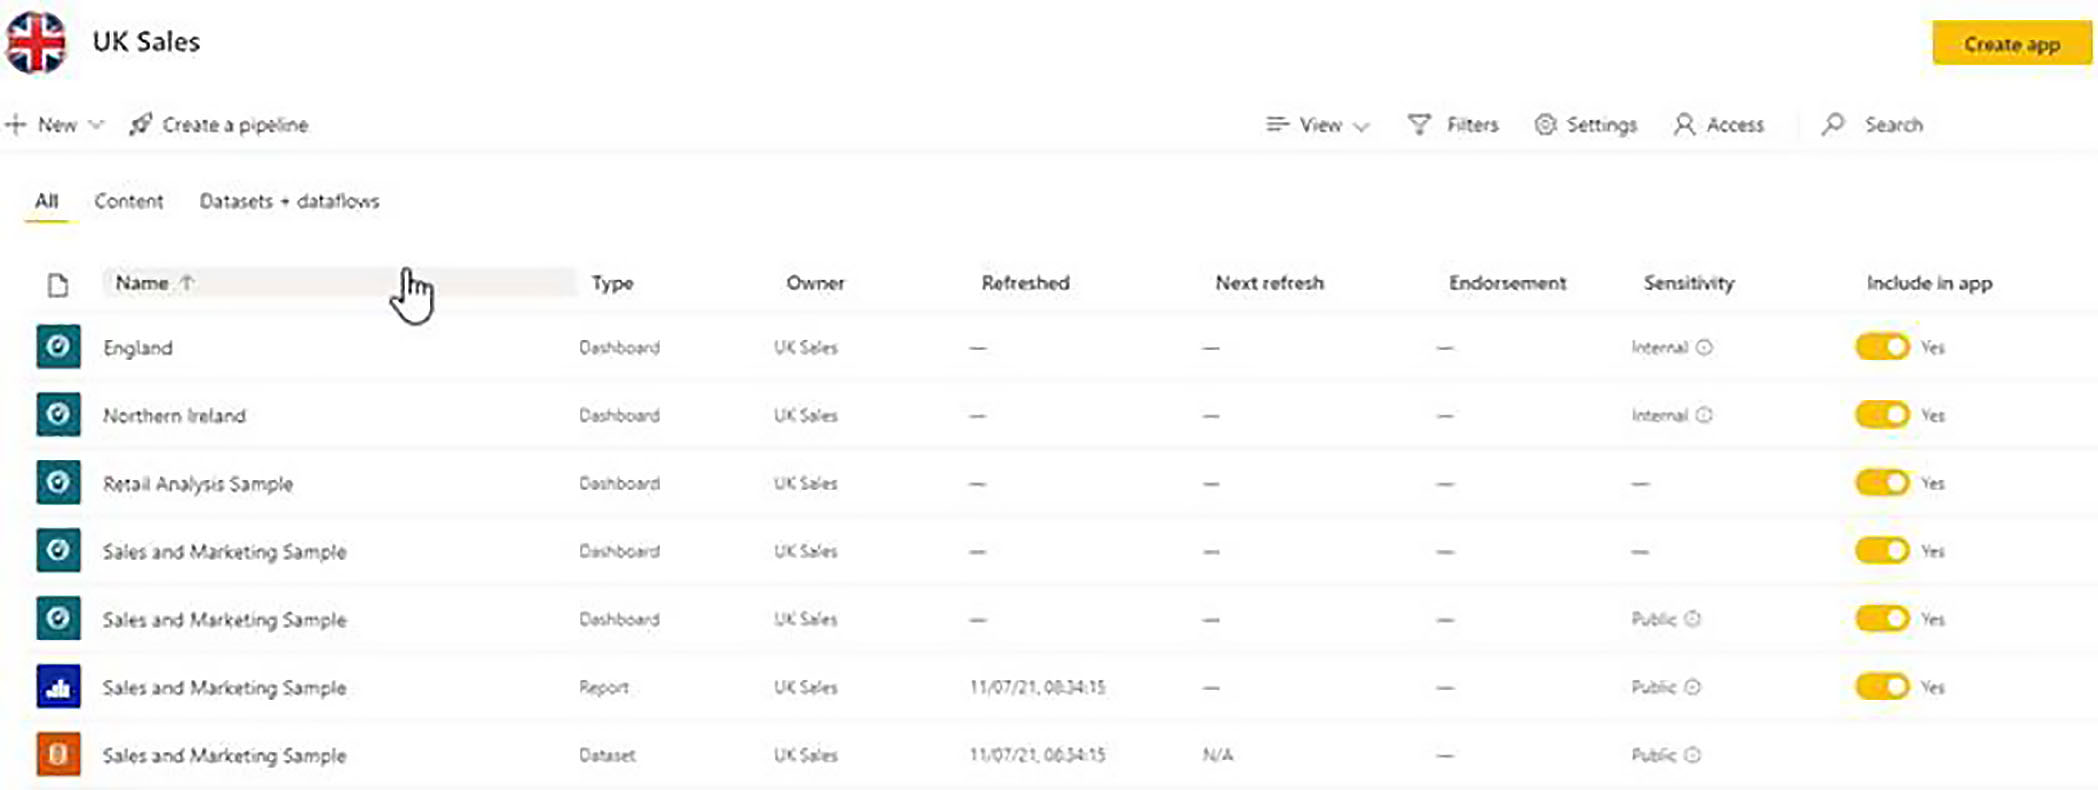
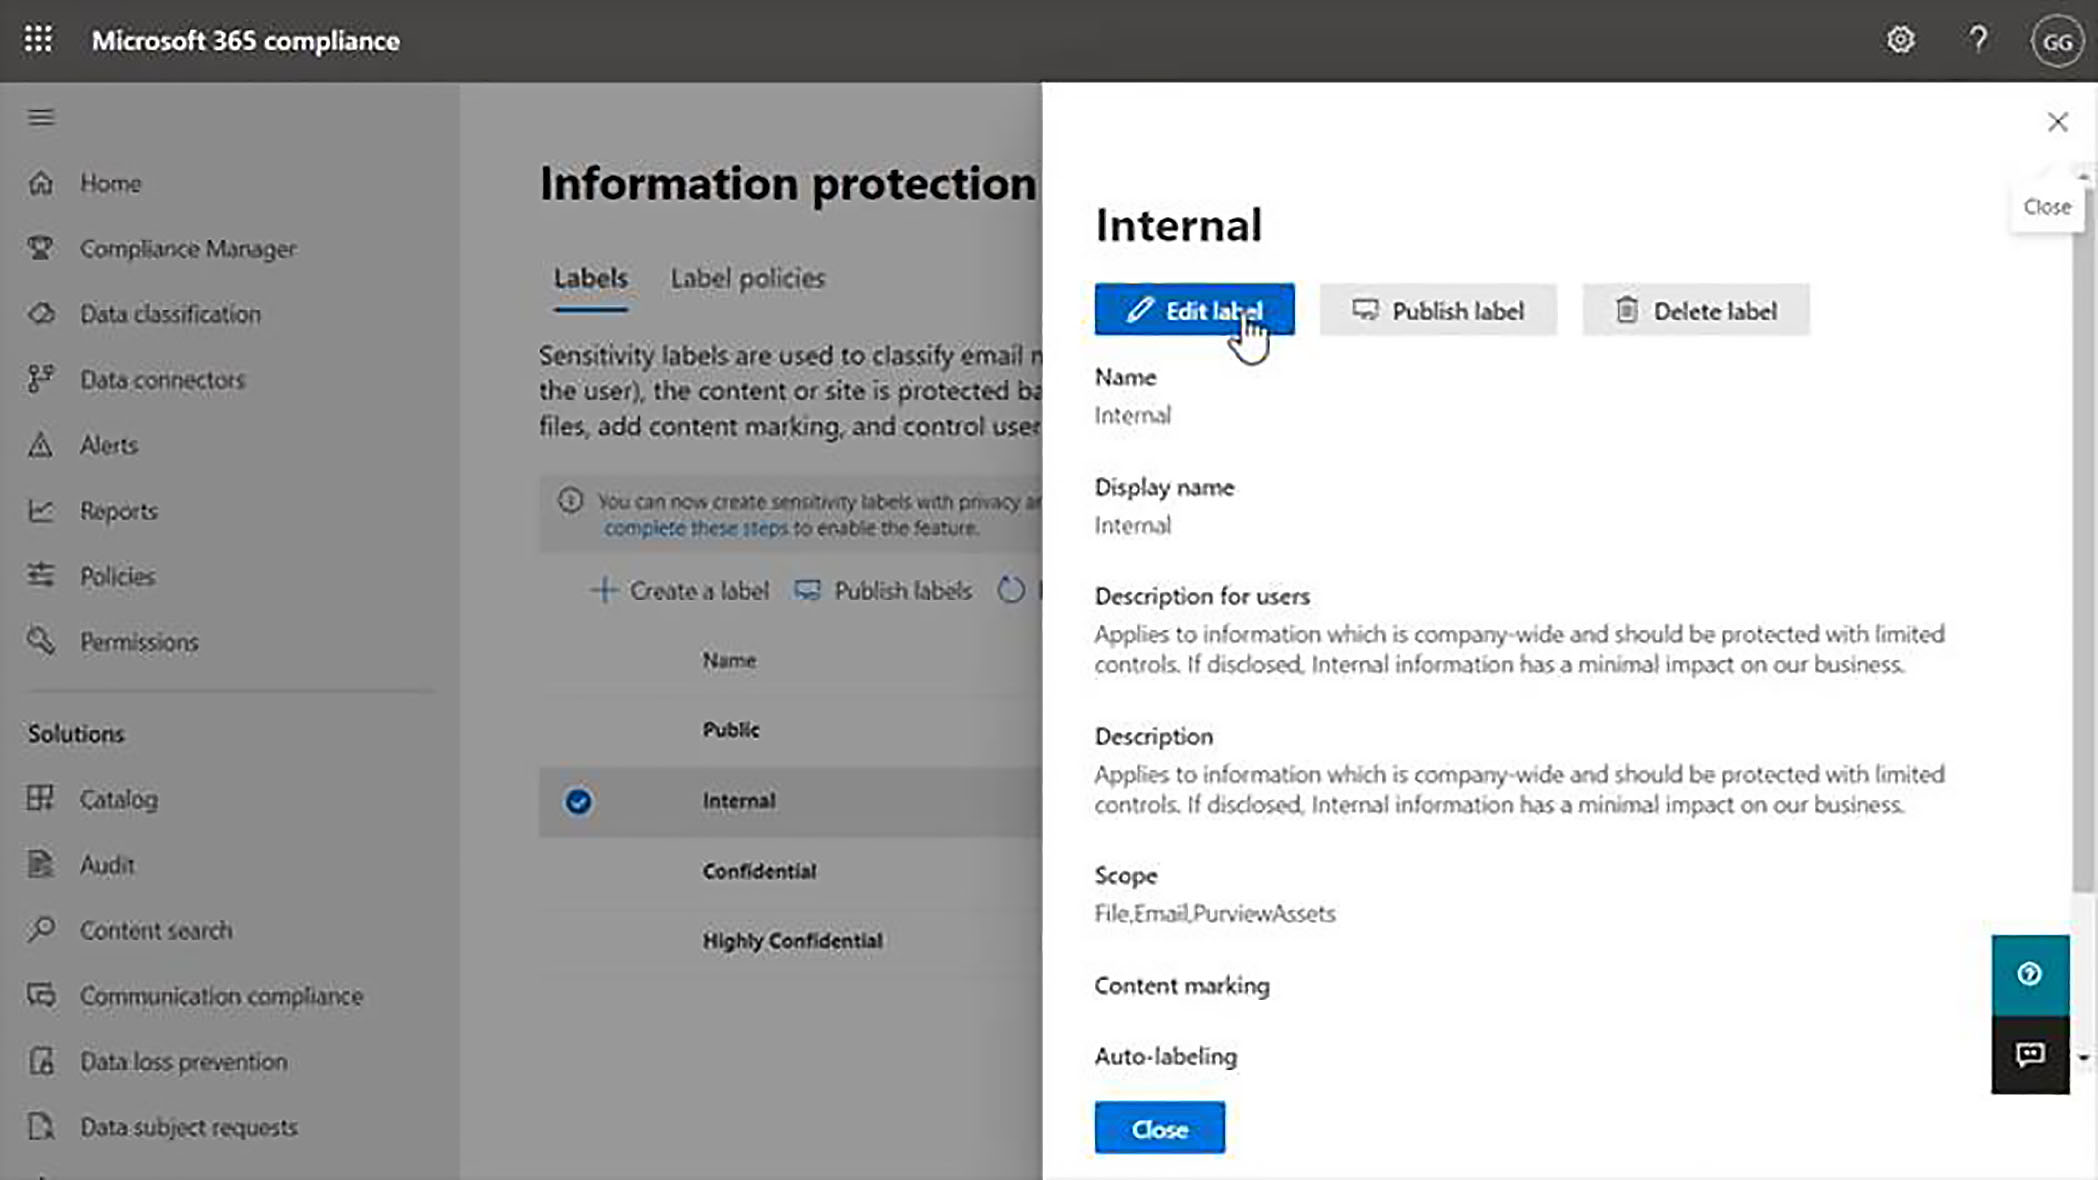
Next to the label, we have an Information button, which displays the description associated with that label.
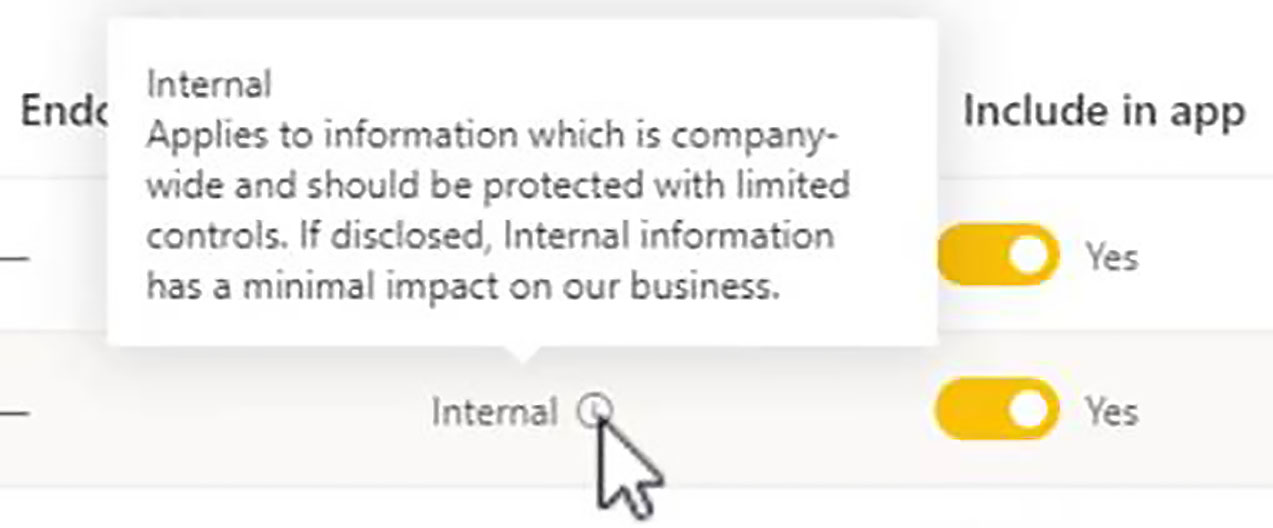
This description was of course entered by the administrator when creating the label. In this example, we added a label called "Internal", and the text shown in the information popup is the text that we entered in the box here marked "Description for users".
Also, when we switch from List view to lineage view, we can see a label on each of the labelled items. When we hover over the label, we can read the description that was put in place by our admin.