- You are here:
- Home »
- Blog »
- Power BI »
- Power BI MCSA Certification Training Tips – Part 6: Merge Queries (Table.NestedJoin)

Power BI MCSA Certification Training Tips – Part 6: Merge Queries (Table.NestedJoin)
To obtain your MCSA: BI Reporting you need to pass two exams: 70-778 (Analyzing and Visualizing Data with Power BI) and 70-779 (Analyzing and Visualizing Data with Excel). However, there is a huge overlap between the two exams resulting from the common BI features found in both Power BI and Excel: namely data modelling using the DAX language; and data connection and transformation using the M language.
We, at G Com Solutions, recommend to the clients to whom we supply Power BI Training that they prepare for both exams simultaneously and then sit both exams on the same day. We also run a 5 day Power BI MCSA Certification Prep course in London which includes both exams 70-778 and 70-779.
In this series of blog posts, we will be examining some of the key features of Power BI, Power Pivot and Power Query which you will need to master in order to pass the two exams.
This topic applies equally to both Power BI and Excel Power Query and examines Power Query’s Merge Query command which generates the M function Table.InnerJoin.
Table.NestedJoin (a.k.a. Merge Queries)
Merge Queries, is used to (horizontally) stitch together columns of data. This command is used where you have two data source which have rows in common; whereas Append Queries is used when you have two or more data sources which have columns in common. Naturally, having a common column in both queries is a requirement when using the Merge Queries command. The values in the common column are used to marry up the rows of data in the two input queries.
As with the Append Queries command, you have the choice of either merging into one of the original queries; or, creating a completely new query, which merges the two original queries together. You will usually find that the latter approach is more useful.
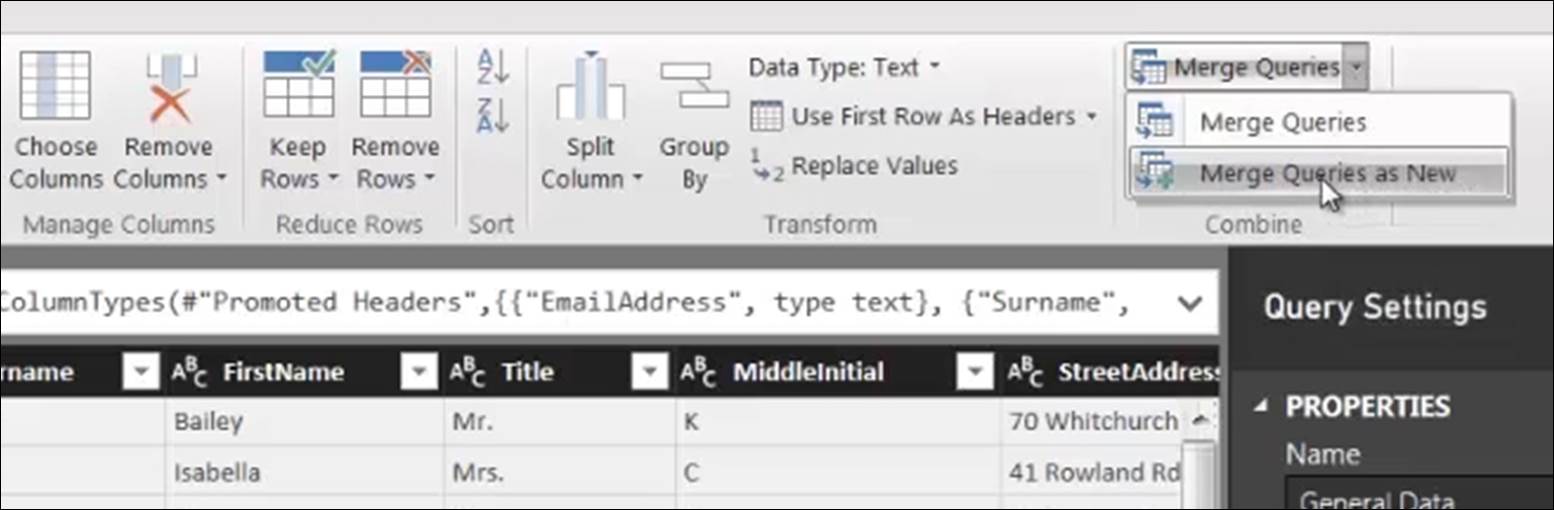
Highlight the first (or left) query, and, in the Home Tab, above Append Queries, you will find Merge Queries; and, again, we have both Merge Queries and Merge Queries as New.
When the Merge dialog appears, specify which is the column you want to use for matching, in the selected table; and you do this simply by clicking on the column. (If two columns in each table are required for matching, hold down the control key and click on each column.)
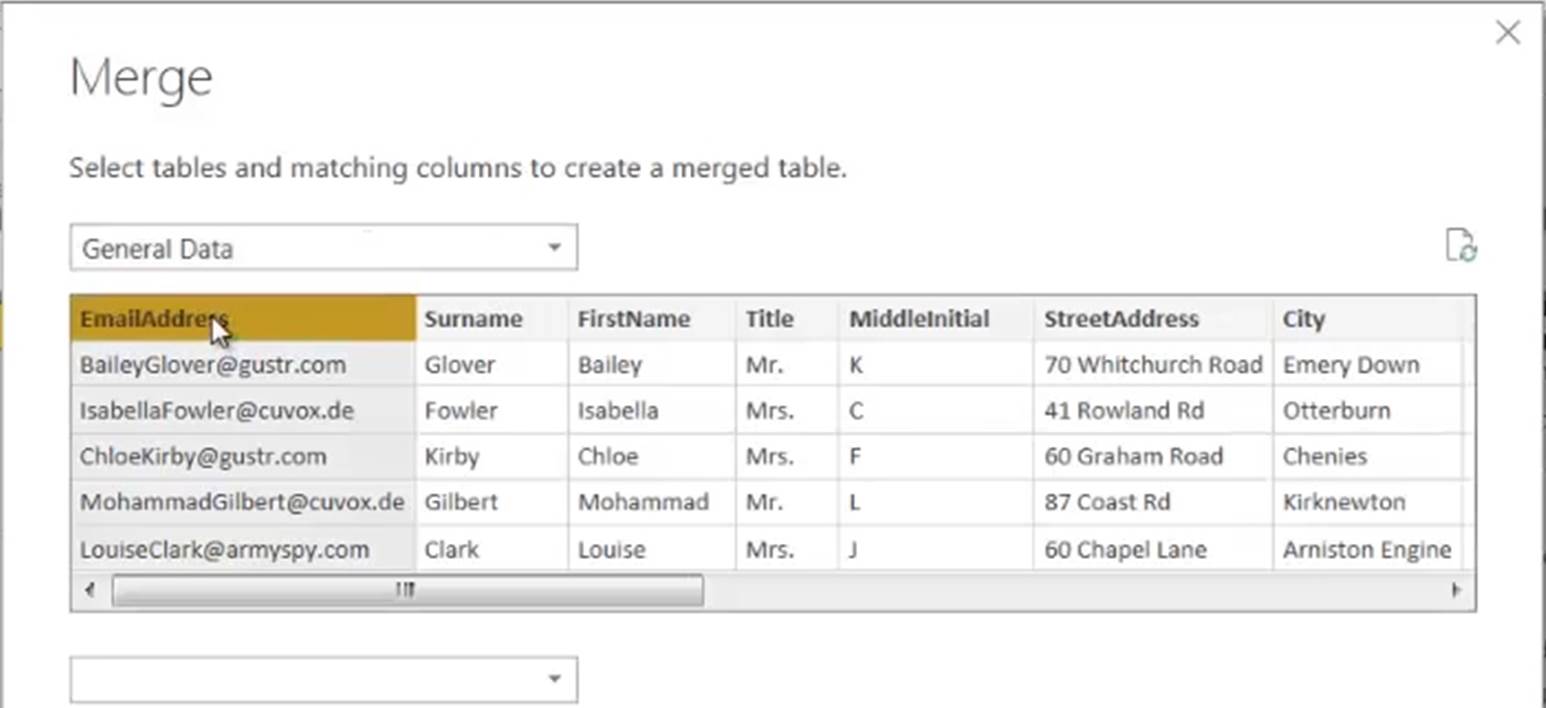
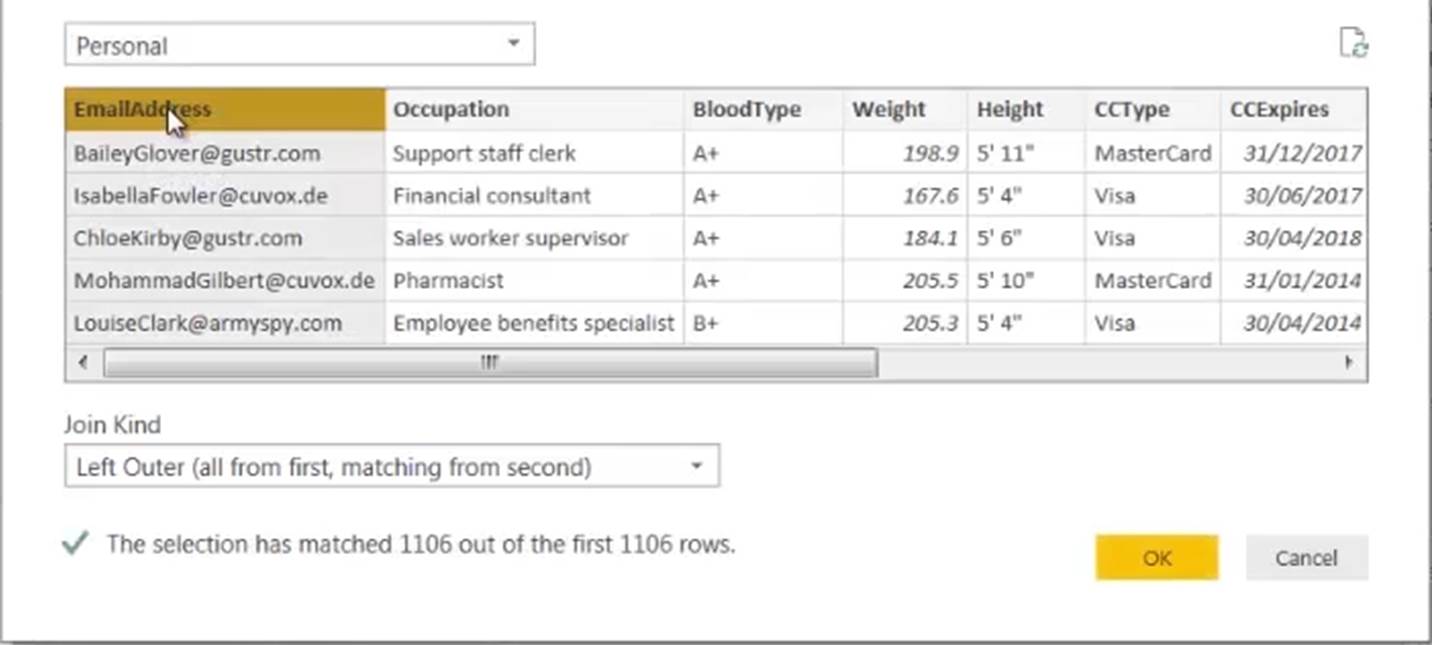
Next, specify the name of the second Table the matching column as before.
Specifying the Join Kind
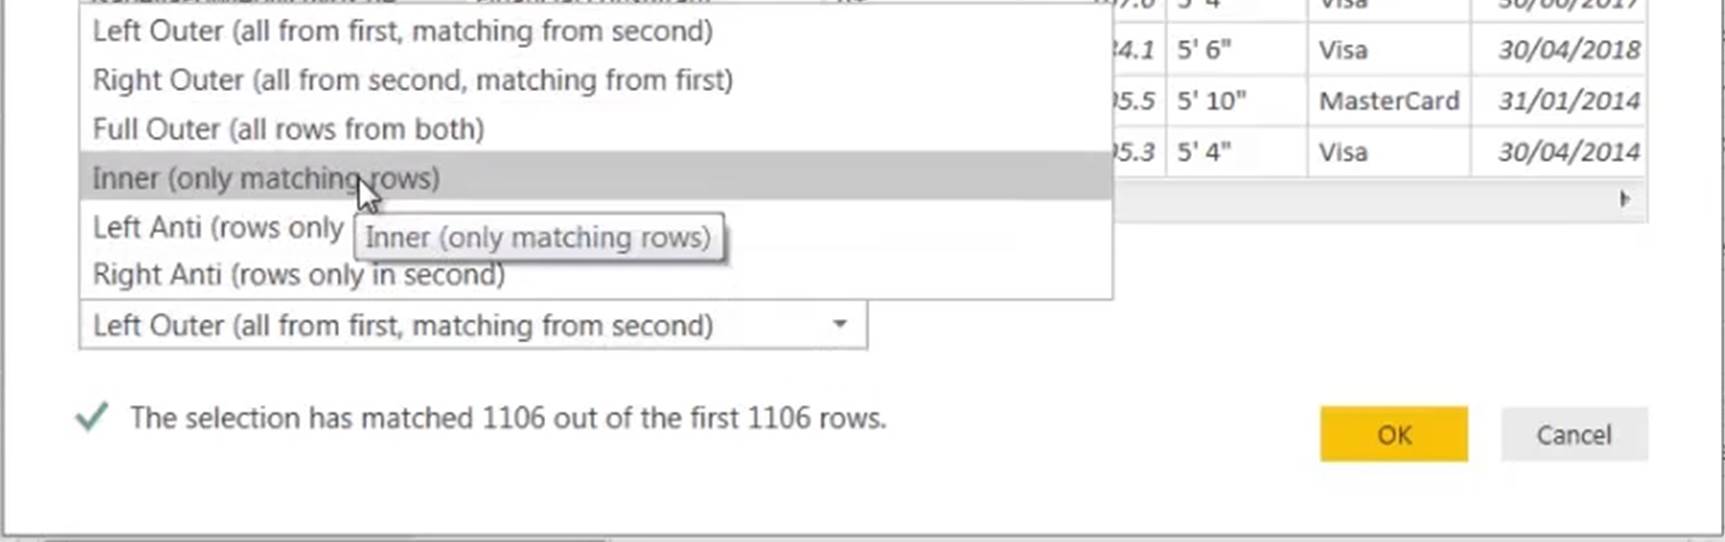
You then have all the possible ways of joining the two input queries; and you will probably recognise these options as being identical to SQL joins.
· Left Outer (all from first, matching from second)
· Right Outer (all rows from second, matching from first)
· Full Outer (all rows from both)
· Inner (only matching rows)
· Let Anti (rows only in first)
· Right Anti (rows only in second)

In the illustration shown below, we only want the matching columns from both datasets. Thus, we choose Inner (only matching rows).
When you click OK, the settings you have chosen will create a completely new query which will only contain rows of data where the same value is found in the matching column, in both input queries. However, unlike the Append Queries command, Match Queries places the merged table in a single column in the resulting query. This column then needs to be expanded to obtain the columns in the second table.
Syntax
Table.NestedJoin(
table1 as table,
key1 as any,
table2 as any,
key2 as any,
newColumnName as text,
optional joinKind as nullable number,
optional keyEqualityComparers as nullable list
) as table
· Table1
The first of the two tables whose columns you wish to combine in producing the resulting query.
· Key1
The key column in table1 whose values will be tested for equality with those of the key2.
· Table2
The second of the two tables whose columns you wish to combine in producing the resulting query.
· Key2
The key column in table2 whose values will be tested for equality with those of the key1.
· NewColumnName
The name of the new column generated by the Merge Queries command which will contain binary table data.
· JoinKind
An enumeration or number to specify the type of join used: JoinKind.Inner or 0, JoinKind.LeftOuter or 1, JoinKind.RightOuter or 2, JoinKind.FullOuter or 3, JoinKind.LeftAnti or 4, JoinKind.RightAnti or 5.
· keyEqualityComparers
Optional specification of how the two key columns should be compared.
Having used the Merge Queries command, at first glance, it can appear as though the resulting query only contains the columns from the first table. However, if you scroll all the way to the right, you will find an additional, binary column, called by default “NewColumn”, and containing the data from the second table. To add the actual columns from the second table, we click the expand button which, behind the scenes, adds the Table.ExpandTableColumn function to our M code.
Table.ExpandTableColumn (Expand button)
Click on the Expand button, on the right of the “NewColumn” column, to get access to all the other columns from the query produced by the Merge Queries command. In the dialog which appears, activate the columns which you want to add. Unless, there will be a clash of column names, you can also deactivate the option Use original column name as prefix.
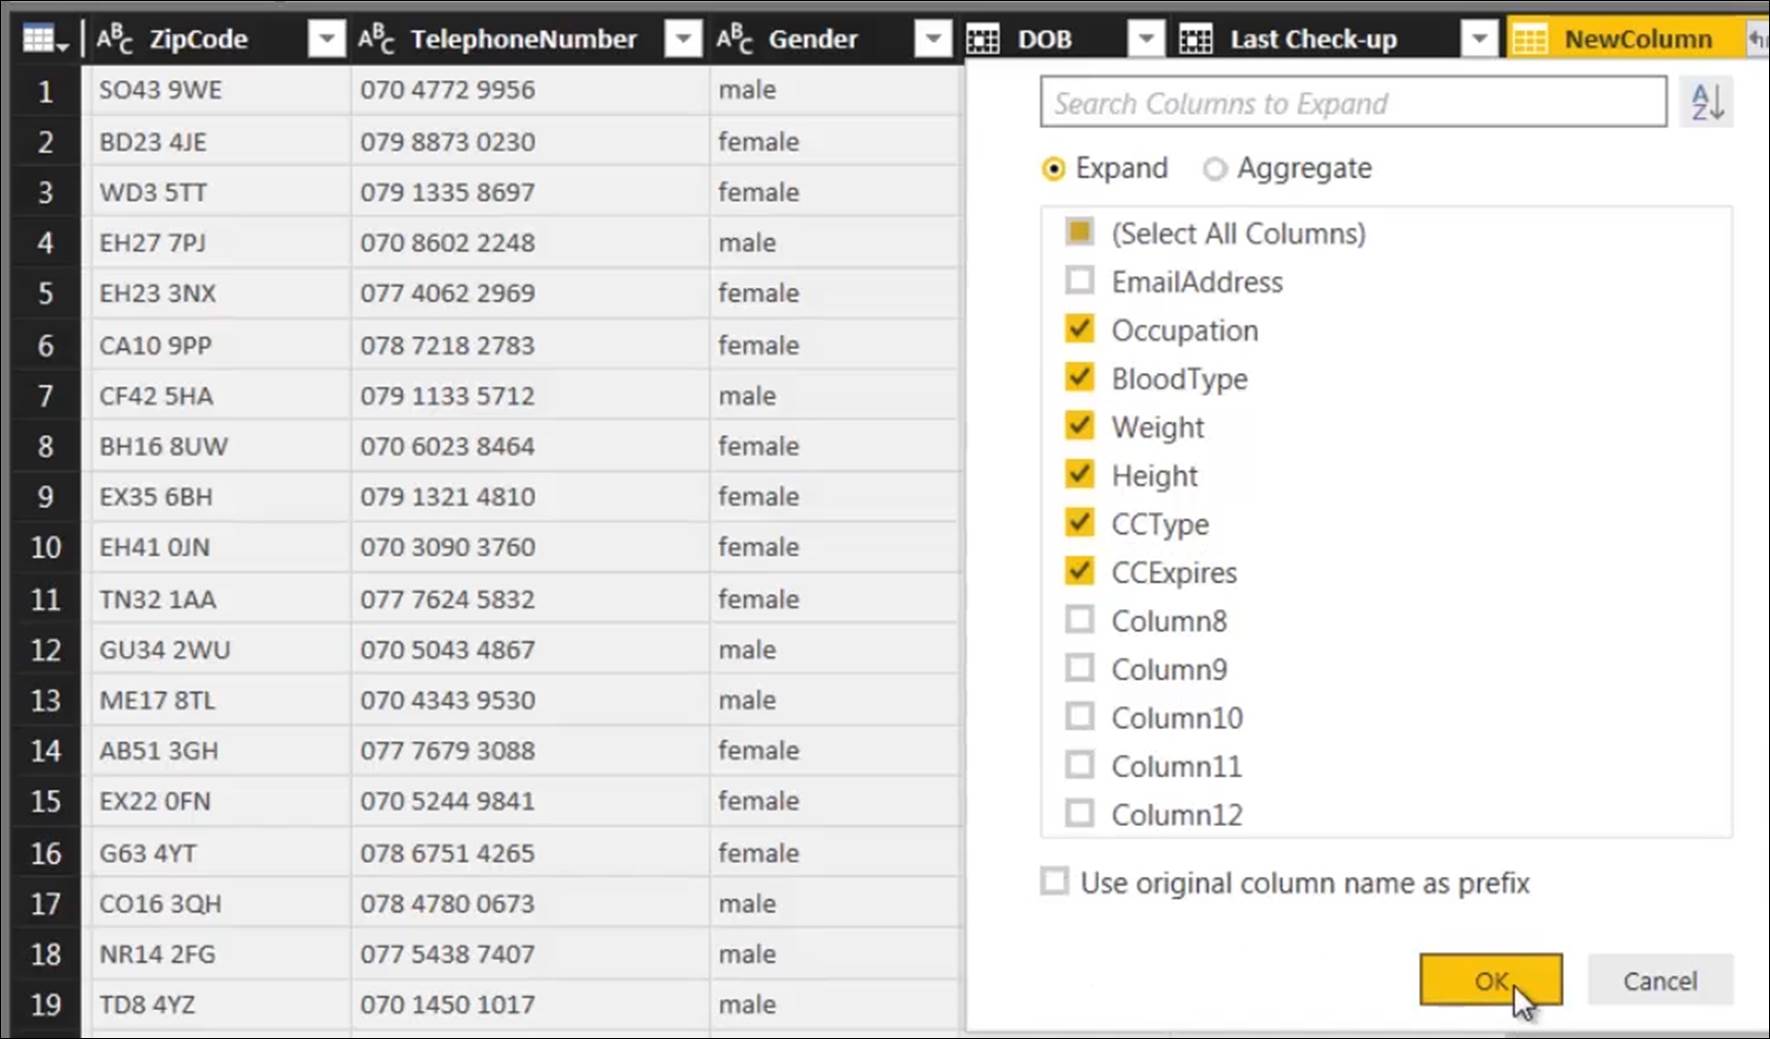
When you click OK, we have all the columns from the second table added to your query.
Syntax
Table.ExpandTableColumn(
table as table,
column as text,
columnNames as list,
optional newColumnNames as nullable list
) as table
· Table
The table which contains the column to be expanded.
· Column
The column to be expanded.
· ColumnNames
The columns from the expanded table which will be included in the resulting query.
· NewColumnNames
The new names which will be given to the columns being selected. If this optional list parameter is omitted, the original column names will be preserved.