
MyWorkspace, App Workspaces, Apps and Template Apps
Once you have configured your Power BI tenant, the next major aspect of Power BI which you need to address is the configuration of app workspaces. But what exactly are app workspaces and how do they differ from MyWorkspace, apps and template apps. Let’s start with workspaces.
(If you are looking to learn Power BI, then our series of Power BI Training Free Online Books can help.)
Workspaces are the Only Substructure within a Power BI Tenant
A workspace is an area designated within your Power BI tenant as a container for reports, dashboards, workbooks, datasets and dataflows. It is the only substructure within a Power BI tenant and is, therefore, of pivotal importance. There are two types of workspace object: MyWorkspace and app workspaces.
MyWorkspace is a Workspace but with Limitations
Each user is who is allocated a Power BI license, be it free or Pro, will find a single workspace when they log in called “MyWorkspace”. Users can upload four types of content to their MyWorkspace workspace: reports, dashboards, workbooks, datasets. Dataflows cannot be created be created in MyWorkspace.
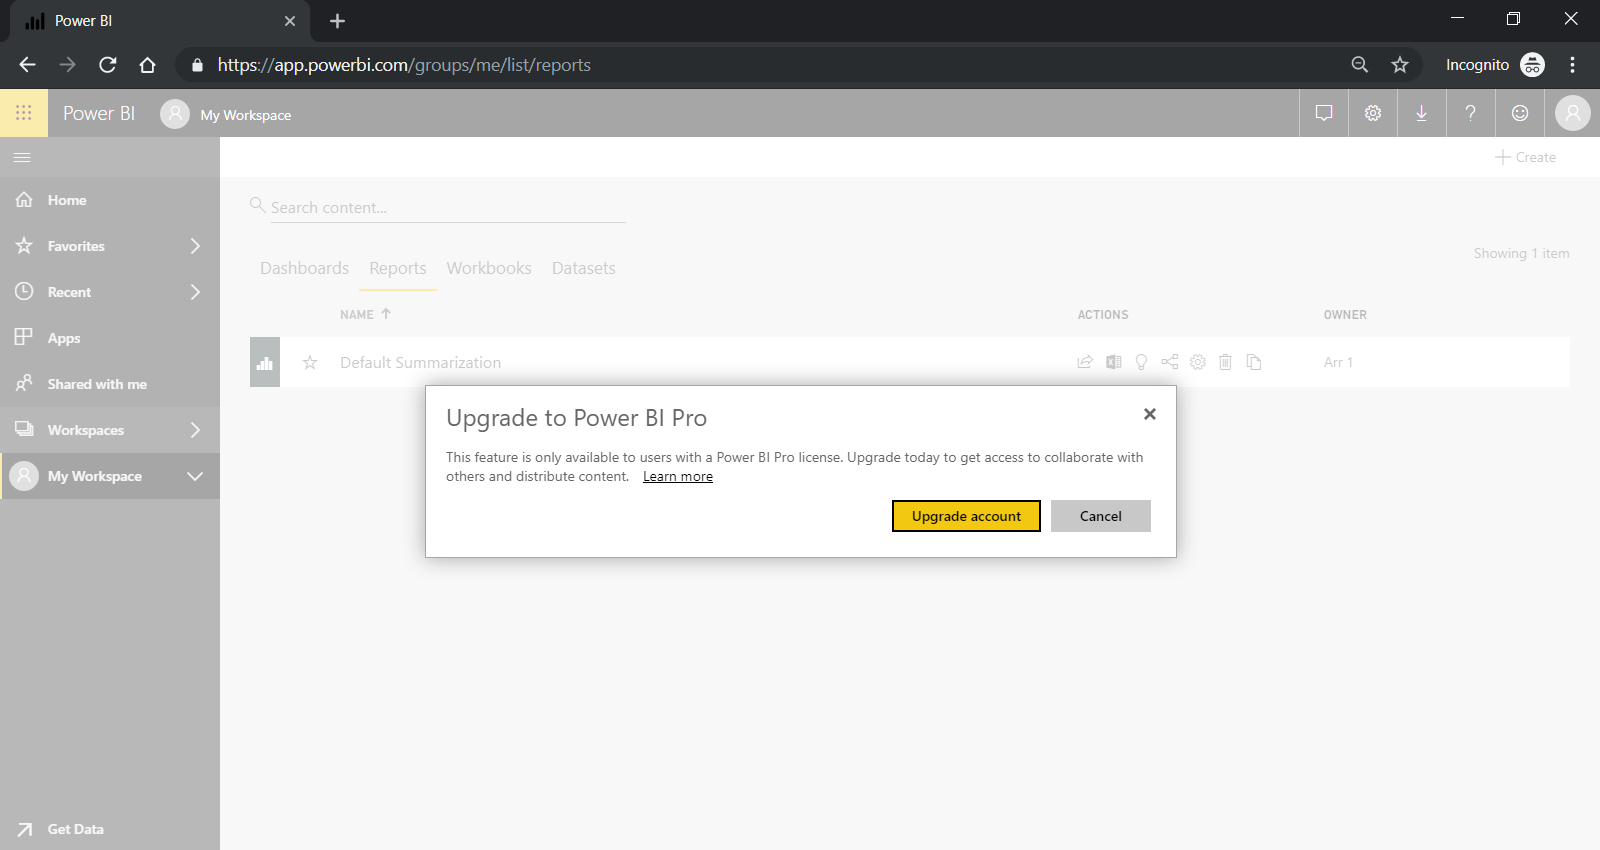
Rather Surprisingly, Content can be Shared from MyWorkspace
Although MyWorkspace cannot be published as an app, perhaps rather surprisingly, it is possible to share individual reports and dashboards. However, best practice is to avoid doing so; each user’s MyWorkspace should be used for content which is either not meant to be shared or not yet ready to be shared. Even this limited sharing, however, still requires the Pro license; although free users are shown a tantalising Share button, when they click on it, they are presented with a message inviting them to upgrade to Pro (or try it free for 60 days).
App Workspaces Provide Additional Features Not Available in MyWorkspace
App workspaces are workspaces designed for collaboration and sharing. They therefore offer three additional features not found in MyWorkspace.
- It is possible to grant access to an app workspace to security groups and individual users to enable collaboration on the creation of content.
- In addition to sharing individual reports and dashboards, it is possible to publish the entire workspace as an app; a read-only copy of the original app workspace.
- It is only possible to create dataflows in app workspaces; they cannot be created in MyWorkspace.
The Ability to Create Workspaces is a Tenant Setting
If you are a user within a Power BI tenant, you may or may not have the ability to create app workspaces. This feature can be activated or deactivated by a Power BI administrator, either at the tenant level or for specific security groups (Settings > Tenant Settings > Workspace settings > Create workspaces).
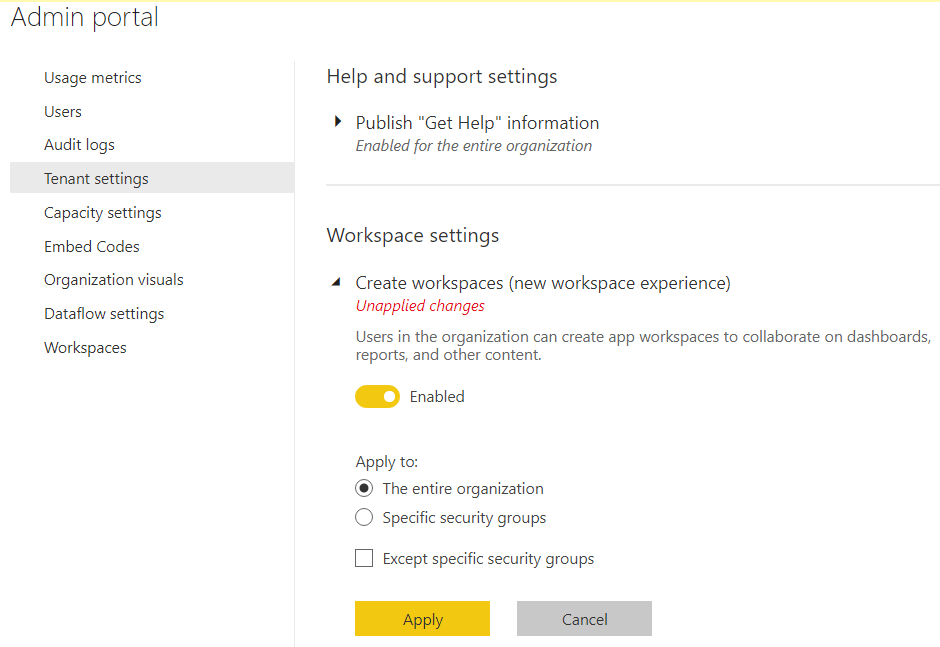
Since the workspace structure in a Power BI tenant plays such an important part in the experience of its users, many IT departments prefer to disable this feature for the general user.
(In this article, we will focus on the new workspace experience, rathe than the deprecated group workspaces based on Office 356 groups.)
Creating an App Workspace is Really Easy, Perhaps too Easy
It only takes a couple of minutes to create an app workspace and each one is created in a kind of structural vacuum with no reference to existing workspaces. Naturally, the name that you choose for each workspace must be unique within the context of the whole Power BI tenant, rather than simply that of the workspaces to which you have access. However, beyond that, you can assign an app workspace whatever name you choose. As well as the name, you have the ability to enter a description and to assign a premium capacity as well as a workspace OneDrive.
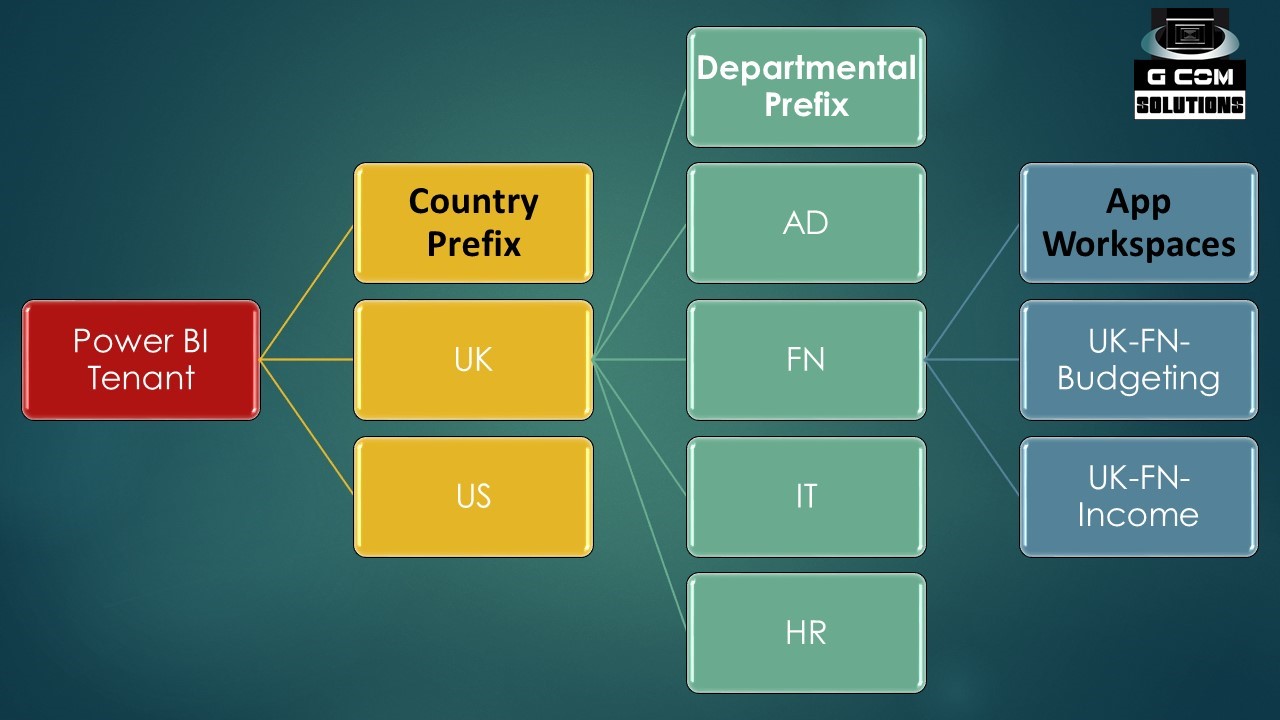
A Naming Convention Can be Used to Create a Workspace Hierarchy
Microsoft do not currently provide any mechanism for grouping workspaces; so, you need to use indirect methods to create any kind of structure. A naming convention can be used to indicate the place of each workspace within an organizational hierarchy. This can be achieved by attaching one or more prefixes to the name of each app workspace. Thus, in the example shown below, we have a country prefix, followed by a departmental one, followed by the name of the workspace.
Workspace MetaData Can be Useful to Tenant Administrators
As well as the name, it is always useful to enter a description. This description is only visible to those who have access to the app workspace as an admin, a member or a contributor. However, it can also be retrieved via PowerShell. This is therefore a good place to insert structured metadata detailing attributes of the workspace which are not exposed by the Power BI Service. A simple example is shown below.
Description: Revenues, expenses, and profits/losses; Created by: Gillian Turner; Creation Date: 11/07/2019; Country: UK; Department: Finance; Role: Reporting Workspace; Path: United Kingdom > Finance > Income
This description could then be easily parsed into columns by administrators building reports on tenant workspaces using Power BI Desktop.
Workspaces Can be Assigned Different Functional Roles
Although, technically, all workspaces are created equal, there is nothing to stop us from using them for distinct purposes. Naturally, the main use of a workspace is to house reporting content. However, as part of a data governance strategy, we might also choose to use certain workspaces in other ways. Here are some examples of the different roles which we may choose to assign to workspaces.
- To store reporting content
- To store dataflows and datasets
- To store dataflows only
- To store datasets only
- To be used as staging areas for unapproved content
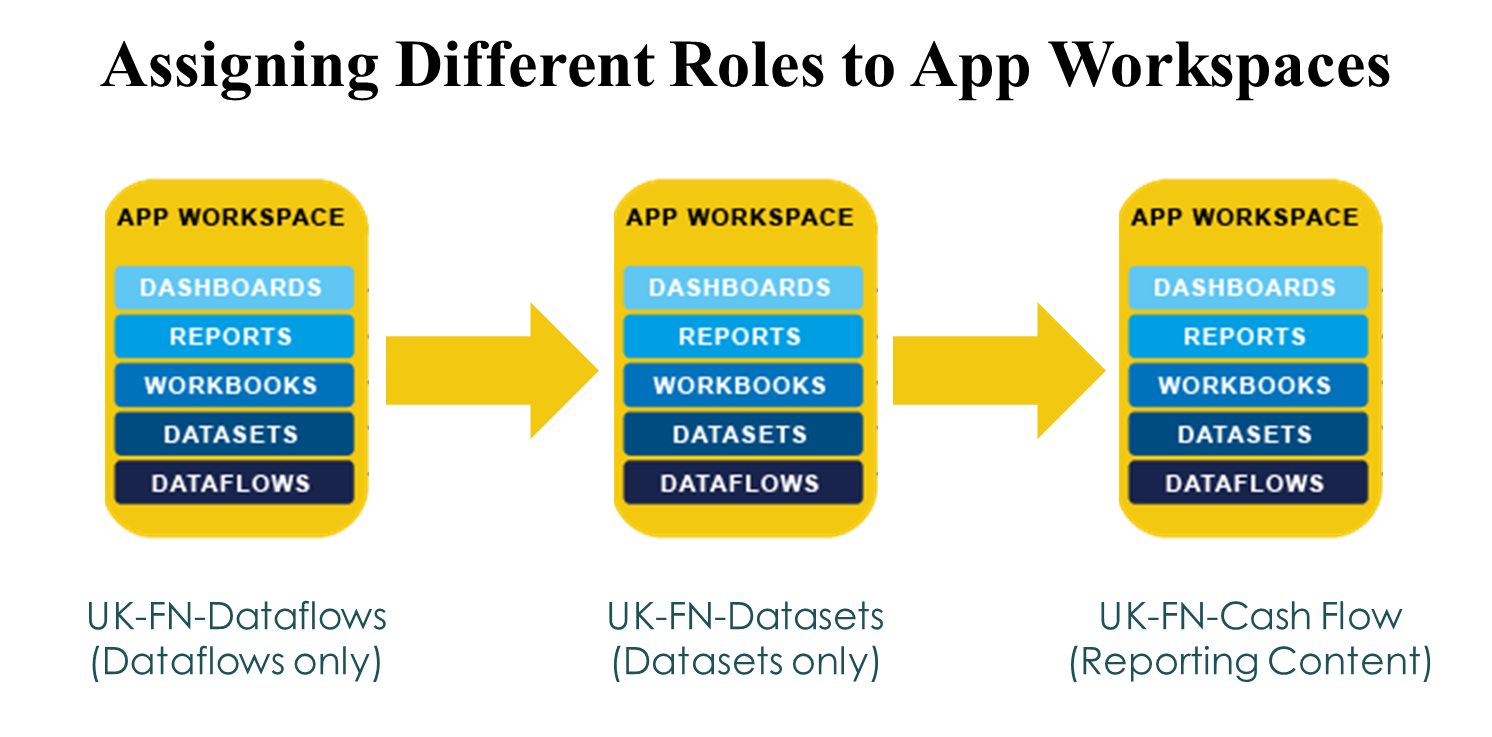
These roles would of course only be indicated by naming conventions, metadata and organizational usage. There is nothing in the Power BI service which allows us to assign a specific role to a given workspace.
Apps are Separate Read-Only Copies of App Workspaces
Moving onto apps, the first point to emphasize is that an app is a separate object to the app workspace from which it is published. Basically, you develop your content in an app workspace and, when the content is ready to be shared, you publish the app and specify which security groups and users have access to it. These users then install and consume the app but have no way of editing its contents.
Not all Content in An App Workspace Needs to be Published
Although only one app can ever be published from a given workspace, publishing is not an all or nothing operation. Power BI displays a button marked “Included in App” next to each item listed in an app workspace. If an item is not ready for publication, simply deactivate this option.
Apps Can be Published, Updated and Unpublished
There are three operations which relate to the publishing of an app: publishing, unpublishing and Updating. Before you publish an app, a yellow “Publish app” button is displayed in the top right of the screen.

Publishing the app creates a read-only copy which is consumed in the App and Home sections of their Power BI service. In the original app workspace, the “Pubish app” button then changes to an “Update app” button.

If you later wish to recall the app, you can use the Unpublish command found in the ellipsis menu next to the “Update app” button.
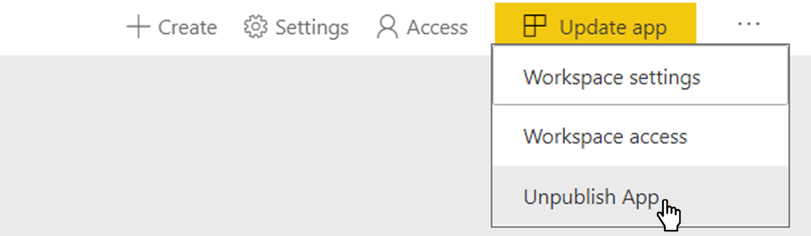
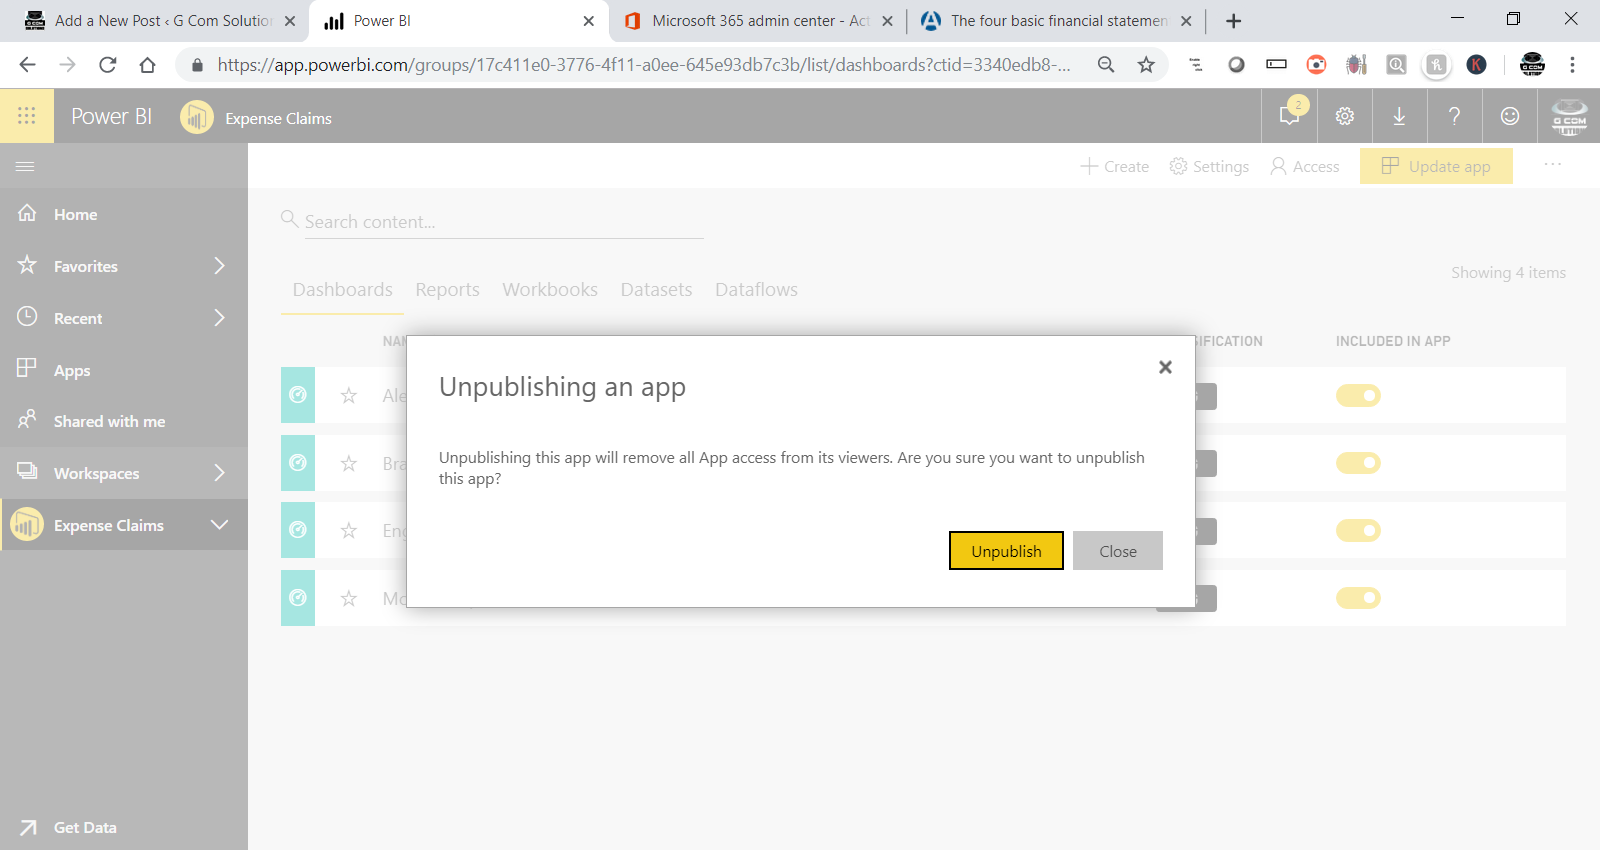
Unpublishing the app is tantamount to deleting it, as indicated by the message which is displayed when you use the command.
Naturally, if you delete the workspace from which the app was published, the app will also be deleted.
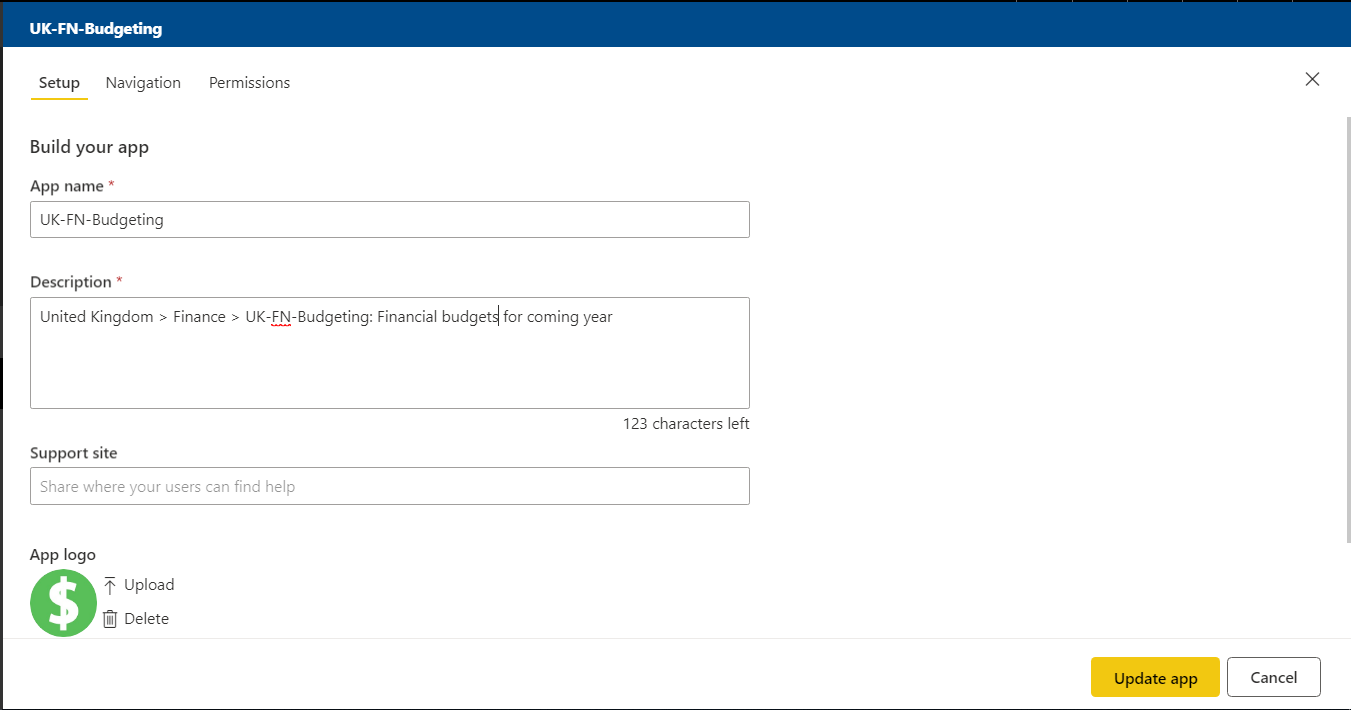
The Steps to Publishing an App are Setup, Navigation and Permissions
When you click on the Publish App button, you are taken into a wizard-style interface consisting of three tabs: Setup, Navigation and Permissions. In the Setup tab, you enter the name of the app; and it usually makes sense to keep the same name as the original app workspace. The same goes for the app logo.
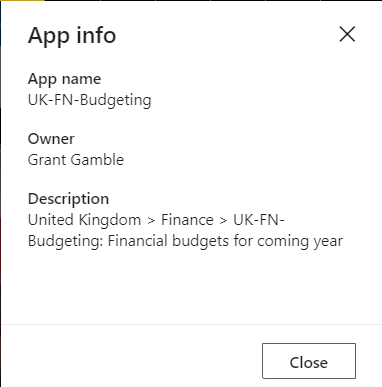
App Descriptions are Displayed in the App Info Dialog
You also need to enter a description. The description is not inherited from the app workspace. As before, the description provides an opportunity to enter metadata; this time, for the benefit of the user. Thus, it can be used to display navigational breadcrumbs as well as an overview of the workspace.
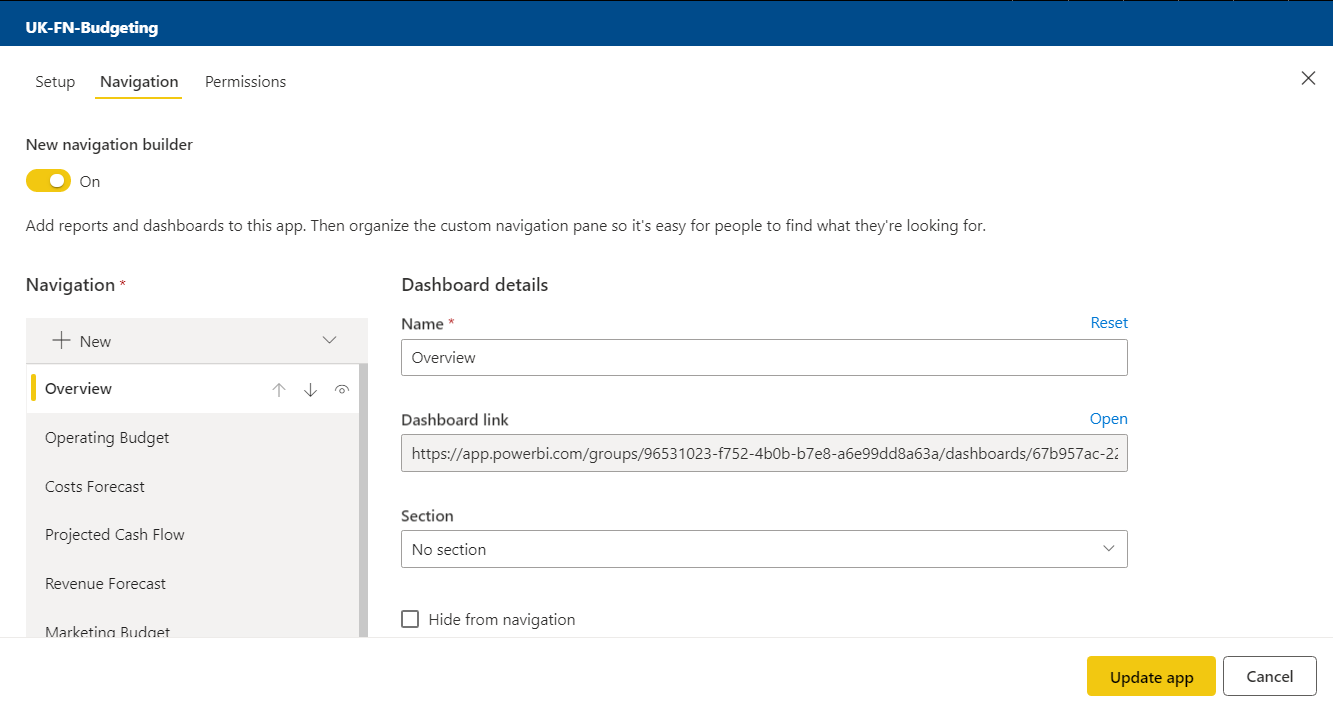
The Navigation Pane Can Be Customized to Suit Your Requirements
In the Navigation tab, you are presented with a menu of automatically generated links to each of the objects in your app: dashboards, reports and workbooks. You can reorder and rename these links; hide them and add new ones. If you have a lot of content, you can even group links into different sections. When the user accesses the app, the Navigation pane will show up on the left of the screen. The first item in the navigation list will, effectively, become the home page.
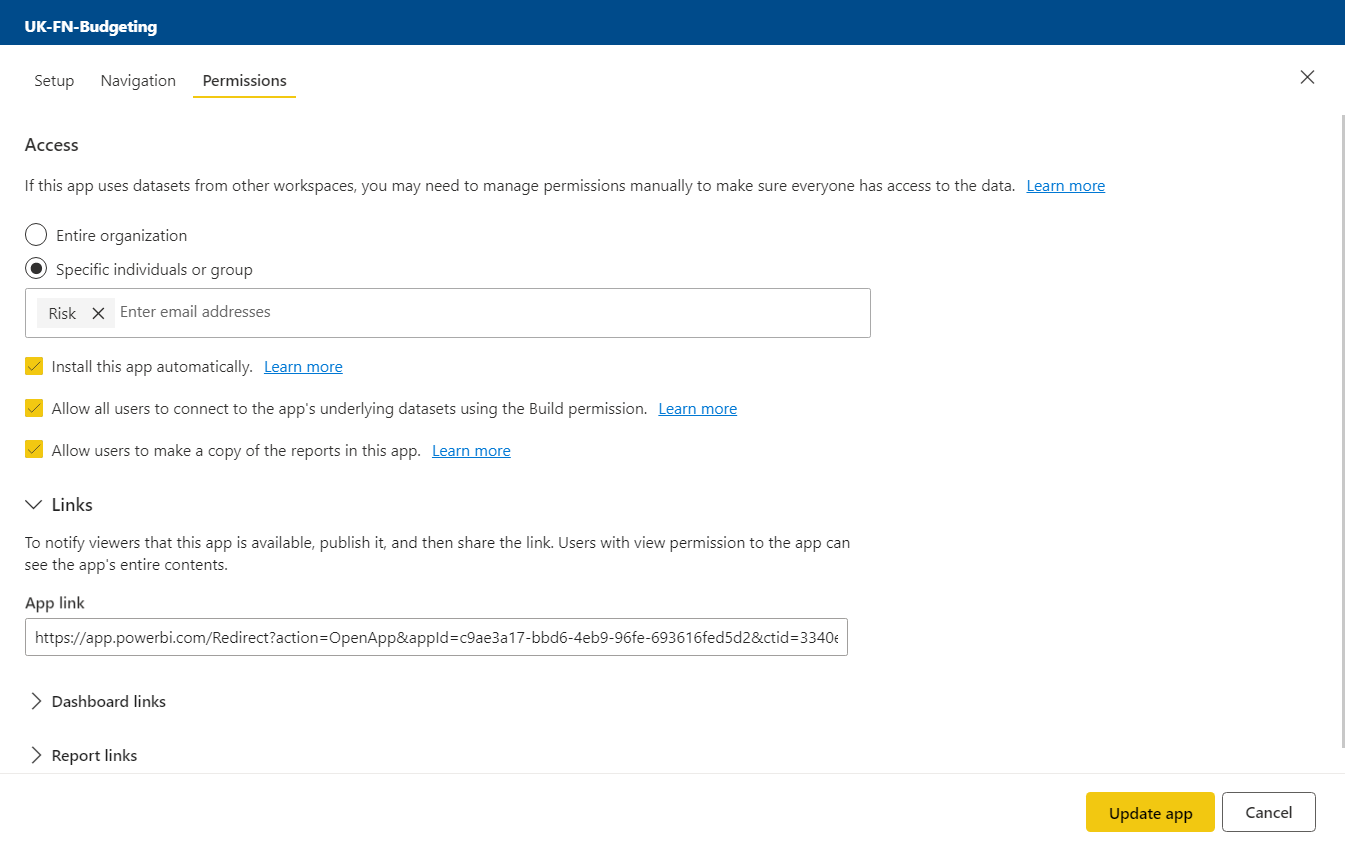
The Permissions Tab Now Provides a Good Deal of Flexibility
As well allowing you to specify which security groups and/or individuals will have access to the app, the Permissions tab now contains two useful additional options. These new options restore some of the functionality which was present in content packs which disappeared when these were replaced by apps. These options move the app away from its strictly read-only role and allows users to build
Firstly, we have the option: “Allow all users to connect to the app’s underlying datasets using the Build permission.” And, secondly: “Allow users to make a copy of the reports in this app.”
The second of these two options is particularly powerful, since it effectively allows the user to create an entirely new workspace based on the app.
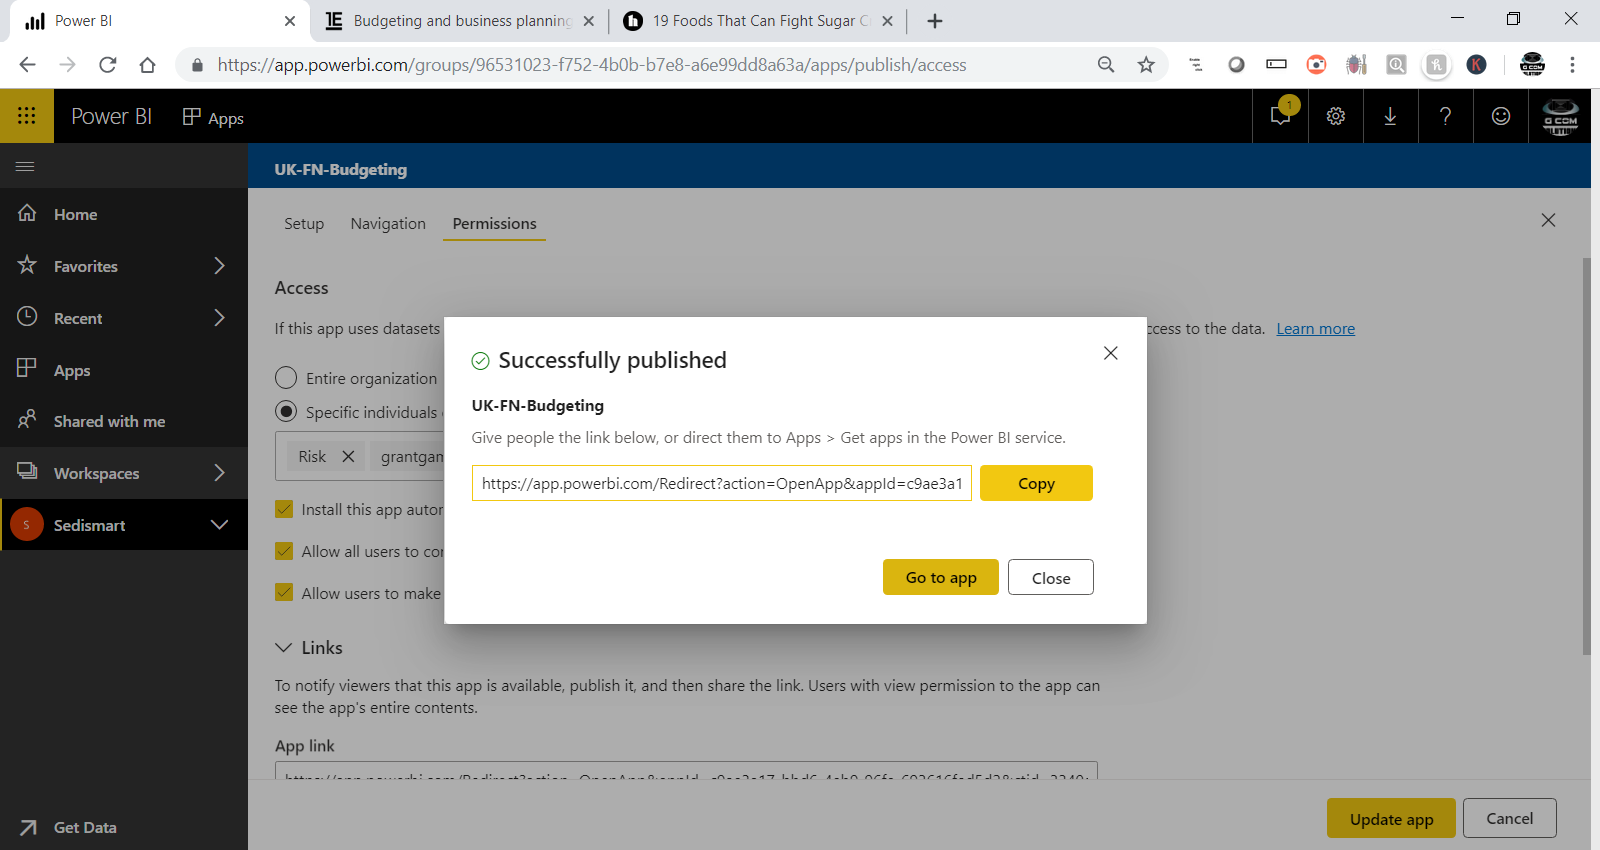
Once you have setup the options in these three tabs, click “Publish app” or “Update app”, as appropriate; and Power BI will display a dialog containing a link which you can distribute to its audience and a “Go to app” button which enables you to test your app experience.
That just leaves us with template apps.
Template Apps Enable the External Distribution of Your Power BI Content
Template apps provide a simple way to create Power BI content which can be distributed across Power BI tenants. To do this, your organization needs to join the Microsoft partner program.
Creating a template app is similar to preparing content in any app workspace and then publishing an app. However, there are several key differences. Firstly, template apps provide a release management approval mechanism.
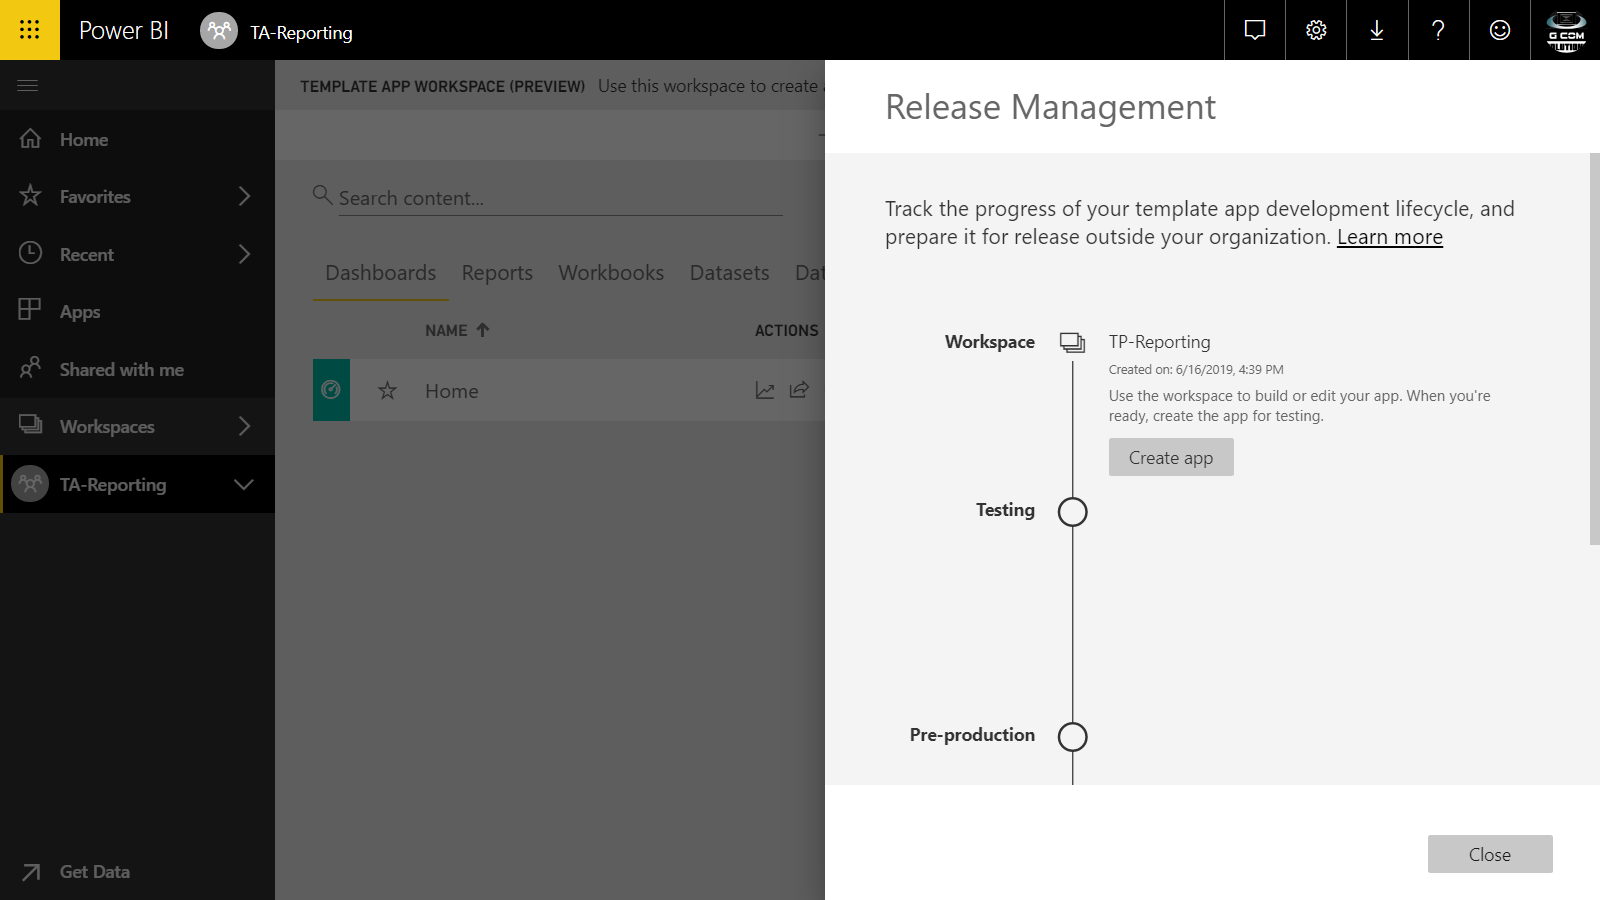
This means that, having created the content you wish to make available to the outside world, you can begin by running internal testing. Once these tests have been passed, you then promote the test package to the preproduction, test it outside your Power BI tenant, and submit it to AppSource.
You then use the preproduction package to create a Power BI template app offer and initiate the validation process by Microsoft. Once your preproduction package is approved, you promote it to production and go live.
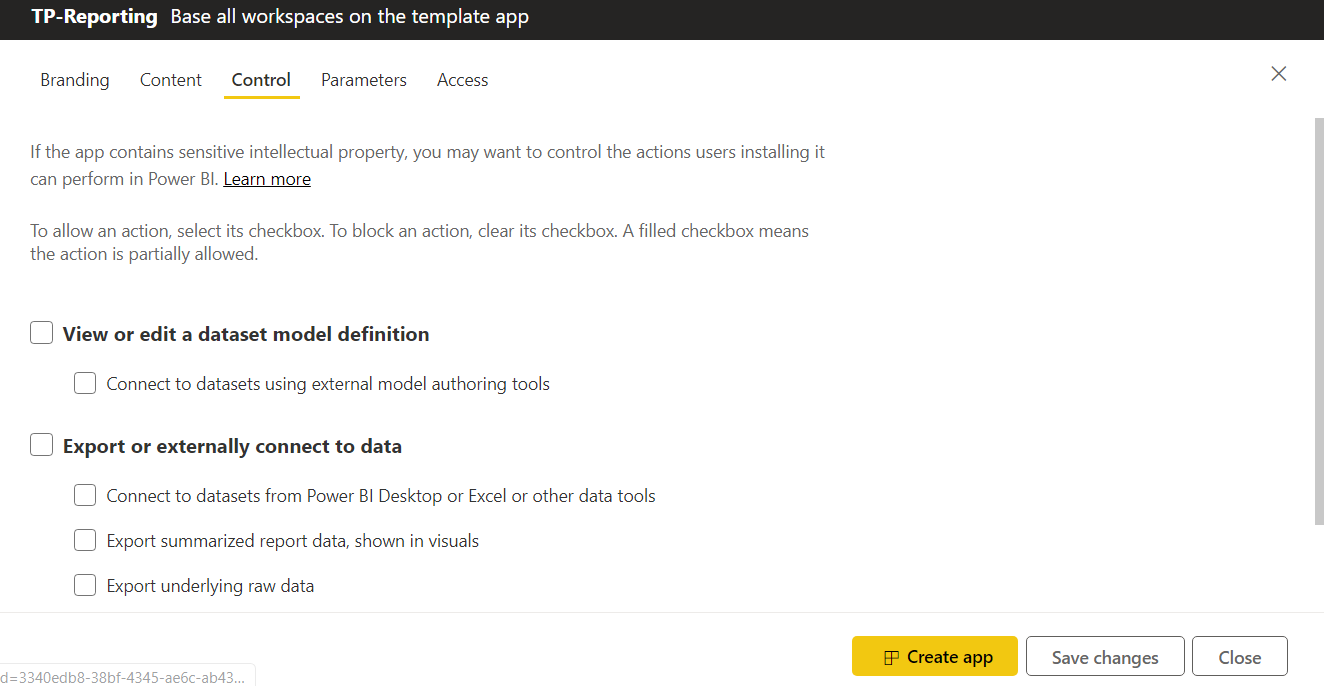
Template Apps Allow You to Make Datasets Completely Inaccessible
A second feature peculiar to template apps is the ability to protect your intellectual property by completely removing access to the datasets which drive your solution. This is done in the Control Tab of the Publishing wizard.
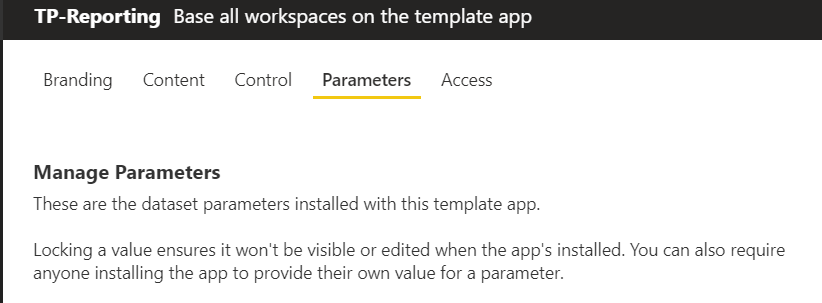
Template Apps Use Parameters to Facilitate Customization
In much the same way as Power BI’s PBIT templates, template apps allow you to use Power Query parameters to allow users to customize such features as connecting to data sources.
Summary
So, there you have it: MyWorkspace is a work area which only you can access; app workspaces are used to store related Power BI content which is then published as an app; while template apps are used to make your content available to Power BI users outside your tenant.