- You are here:
- Home »
- Blog »
- Power BI »
- Power BI DA-100 Exam Tips
Get Data from Different Data Sources
Use Parameters

Power BI DA-100 Exam Tips
Get Data from Different Data Sources
Use Parameters
In this series of blog posts, we will be examining some of the key features of Power BI Desktop, Power Query and the Power BI Service needed to pass exam DA-100: Analyzing Data with Microsoft Power BI.
In this post, we will examine DA-100 exam – Get Data from Different Data Sources: Use Parameters.
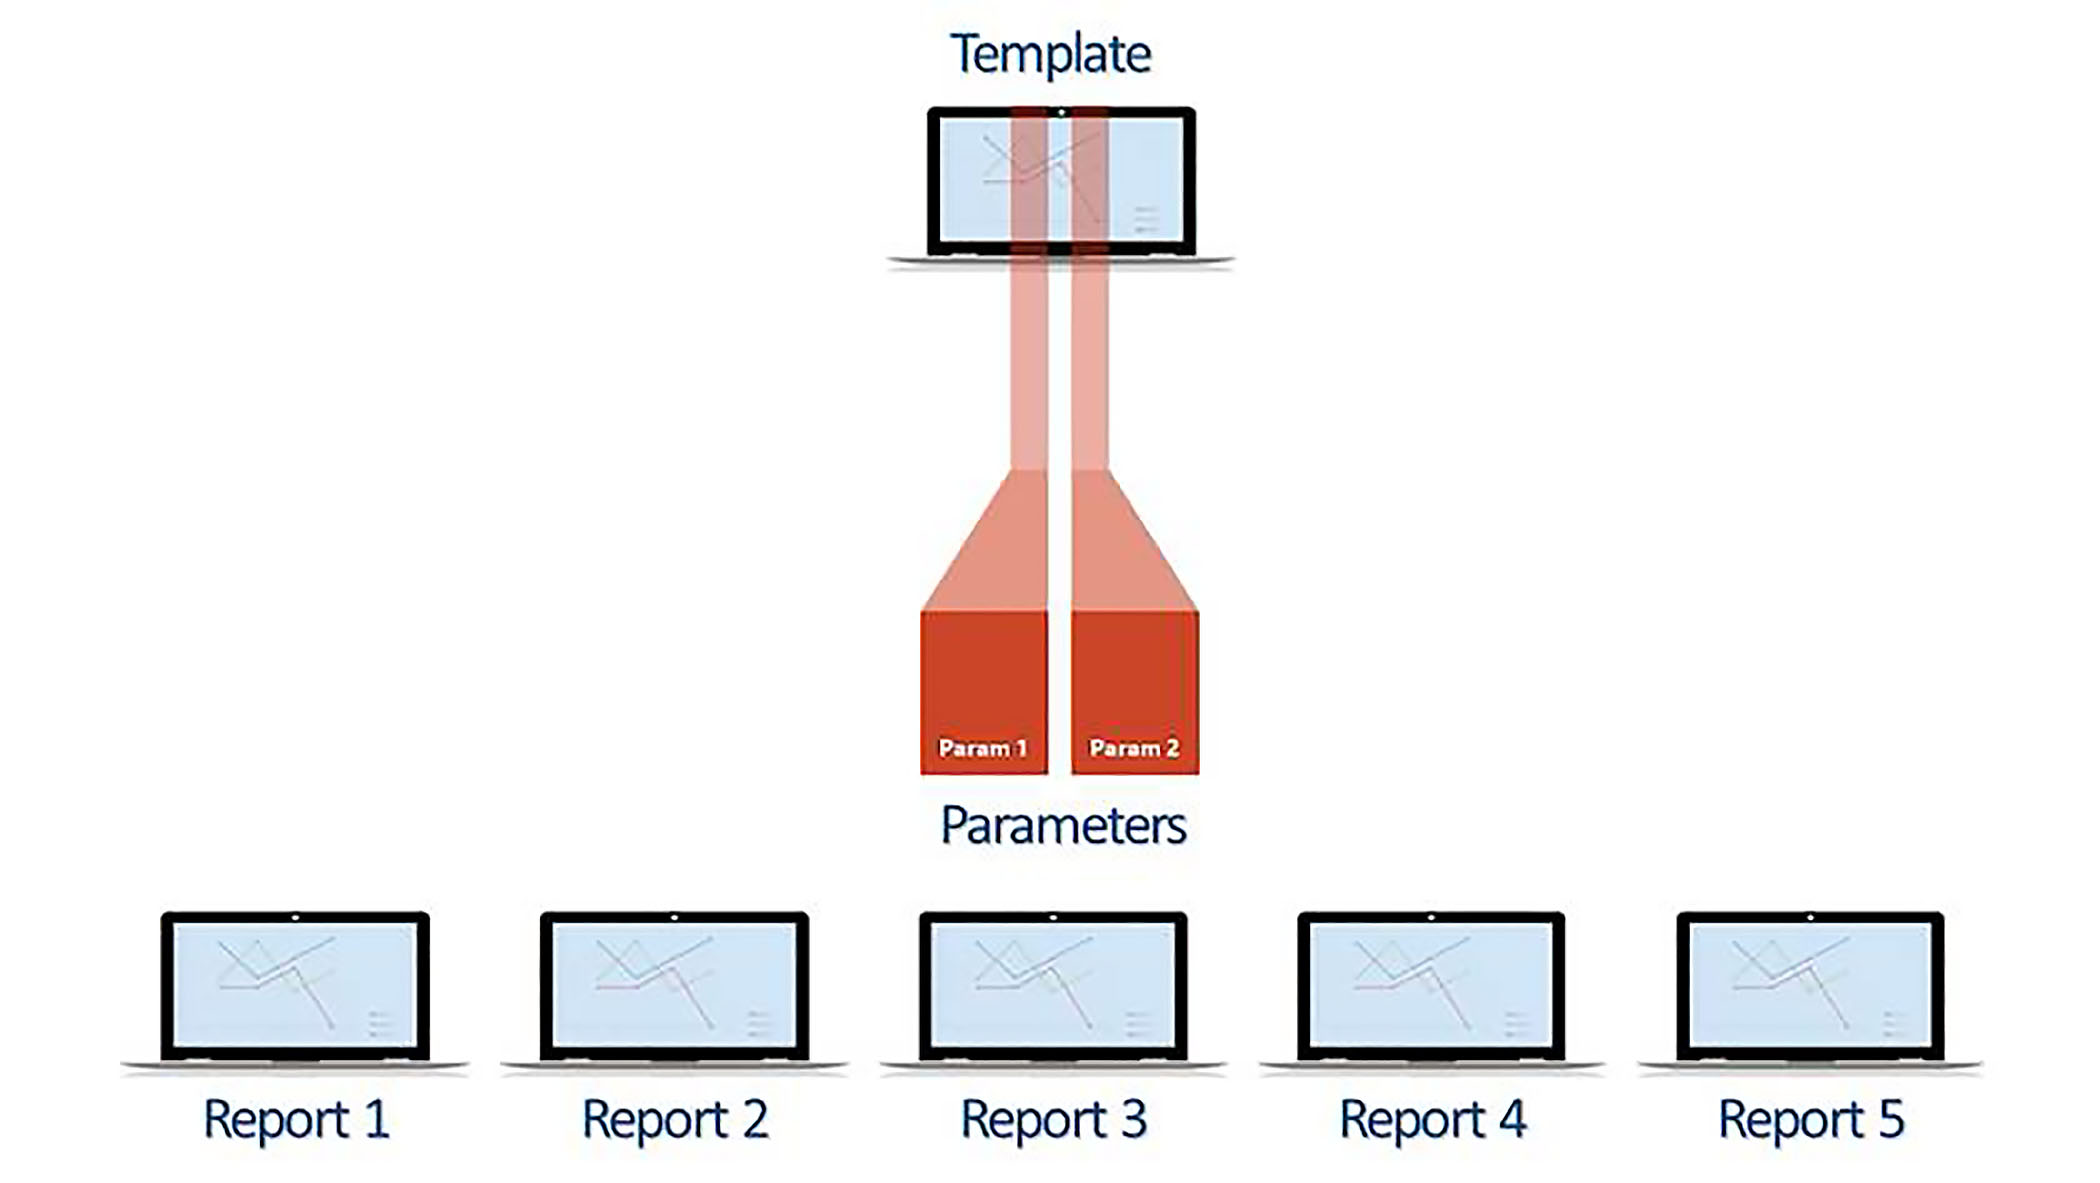
This topic is all about using Power Query parameters, and this is a feature which is very useful for adding flexibility to your report creation. Basically, you can parameterize any aspect of your data, and by supplying a different value for that parameter, you can then determine the rows of data which will be loaded in each time you use your solution.
This feature is often used in conjunction with templates. When you open a template, if you have parameters defined Power BI will ask you to supply a different value for each of these parameters, and this will determine which rows of data are loaded in for that particular use of the template.

In our example, we have a sales report, which will focus on a particular branch.In a card visual, we display a measure which looks to see whether a single branch is selected. Our formula reads:
Title = SELECTEDVALUE(Staff[Branch], "Please select a") & " branch"
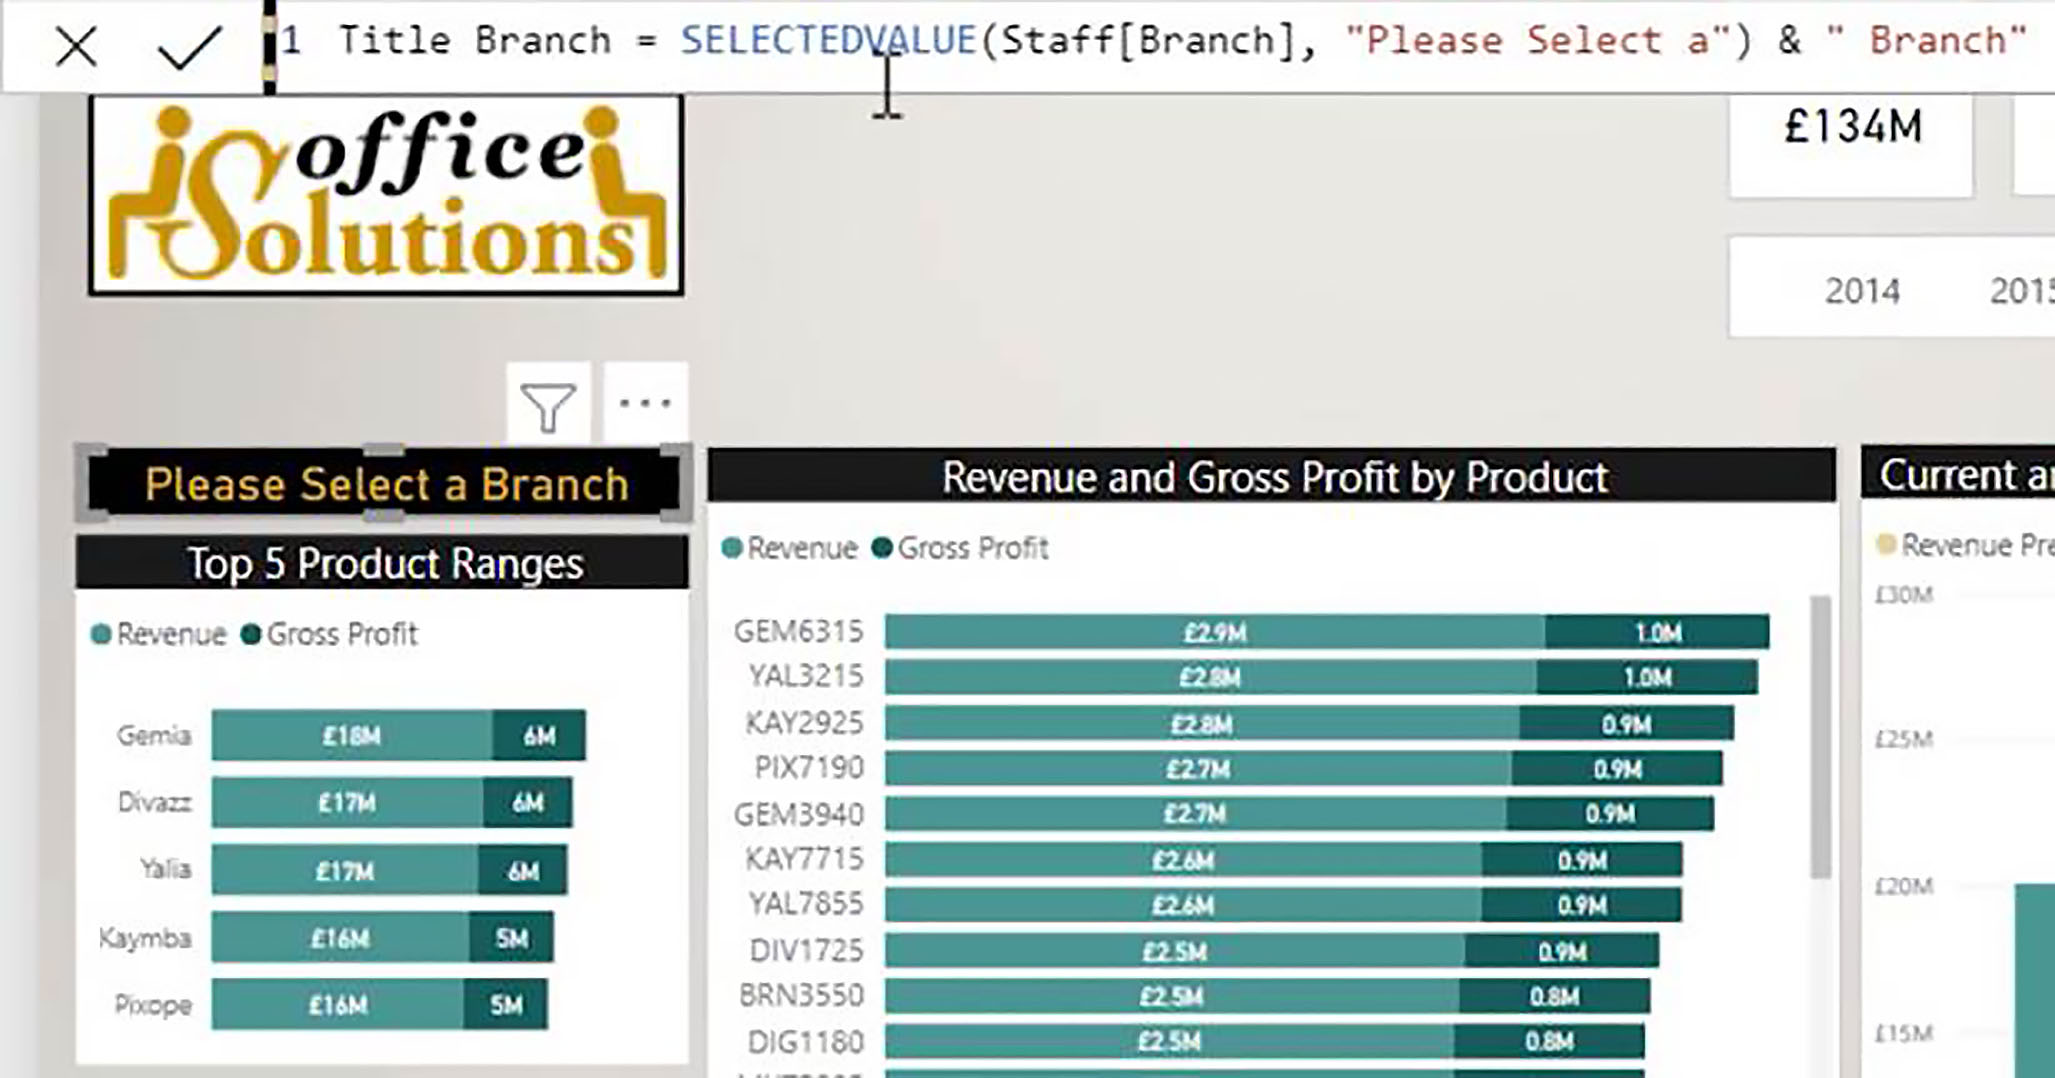
Note that we have an alternate result, which is: "Please select a"; and then we tag on the word " branch". So, when we finished our solution, our title will consist of the name of the branch, followed by the word branch. However, since we have not yet put that functionality in place, the alternate result kicks in, and we have "Please select a", followed by " branch".
Let us now go into Transform Data and see how this is all set up. Here, you will see we have a solution, which contains five queries, and all of them are broken, because the file path in the queries does not apply to the machines that we are currently using.
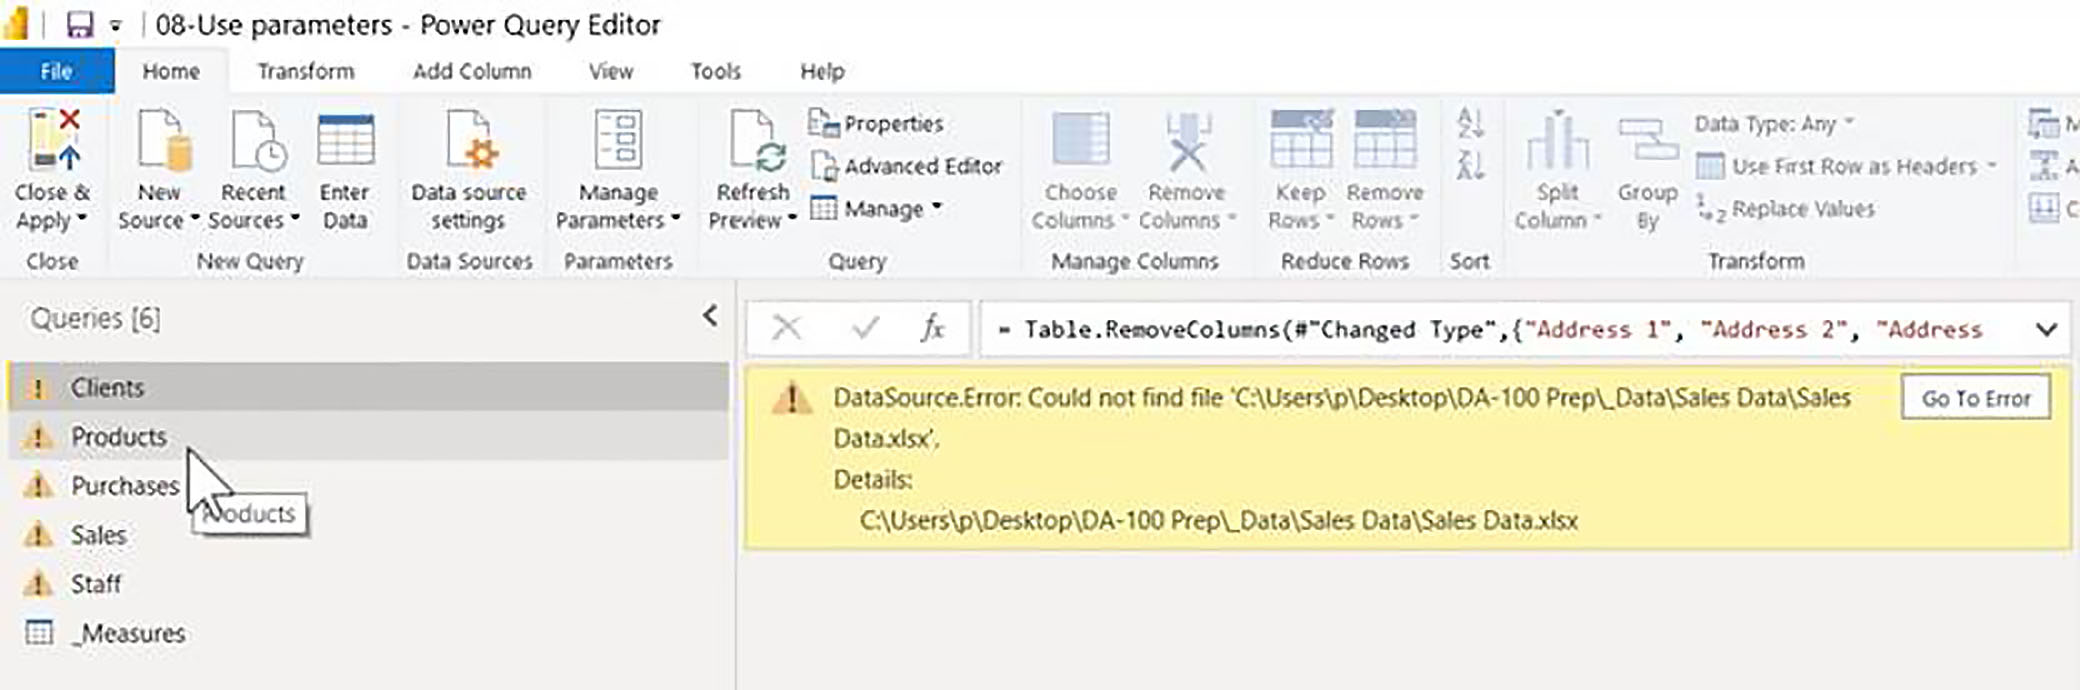
So, what we can do is to parameterize the data source. We can create a parameter which will store, in this case, the file path. However, if we had a database solution, we could parameterize the name of the database, the name of the database server, or even the name of the tables that we wanted to retrieve data from.
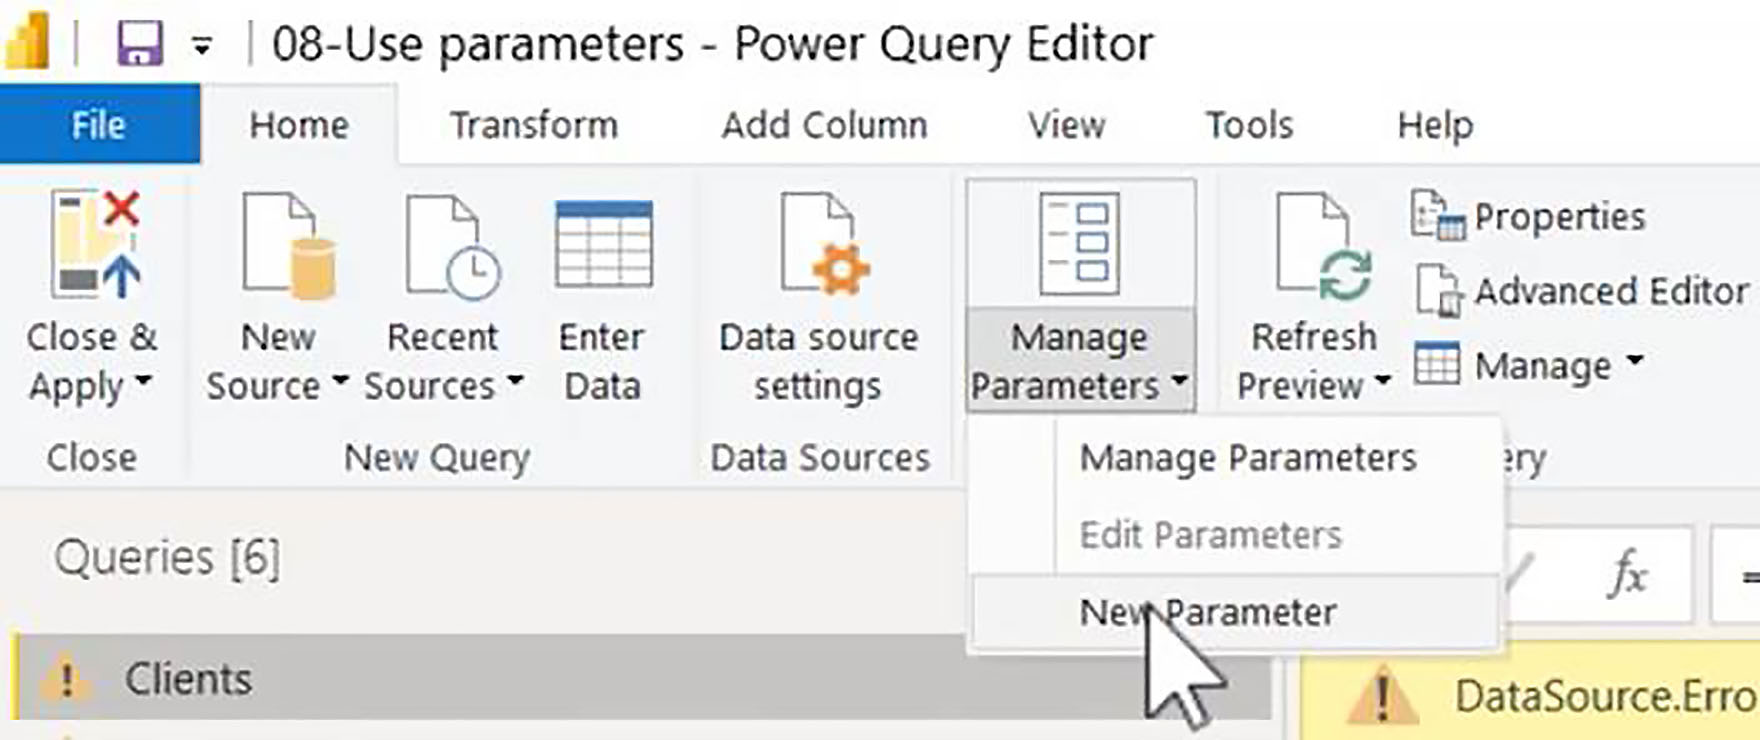
Creating a File Path Parameter
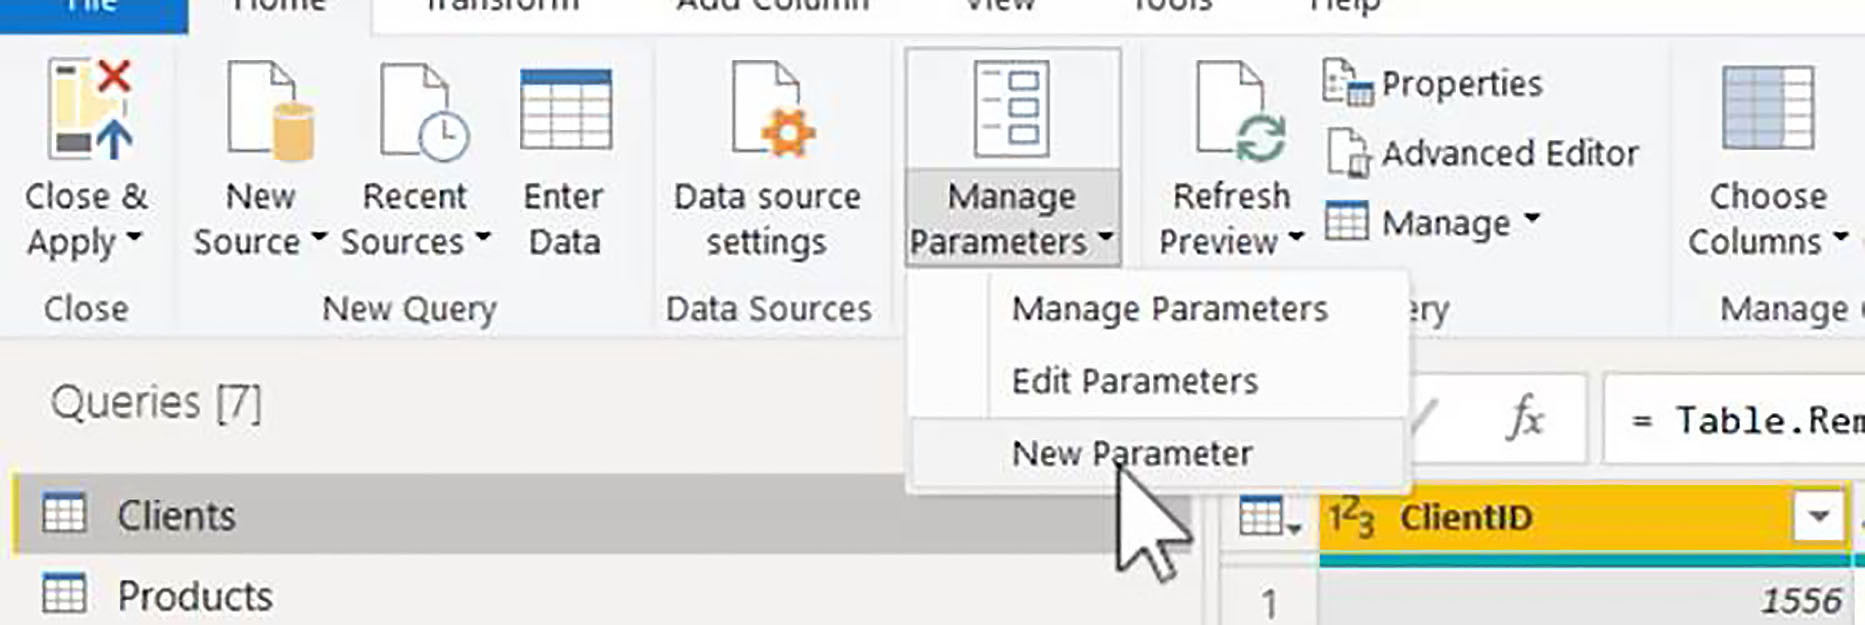
To create a parameter, in the Home tab of the ribbon, we click on Manage Parameters > New Parameter.
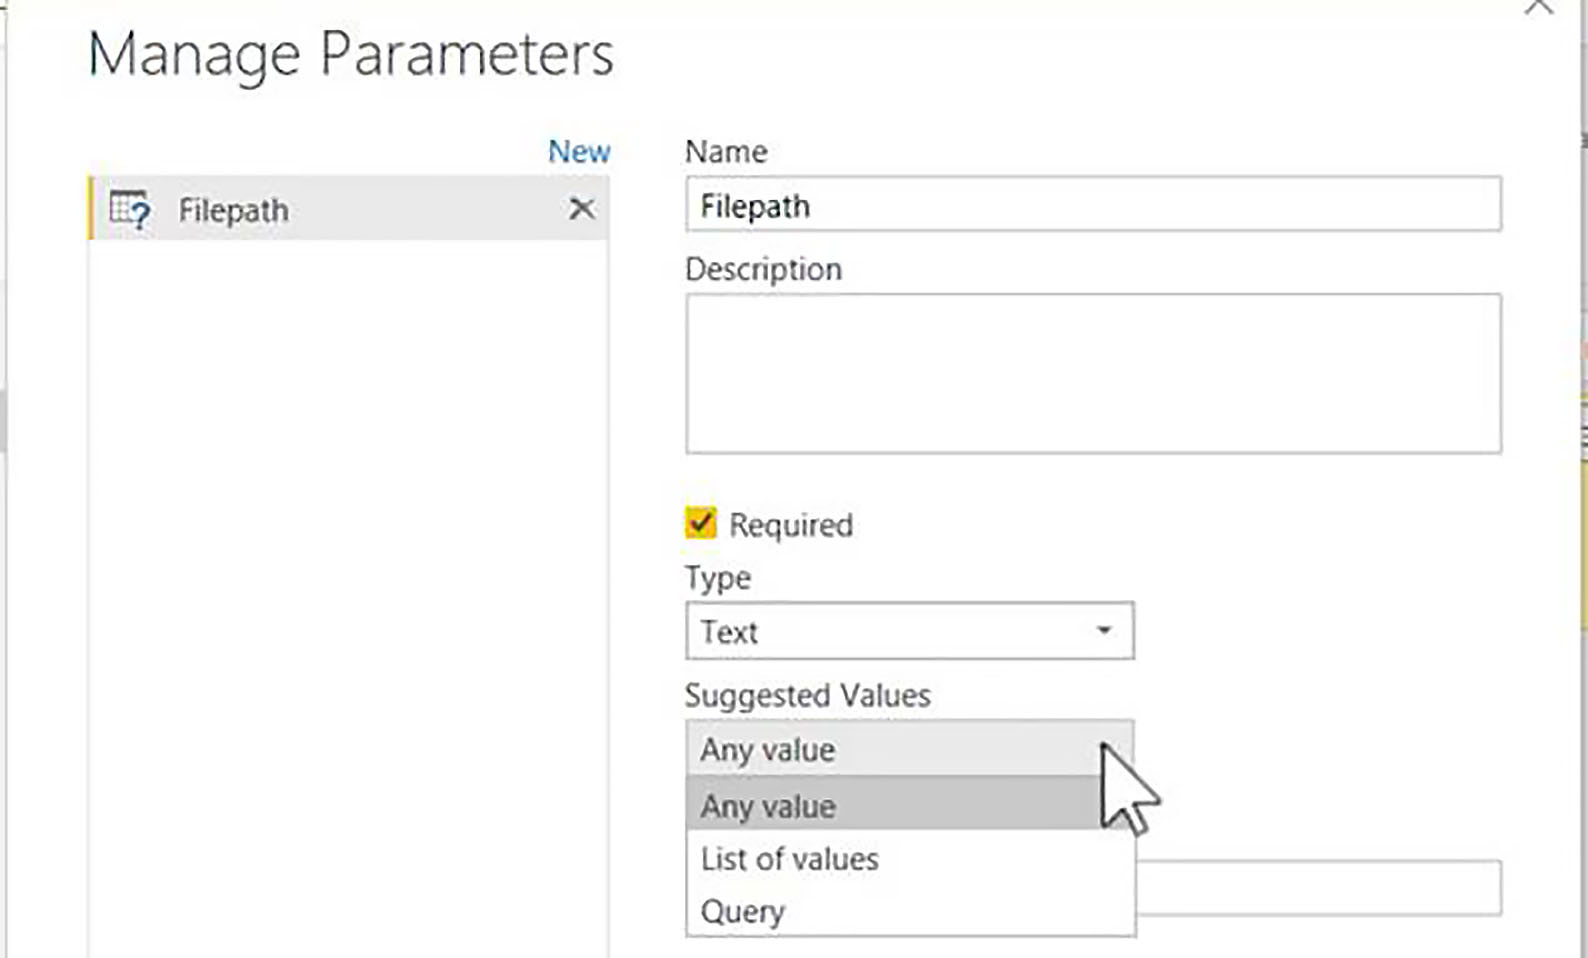
Let us call this parameter: "file path". The Type will, of course, be text.
We then have three methods of data entry:
- Any Value means that the user of this solution will have to enter the value or paste it in.
- List is self-explanatory; you can paste in a static list of values, or type them in.
- Query will require a list query, a query that returns a list object, and obviously, that gives you the chance to have a dynamic solution.
So, we will keep it simple and just have Any Value.
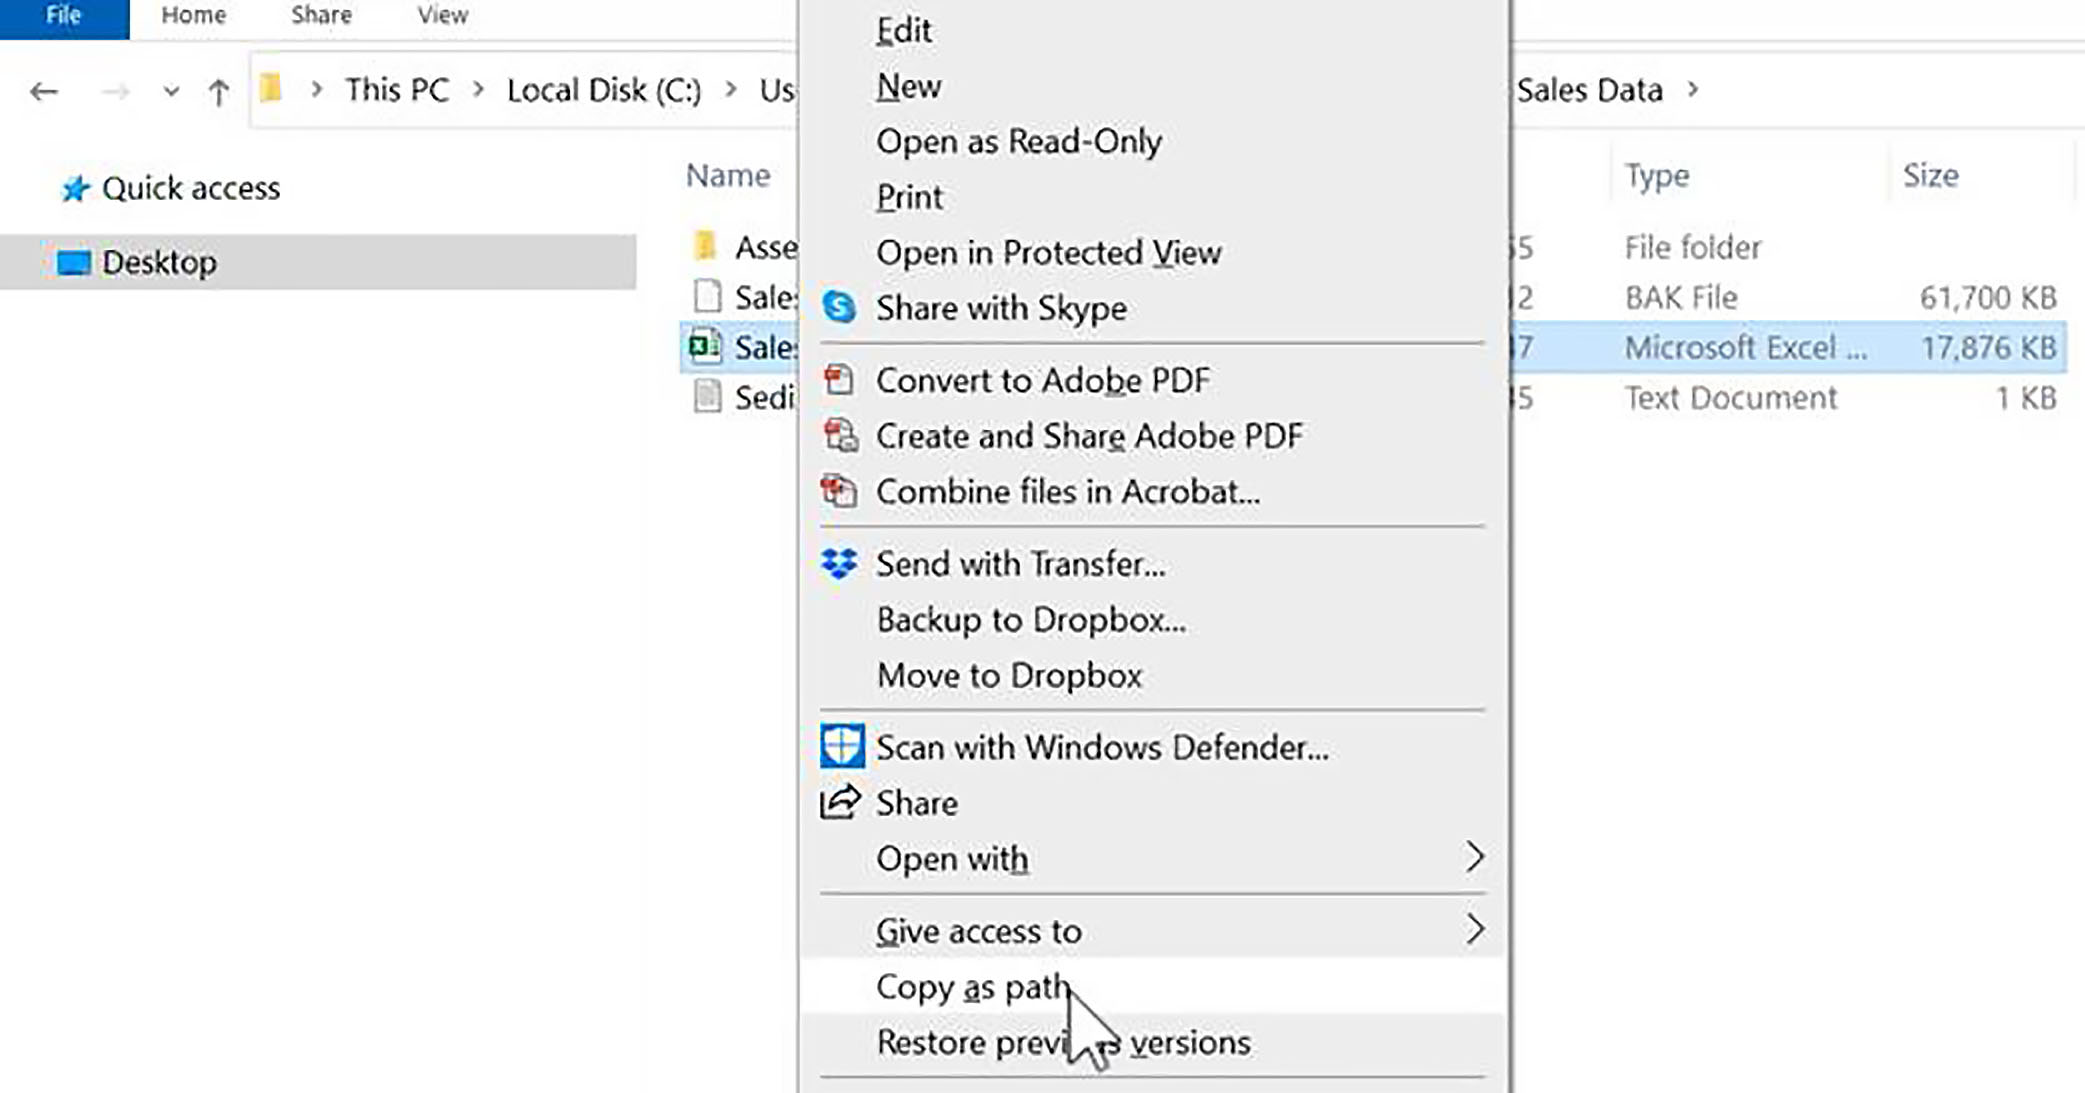
Next, we need to paste in a current value. So, let us grab the path to the workbook on which all these queries are based on the root of our training folder, in a subfolder called "_Data", we have a file called "Sales Data.xlsx".
To copy the path, hold down the Shift key, right-click on "Sales Data.xlsx" and choose Copy as Path.
Then let us go back to Power Query and paste that path into the current value box. Whenever you use copy as path, the system always encloses the path in double quotes. So, let us make sure we get rid of the double quotes at the end and at the start.
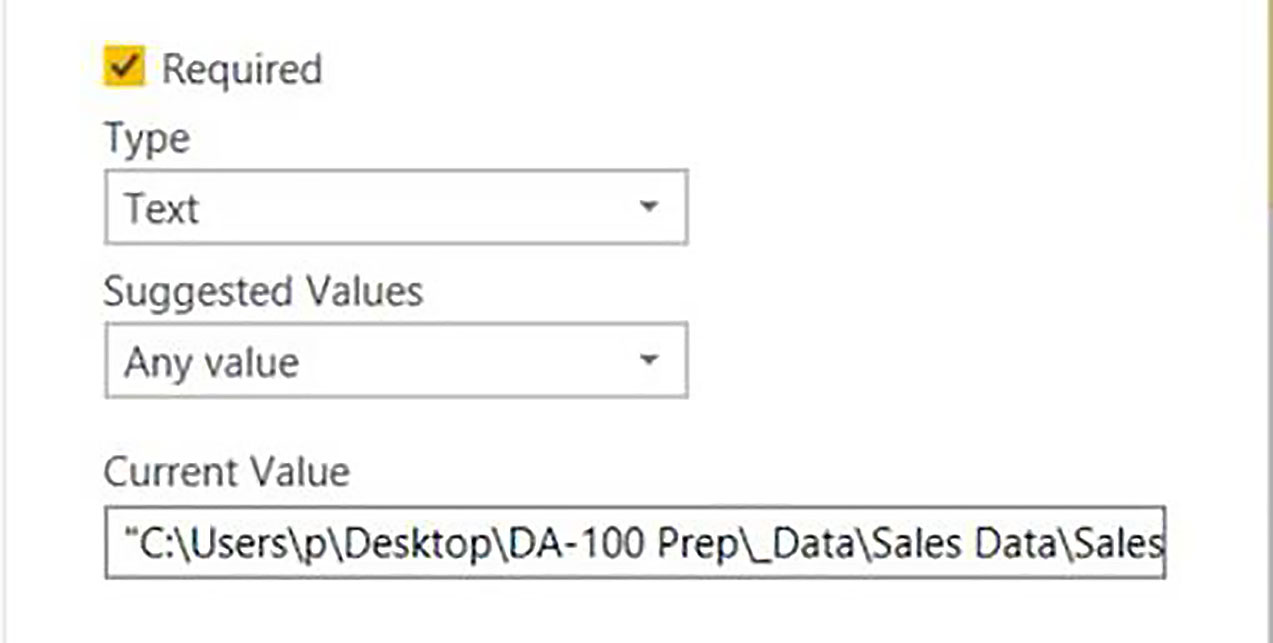
So, now we have a parameter which contains a file path, and this will give us a mechanism for updating the file on which all these queries are dependent.
To implement our parameter, we have two choices: the slow method, which is to click individually on each of the queries and edit the Source step by clicking on the cog icon next to Source.
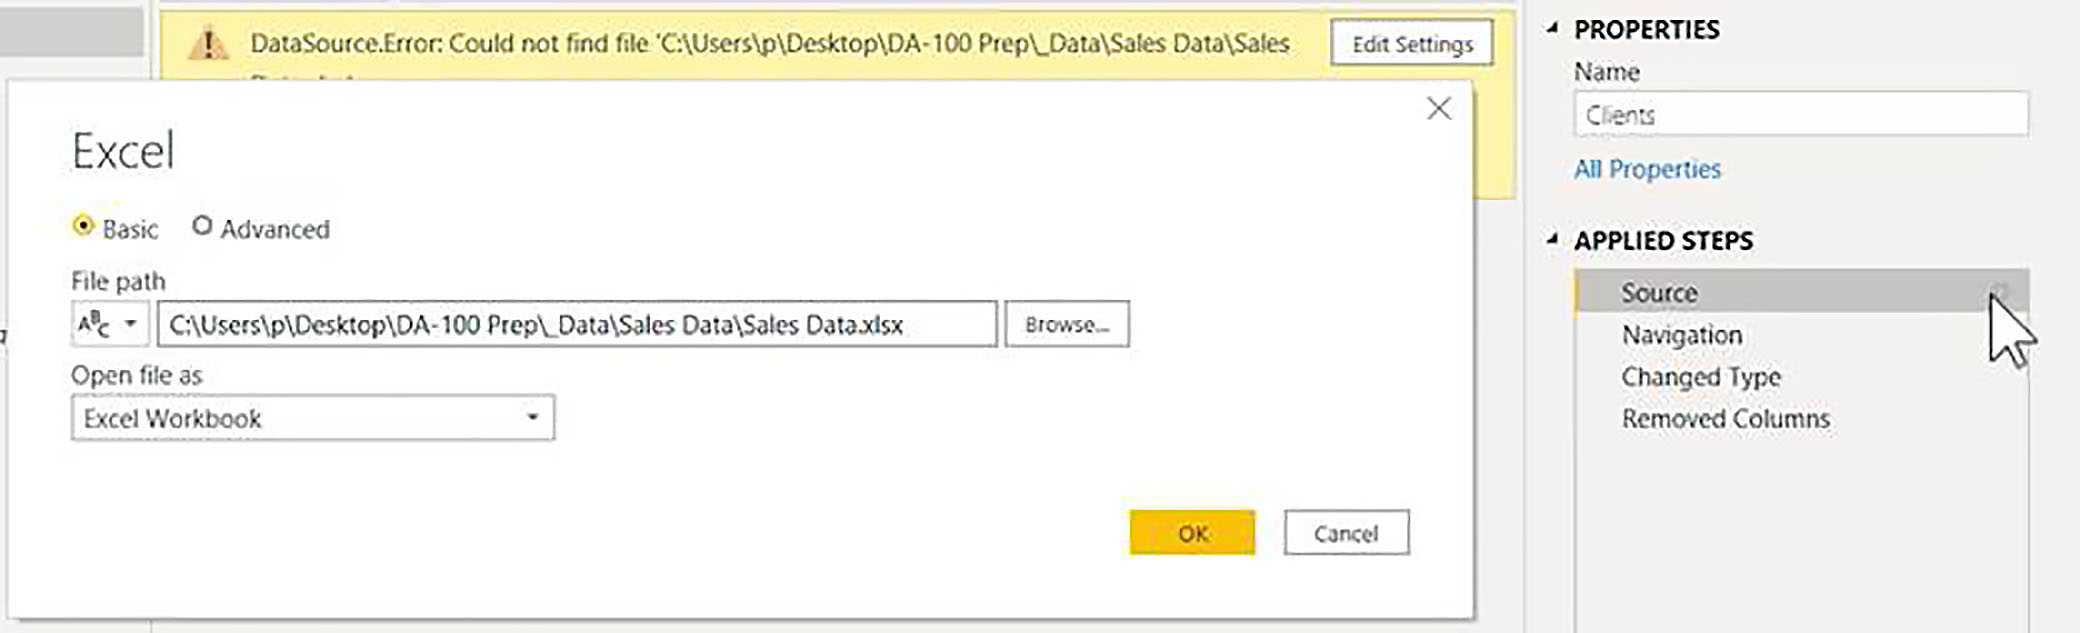
However, we will have to do that for all queries. So, a faster method of making this change is to click on Home > Data Source Settings. And here, we simply need to change our source.
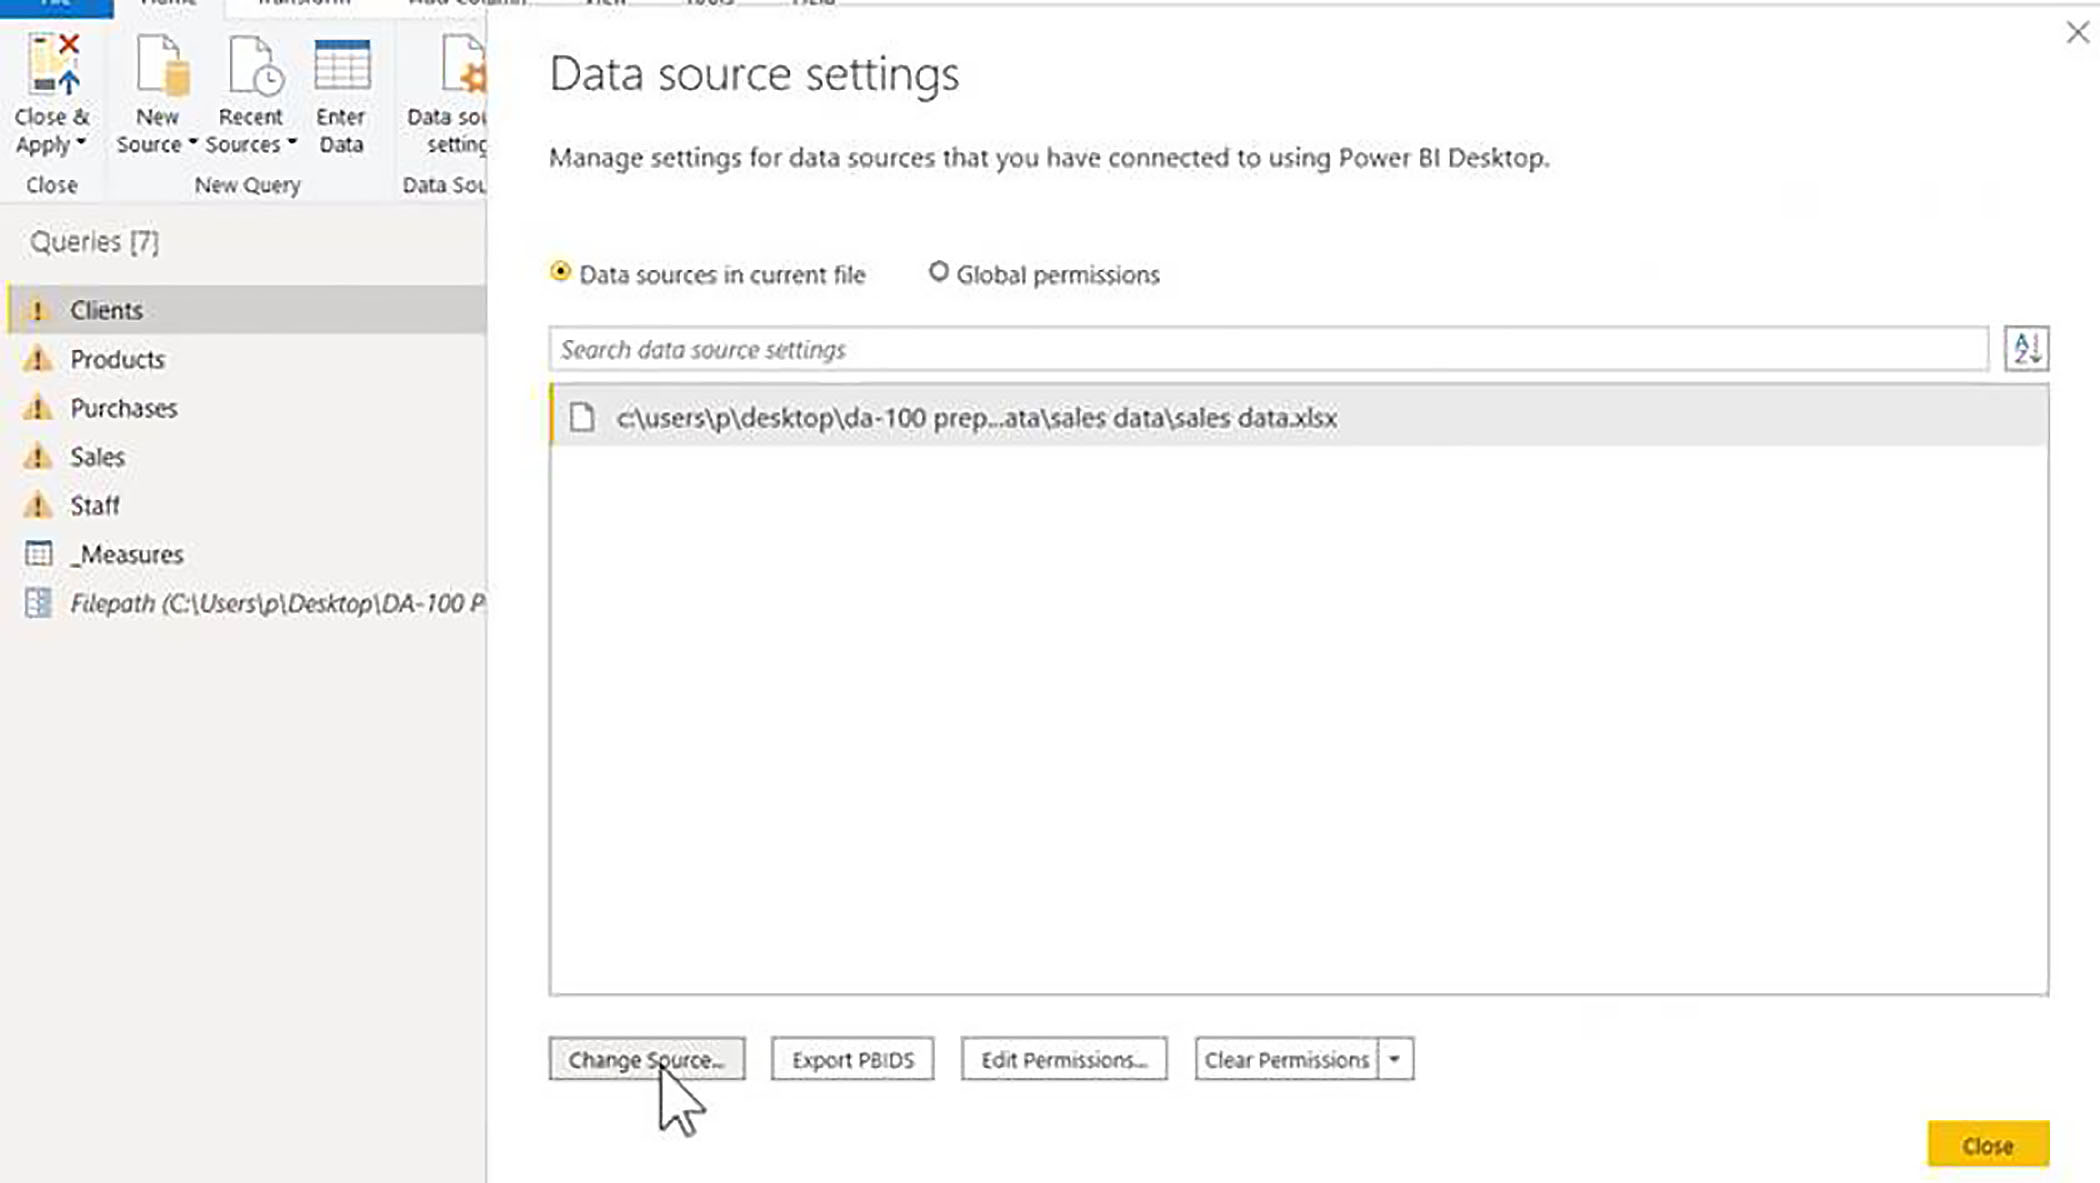
However, we are not simply changing it from one file path to another, we are changing the nature of the source, we want to change it from a string into a parameter, and we do that by clicking on the drop-down on the left of the dialog and choosing Parameter.
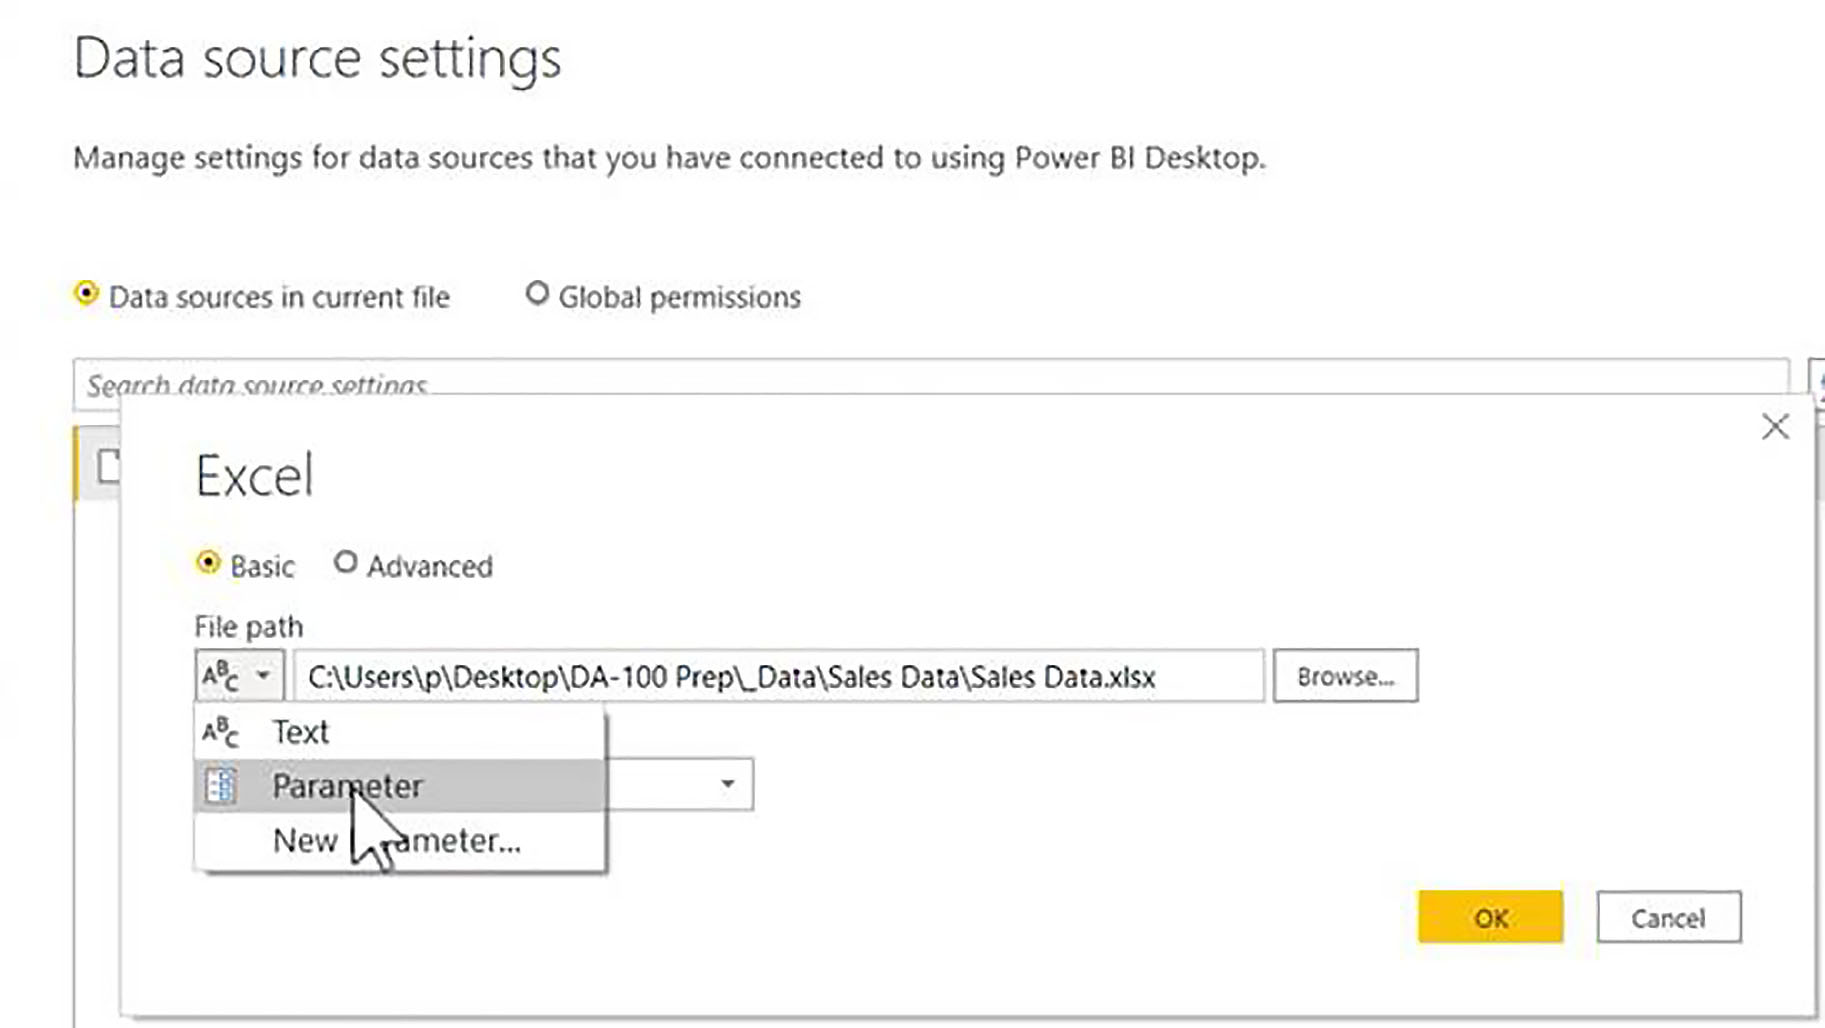
For convenience, we have also the facility of creating a new parameter at this point. So, we will choose parameter, and then of course, at this point in time, we only have one parameter to choose from our File Path parameter.

When we click OK, and Close, all our queries should now be fixed, because they are pointing to the correct data source for the machine that we are using.

Creating a Branch Parameter
So, that is our first parameter implemented. Now let us create a parameter which we can apply to the branch. So, again, Manage Parameters > New Parameter.
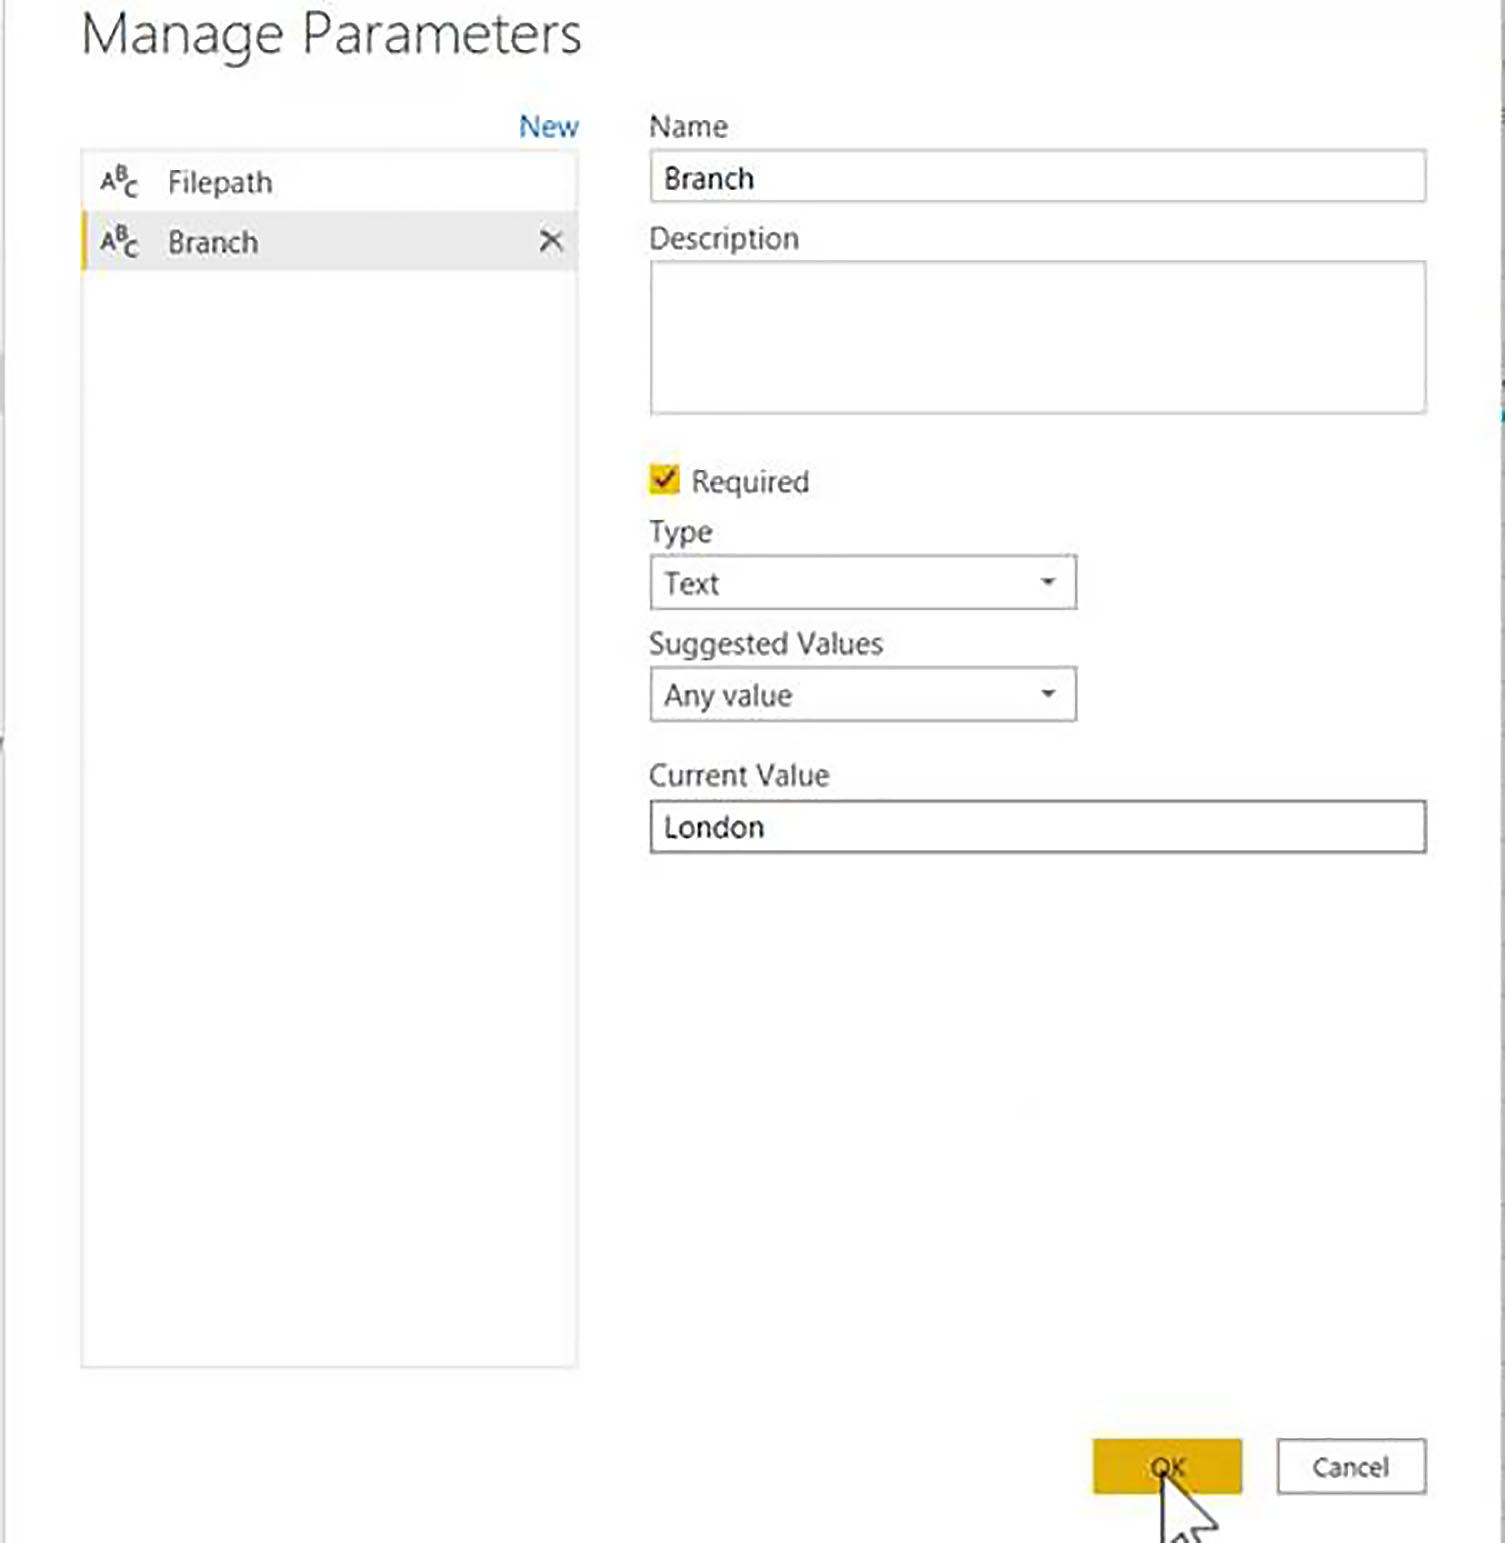
We will call this parameter "Branch". The type will be text, and again, to keep it simple, we will have any value, which means we have to enter the value manually. We will type "London" as our branch.
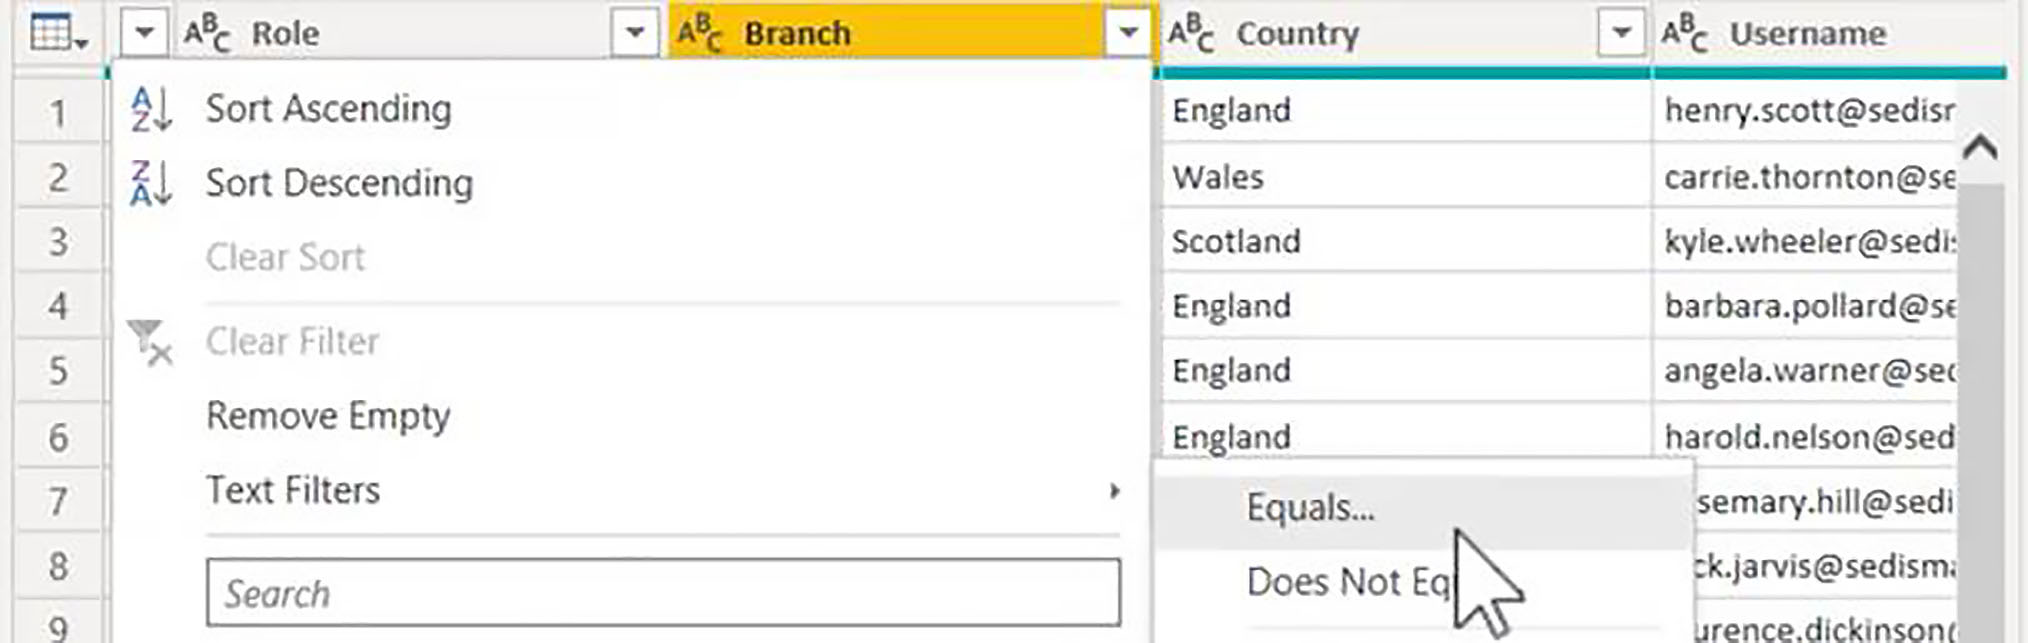
In this solution, the Branch column is stored in the Staff table. To implement our parameter, we will need to apply it as a filter on the Branch column. To do this, we choose Text Filters > Equals.
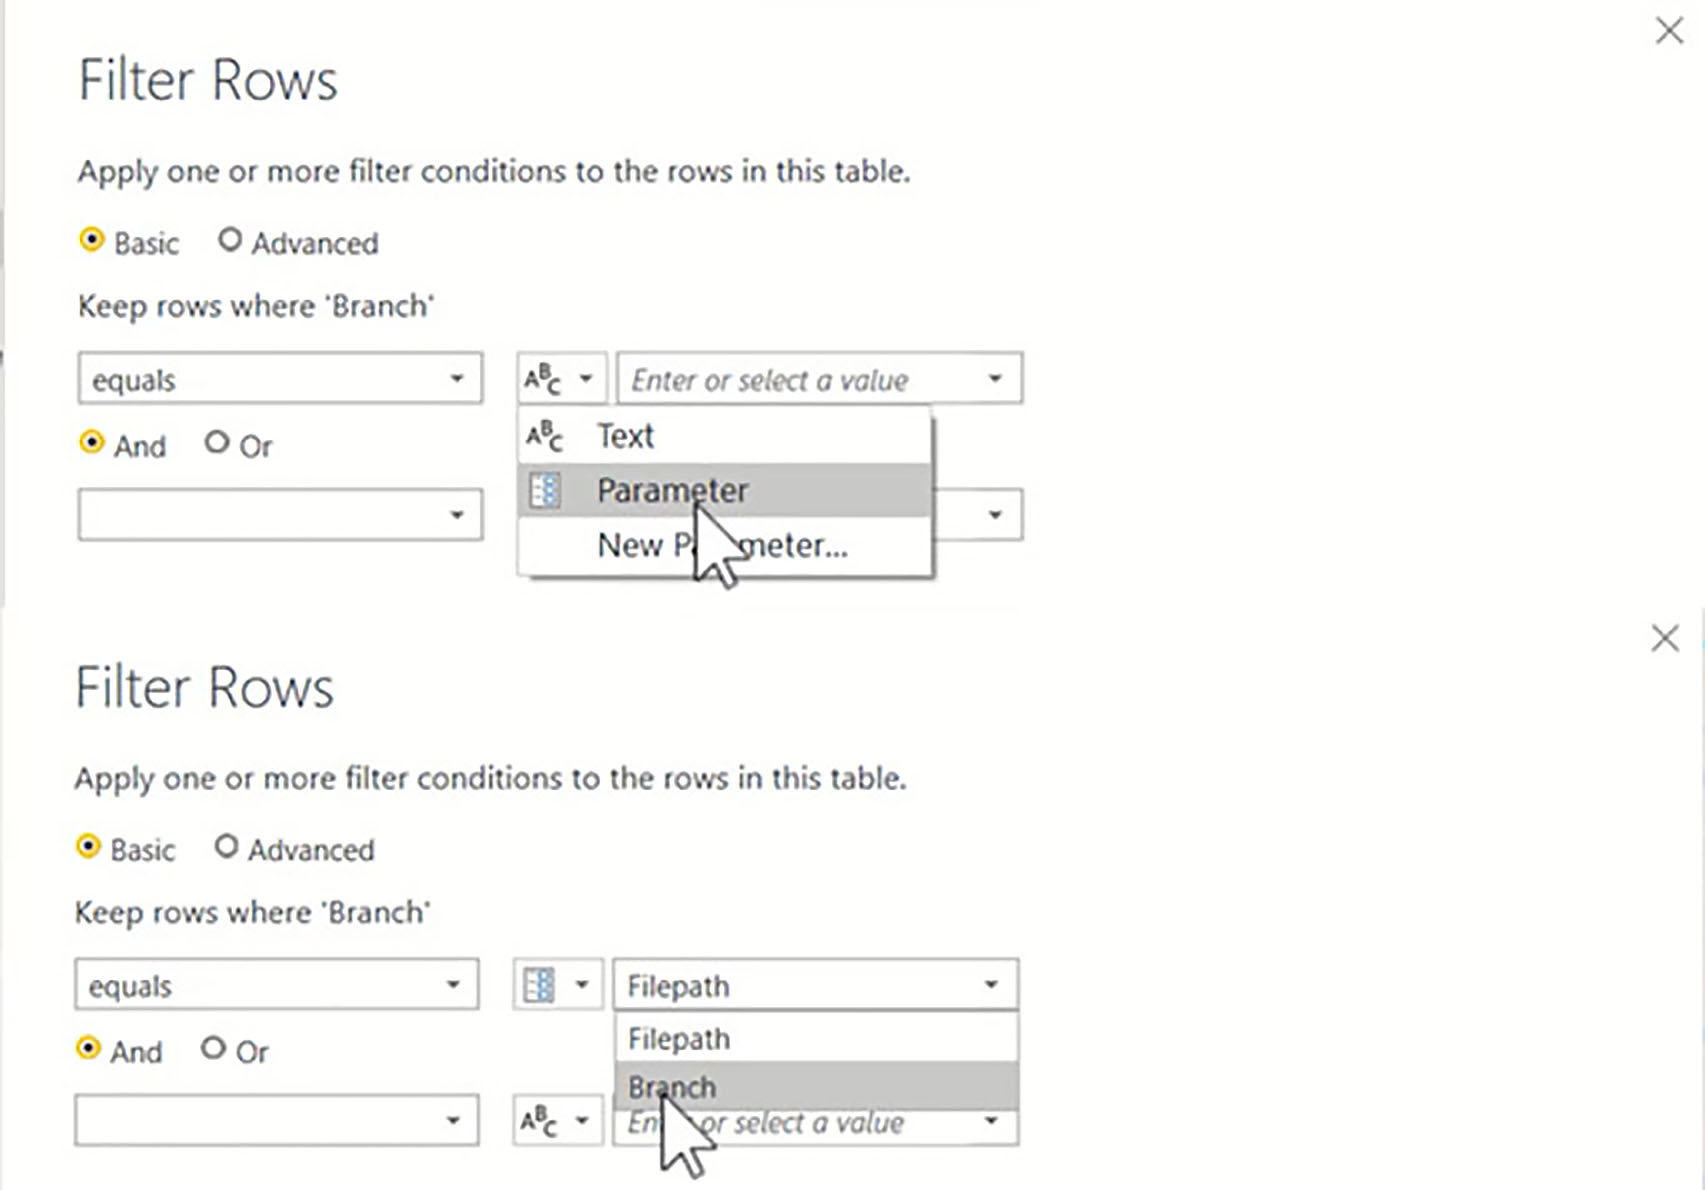
But instead of typing a value, we switch from text to parameter, and then choose our branch parameter.
So, whatever we have in that parameter, will determine the filter that is applied to the branch column. Since we typed "London", only those salespeople in London will be loaded into this solution.

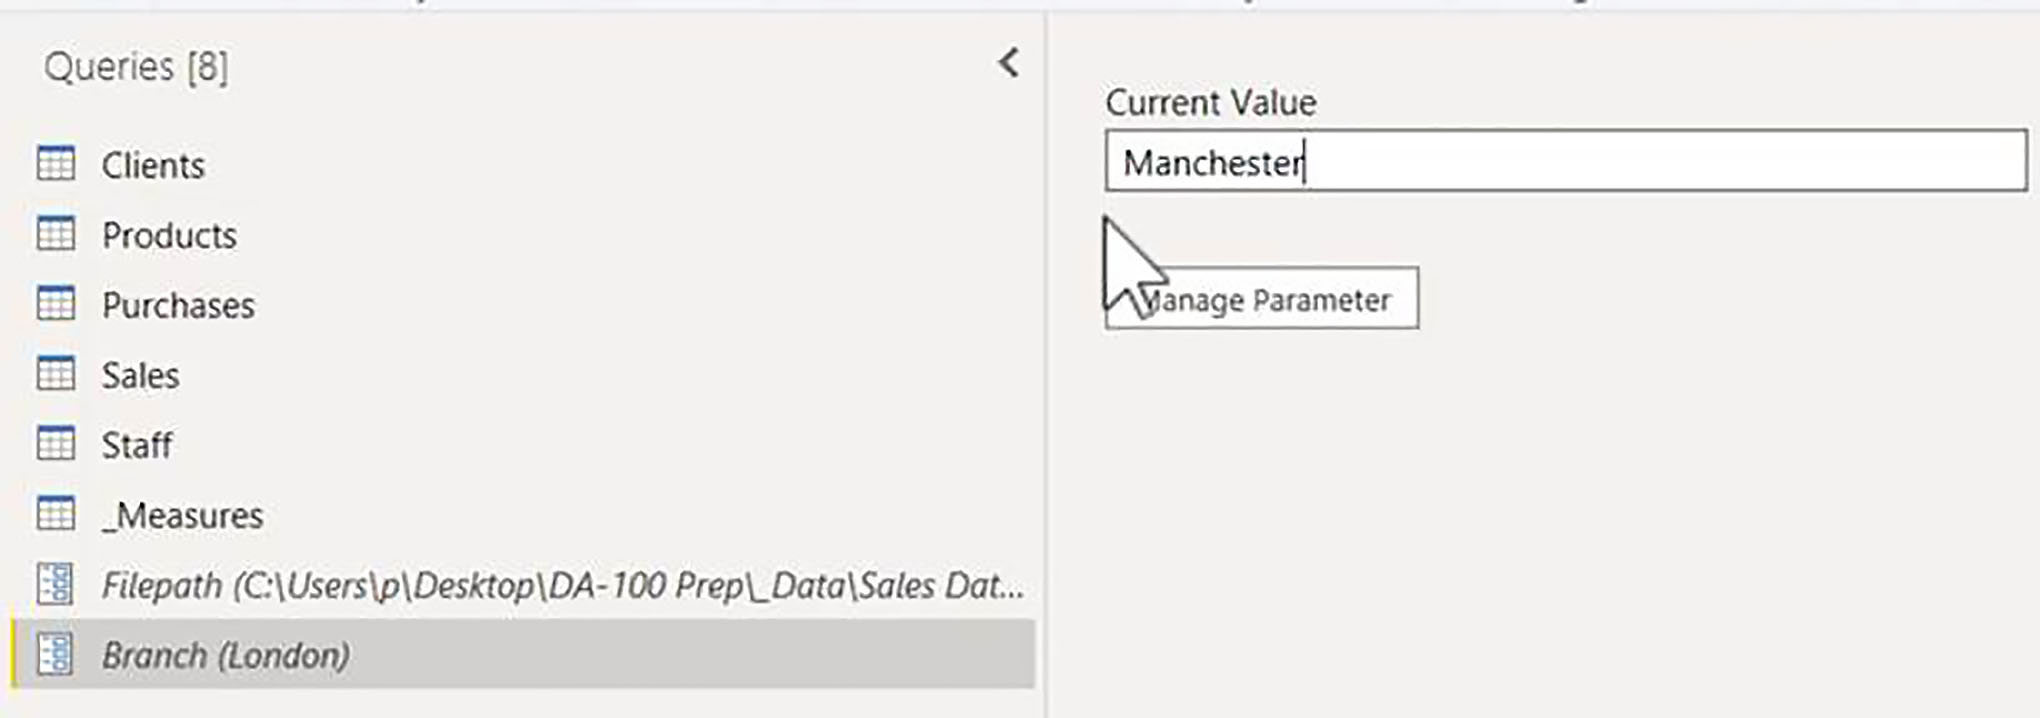
Let us go back into the Branch parameter and change the current value to "Manchester".
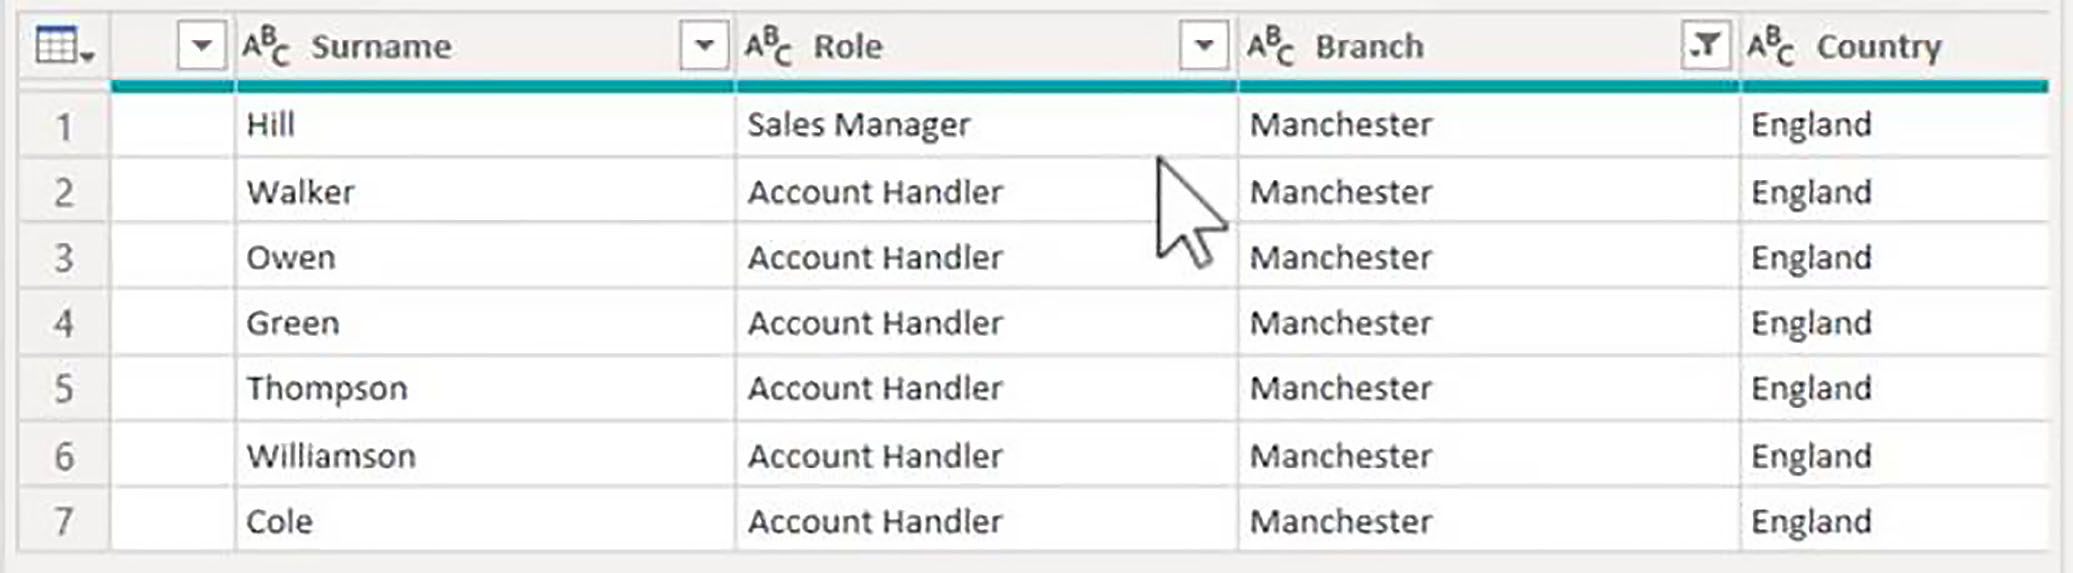
When we go back to our staff table, only those people at the Manchester branch will be loaded.
Using Merge Queries to Filter the Main Table
Now, of course, the staff table is one of our dimension tables. The main table, the one that we are analysing is the sales table. So, any filter we apply to staff will also have to be applied to sales. Because obviously, at this point in time, every single row in the sales table is being loaded. So, we will need to make sure that whatever we have done to the staff table has an impact on which sales rows are loaded.
We can do this by using the Merge Queries command. The first table will be Sales and the second table will be Staff. The common column between the two is, of course, staff ID; and, for the Join Kind, we want Inner (only Matching Rows), since we only want to retain those rows in the Sales table, which are also found in our Staff table.
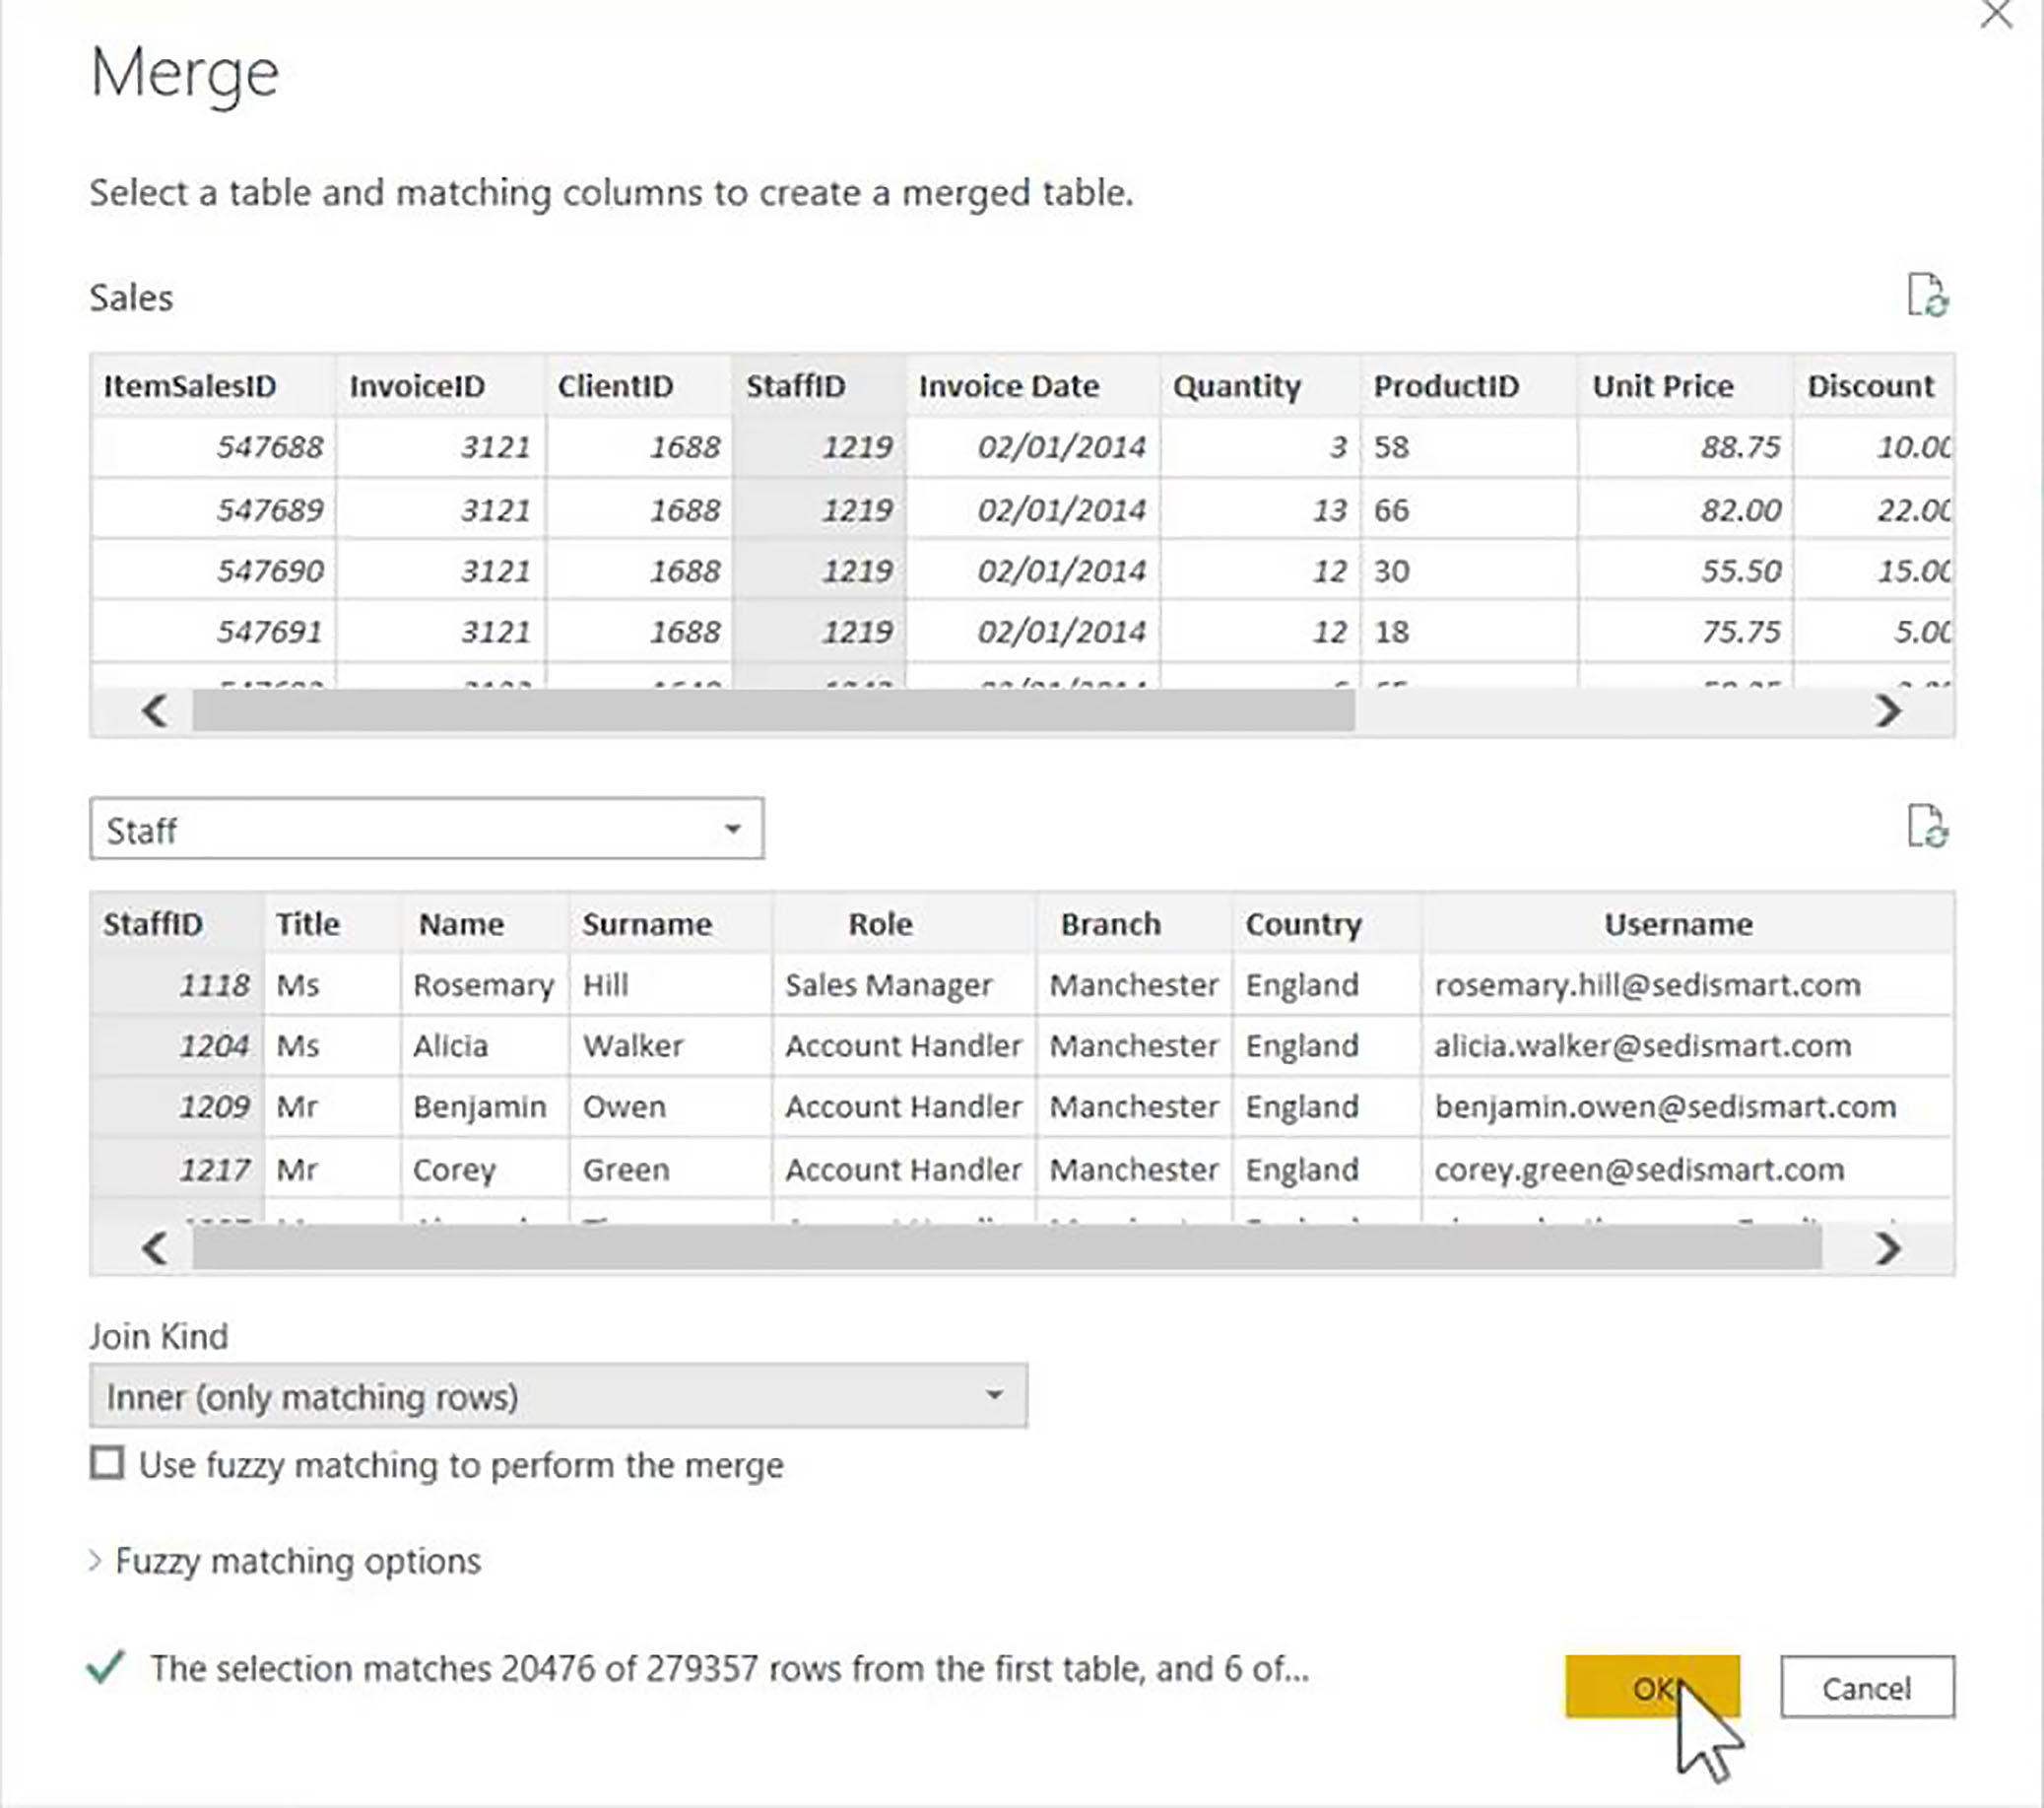
When we click OK, Power BI now knows that it needs to suppress all rows in the sales table, which are not also found in our staff table.
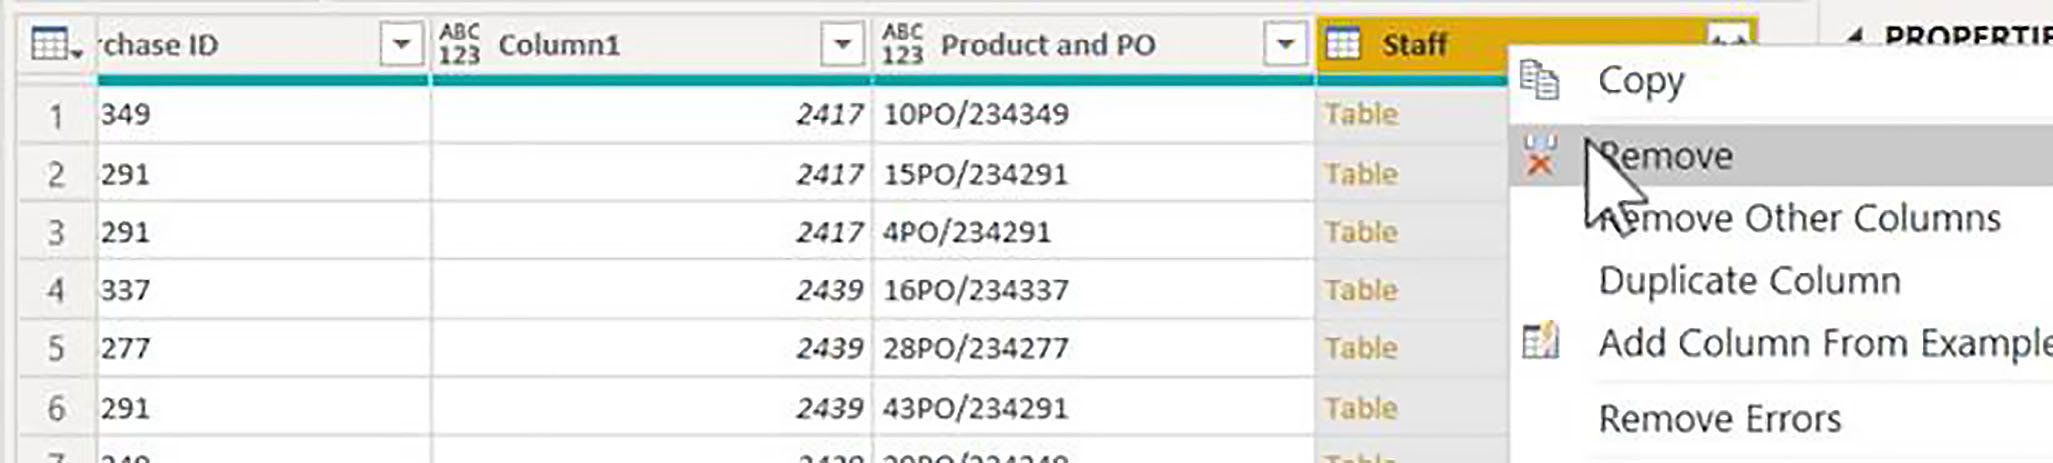
When we use the merge queries command, Power BI creates a column representing the table that you are merging with, and if you want to you can expand this column, and then pull in columns from the other table. However, on this occasion, that is not what we need. What we need has been achieved. We have suppressed the rows, which have no corresponding staff ID in the Staff table. So, we can simply remove this extra column.
When we click Close & Apply, since our current Branch parameter value is "Manchester", our dynamic title reads "Manchester Branch".

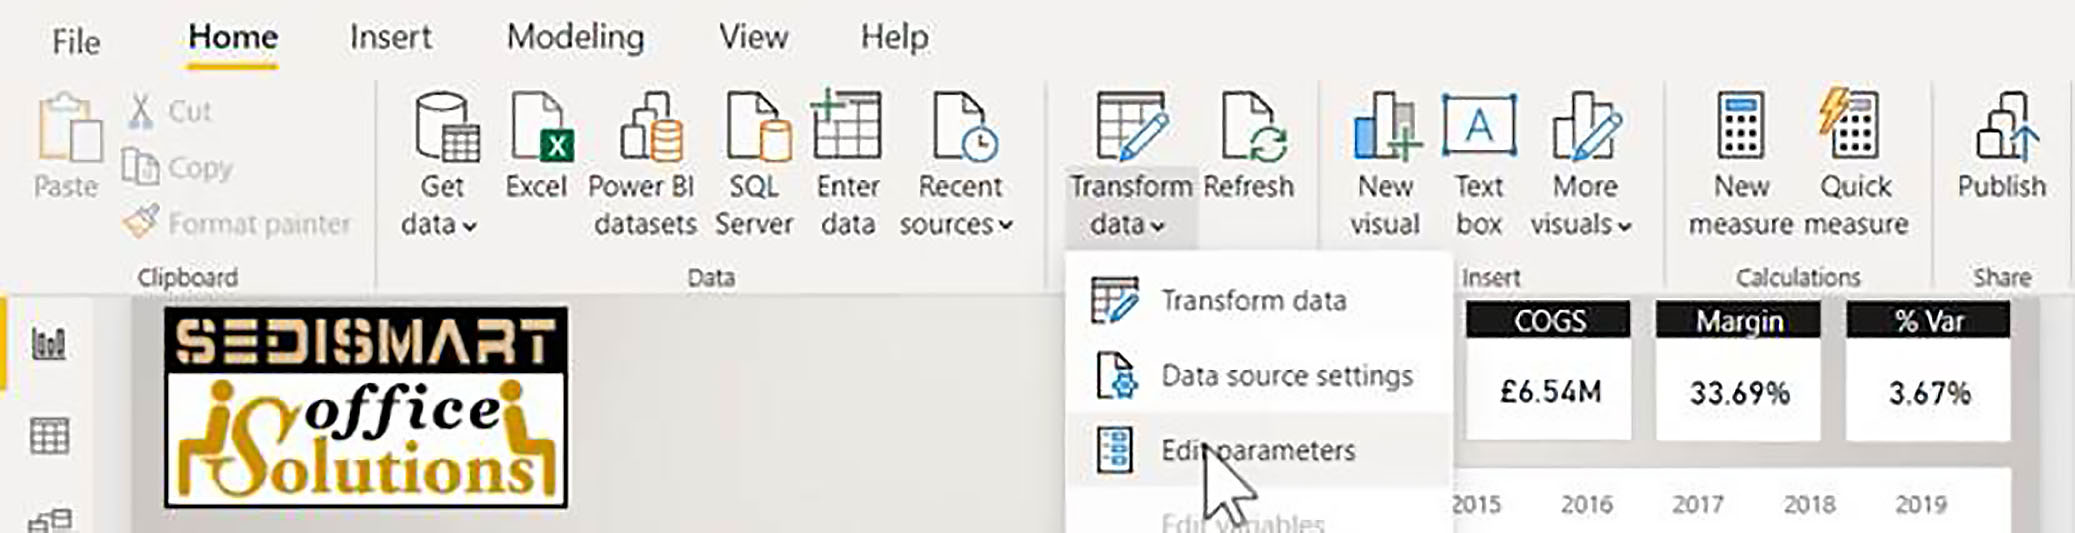
Edit Parameters
In the Home tab of the Ribbon, we can also choose Transform data > Edit parameters.
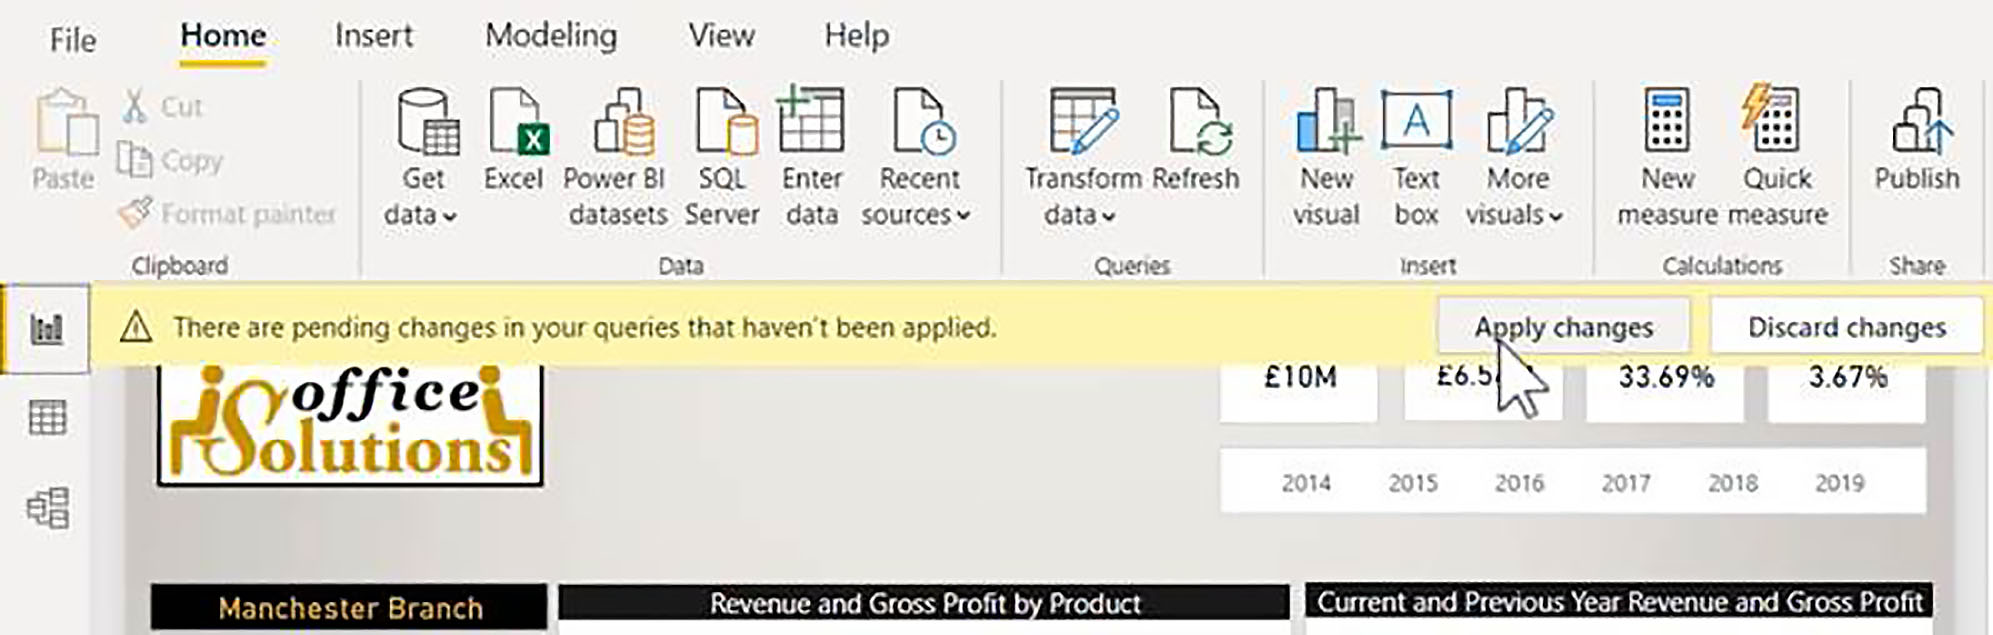
We can see that both of our parameters are available. Let us change our Branch parameter value to "Liverpool".

When we click OK, we then need to click Apply Changes since we have not had the chance to click on Close & Apply, as we normally do; and Power BI then updates the Staff and Sales tables.
Creating a Template
Now we can also export a template from this file. To do that, we go to File > Export > Power BI Template.
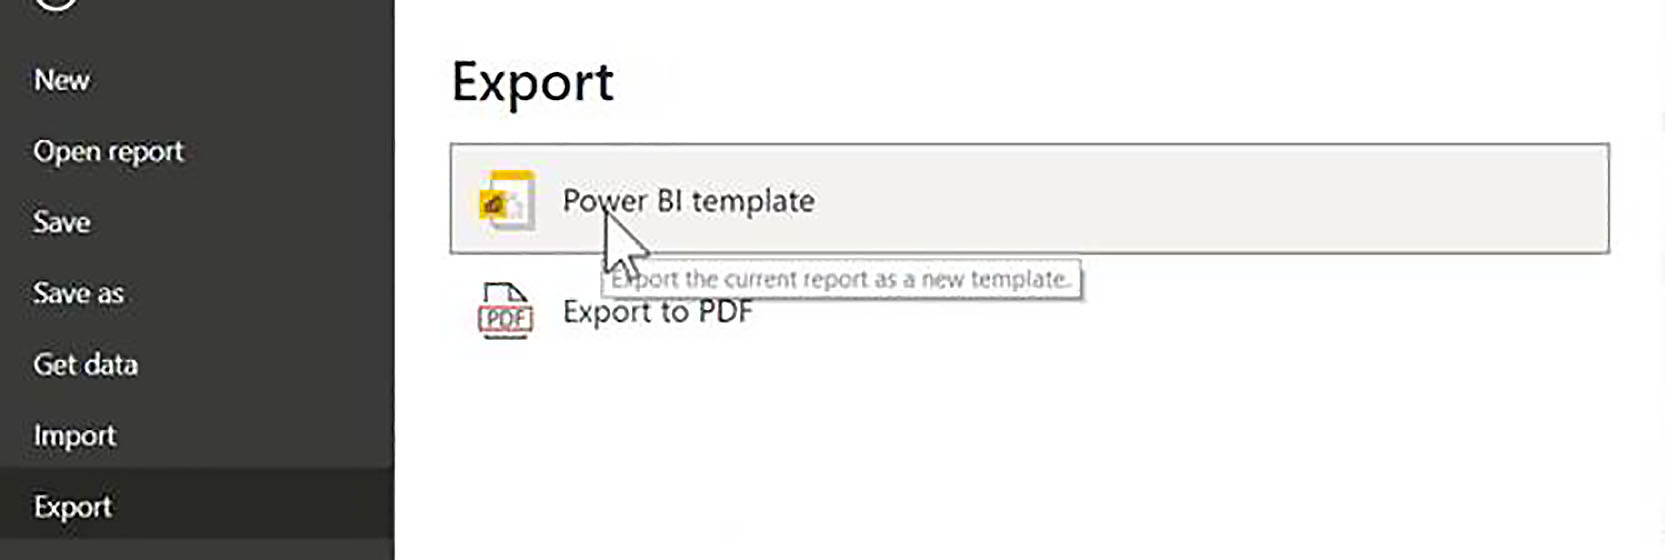
For Description, let us enter "Sales report based on a single branch". When we save the file, it will have a different extension: ".pbit" as opposed to ".pbix".

Using a Template
Now let us use our template. To do so, we simply double-click the PBIT file to open it. As usually happens when you open a template, the original template does not open. Instead, we obtain a copy of the template, which we can then go on to save as an ordinary PBIX file.
So, let us set our branch to "Glasgow", and then paste in the file path. Then, we simply click on Load.
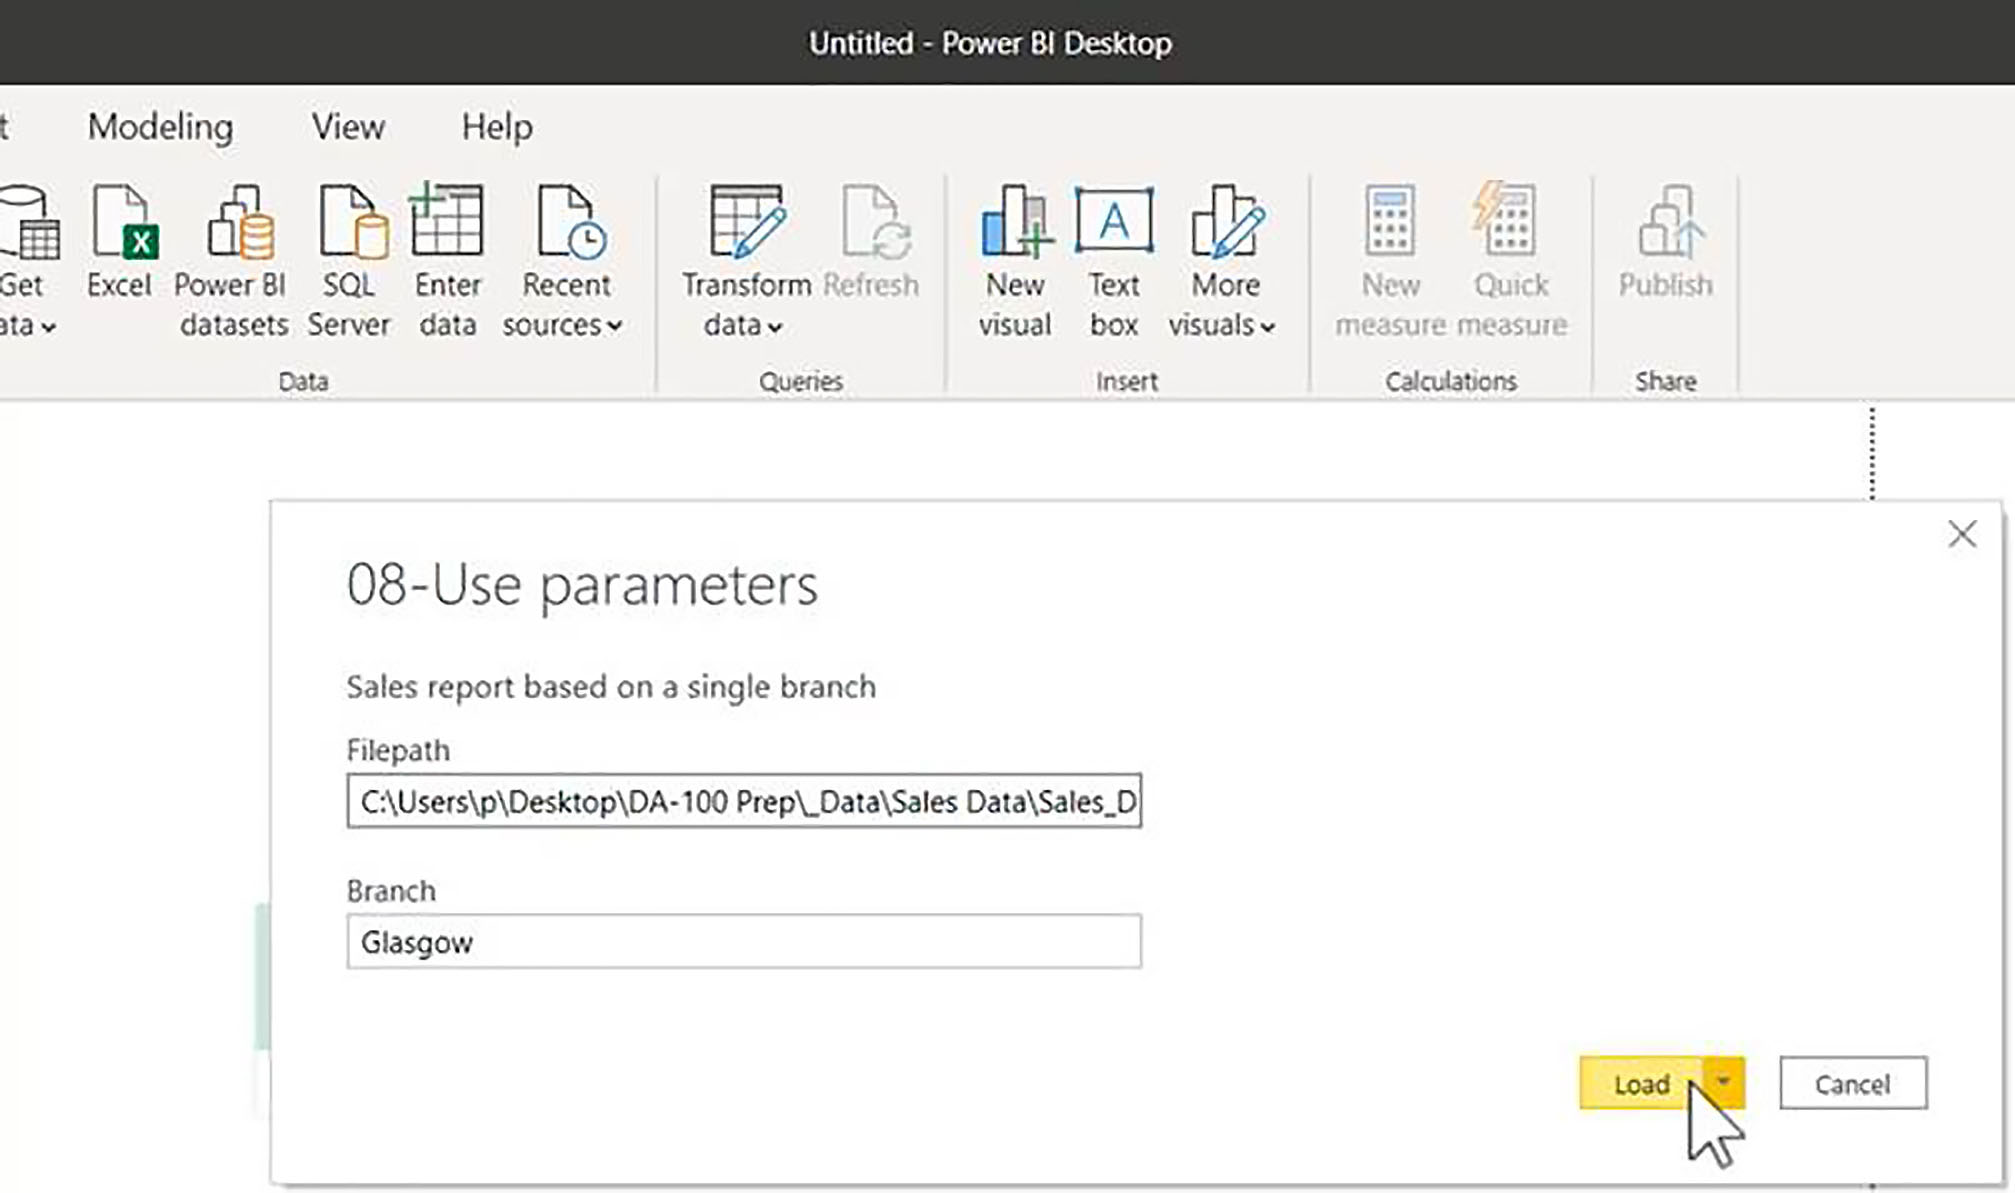
So, we now have a report for a Glasgow branch, and we can just keep reusing this one template to create a report focusing on any branch.

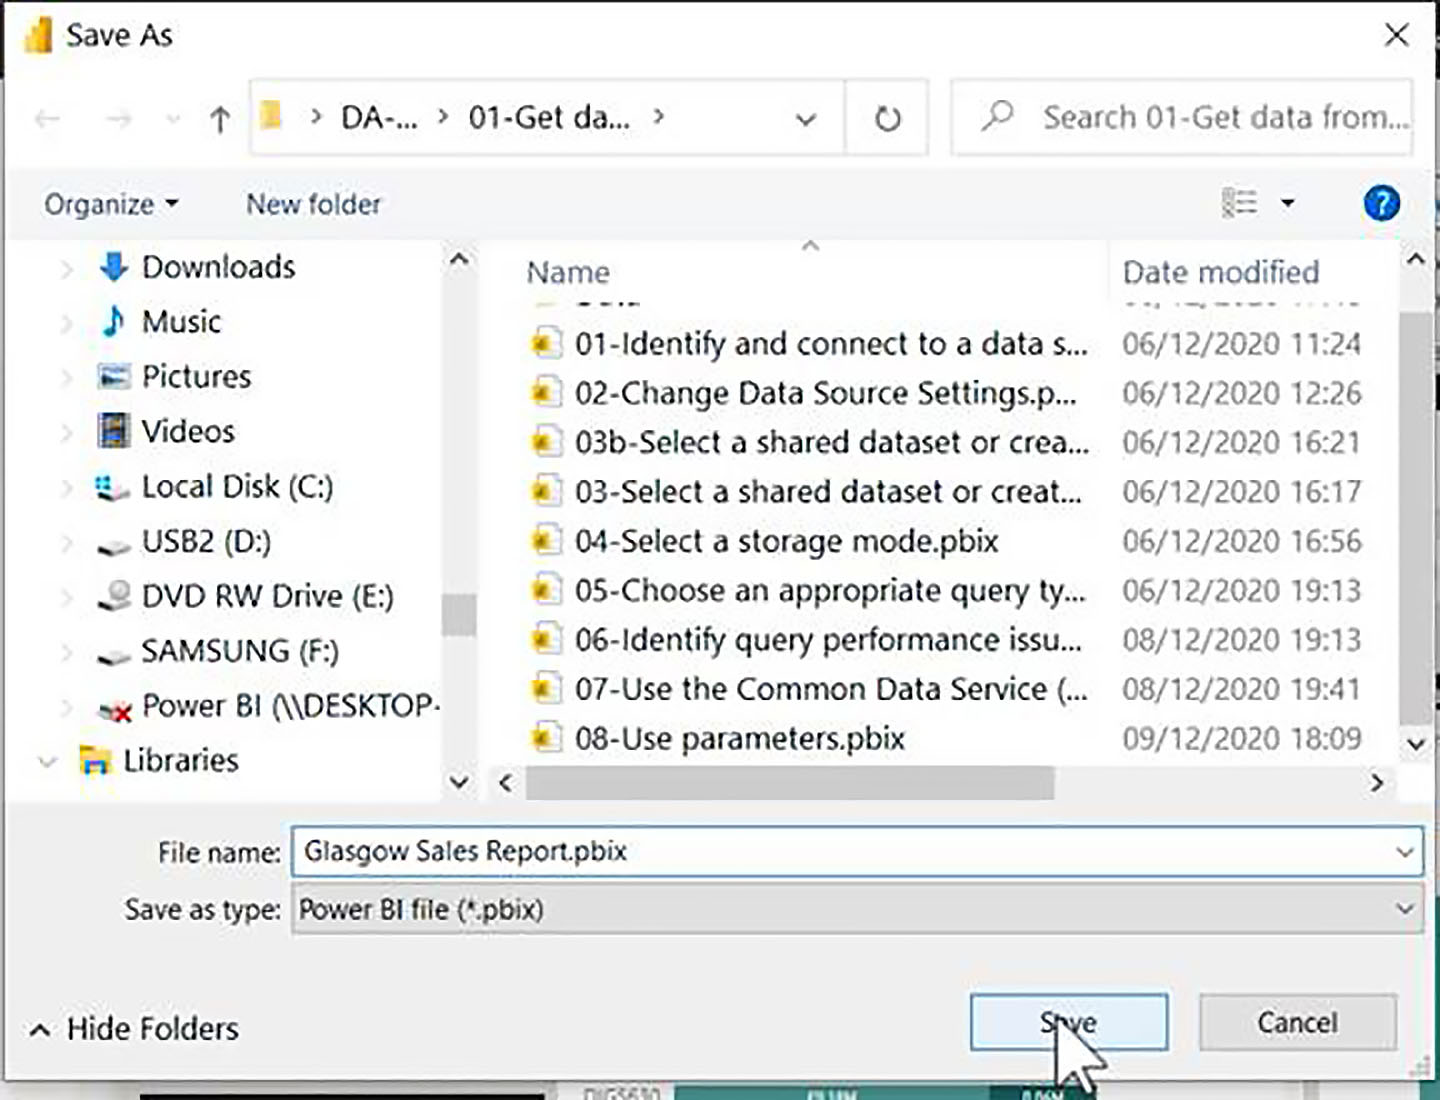
So, let us now save this file and call it "Glasgow Sales Report"; and it is now an ordinary PPIX file.
Editing Parameters in the Power BI Service
Finally, let us publish the file into the Power BI service and look at how you can change the value of the parameter when you are in the Power BI service.
To do this, click on the ellipsis next to the name of the data set underlying the report and choose Settings.

If (like this one) the dataset contains on-premises data sources, we will need to set up a gateway connection. However, the important thing for this topic is changing parameter values. If a dataset has parameters, you can simply go into Settings and then change the parameter values.
So, from the Power BI service, we can go in here and type a different branch name and if necessary a different file path and then click Apply.
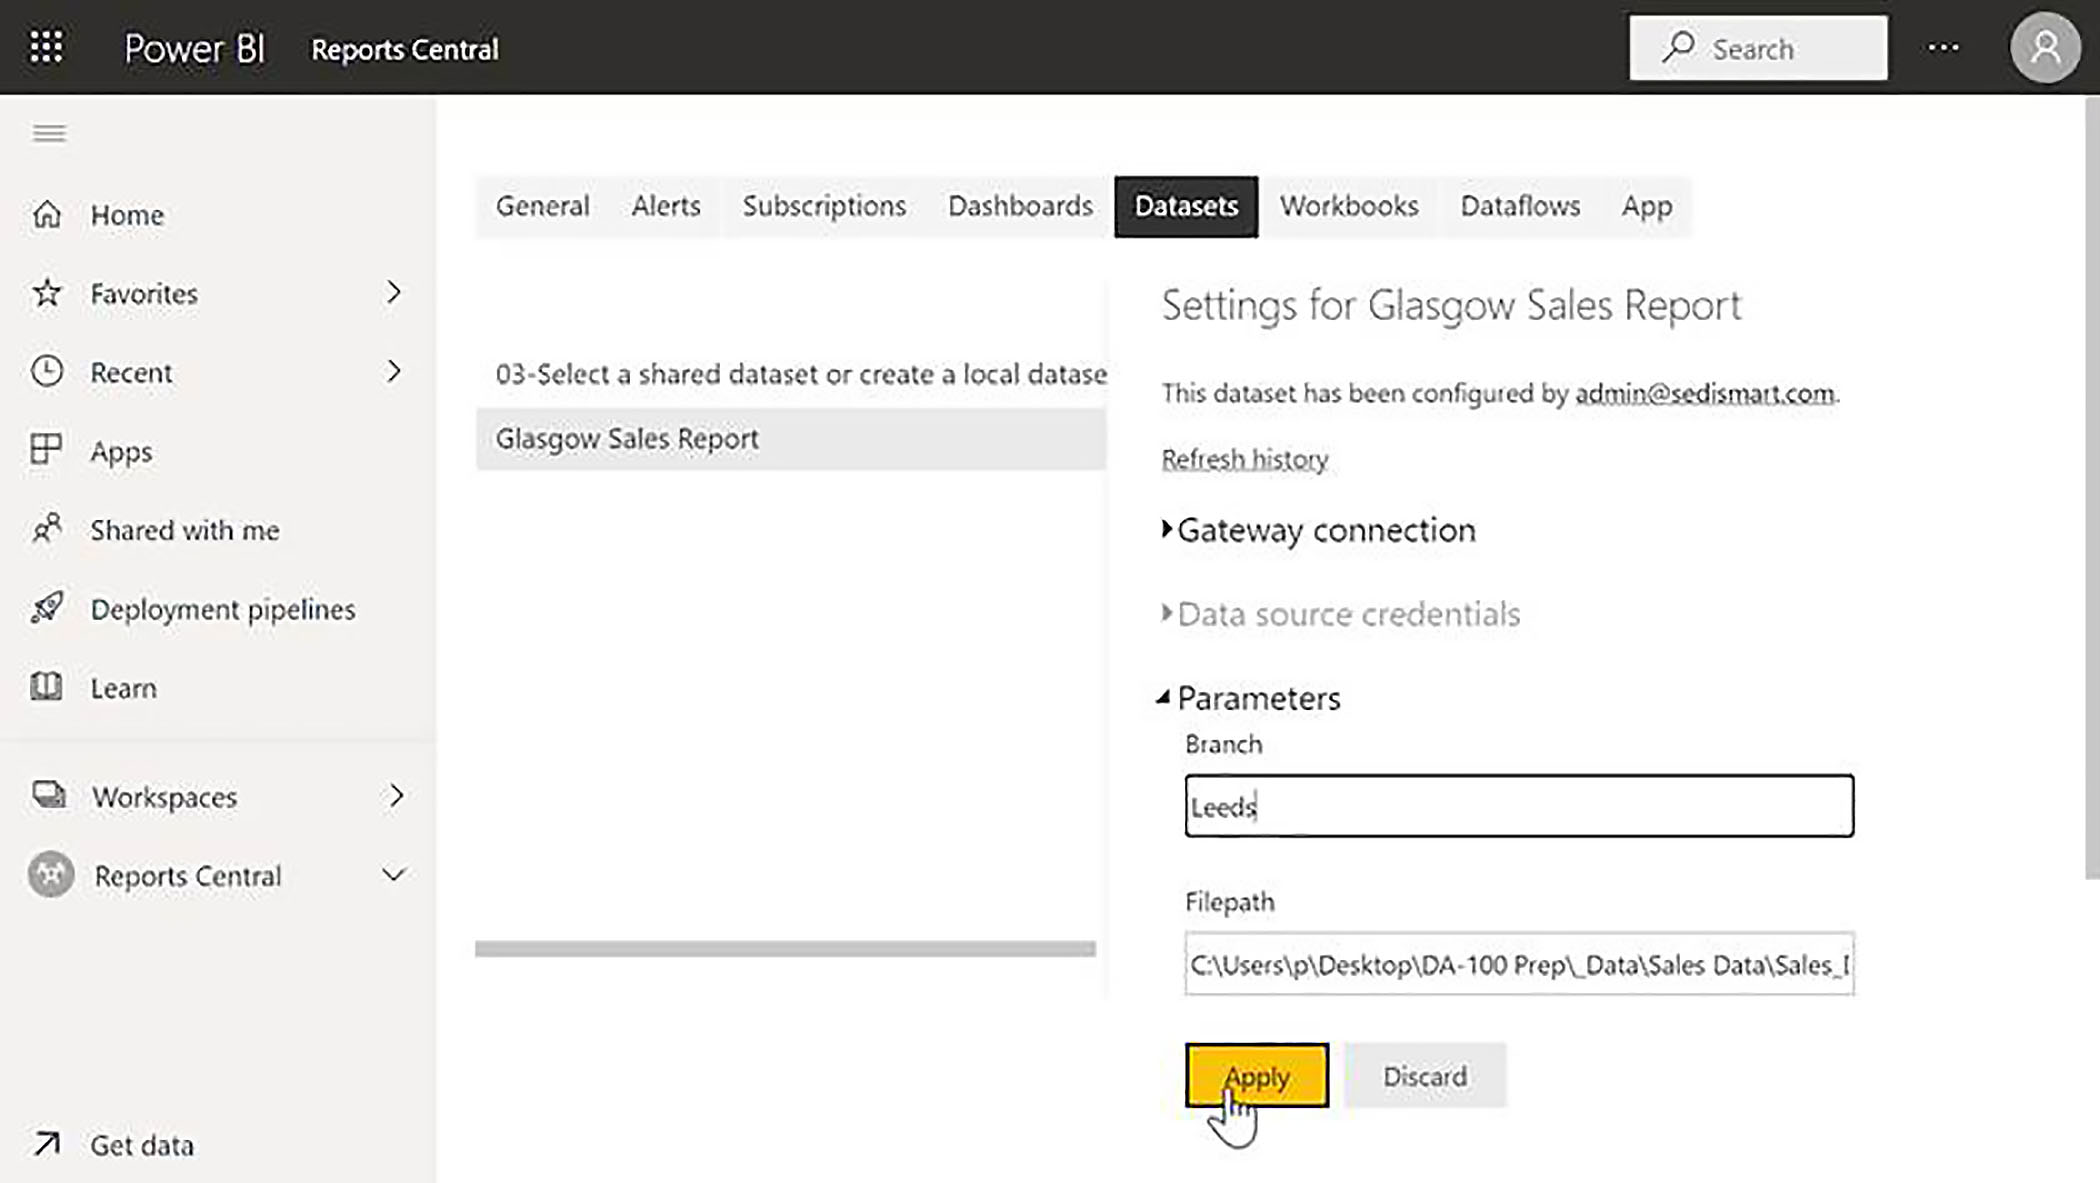
And then, of course, we would need to have an on-premises data gateway in order to be able to pull in the information for that particular branch.
So that should be everything you need to know about templates for the exam DA-100.