- You are here:
- Home »
- Blog »
- Power BI »
- Power BI DA-100 Exam Tips
Create and Manage Workspaces
Use Deployment Pipelines

Power BI DA-100 Exam Tips
Create and Manage Workspaces
Use Deployment Pipelines
In this series of blog posts, we will be examining some of the key features of Power BI Desktop, Power Query and the Power BI Service needed to pass exam DA-100: Analyzing Data with Microsoft Power BI.
In this Power BI training post, we will examine DA-100 exam – Create and Manage Workspaces: Use Deployment Pipelines.
Use Deployment Pipelines
The basic process of creating and making content available within the Power BI service is to create reports in Power BI Desktop, to publish related content into a workspace app, and then to publish the workspace app, and grant access to everyone who has an interest in that type of content.
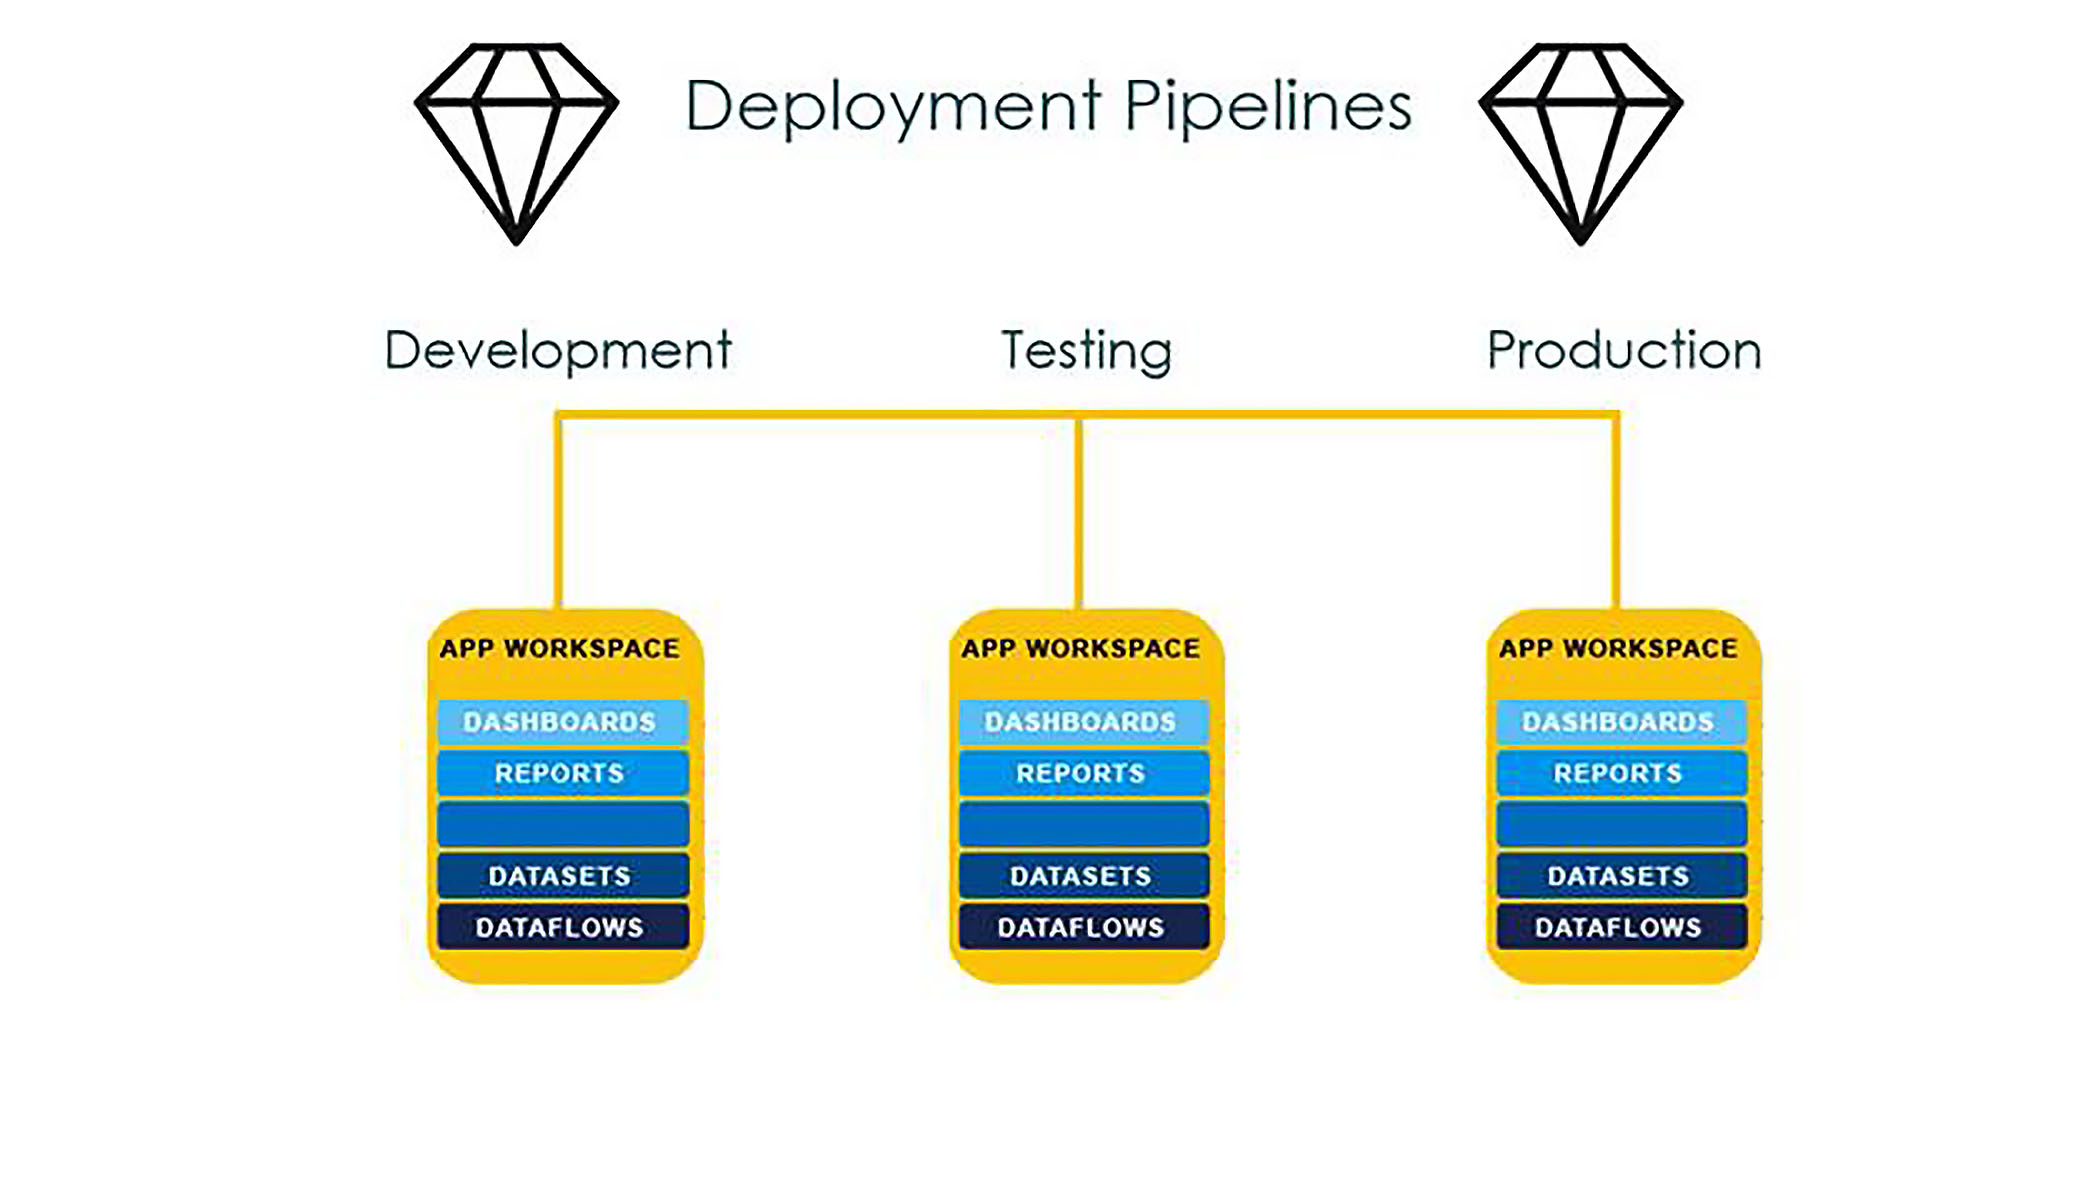
The use of deployment pipelines allows you to go beyond that basic cycle and take a more multi-tiered approach. The deployment pipeline consists of three tiers or three phases, development, testing, and production, and each phase is associated with a separate workspace.
Requirements for Implementing Deployment Pipelines
In theory, all the functionality supplied by deployment pipelines, could be implemented manually. However, using the deployment pipeline feature does streamline the process and leave it less open to inconsistencies and errors.
Bear in mind that in order to use this feature, you will need a Power BI Pro licence, you will need to be the admin of a workspace, and that workspace will have to be assigned to a dedicated capacity. This can be done using Power BI Premium, Power BI Premium per User, or Power BI Embedded.
Creating a Premium Workspace
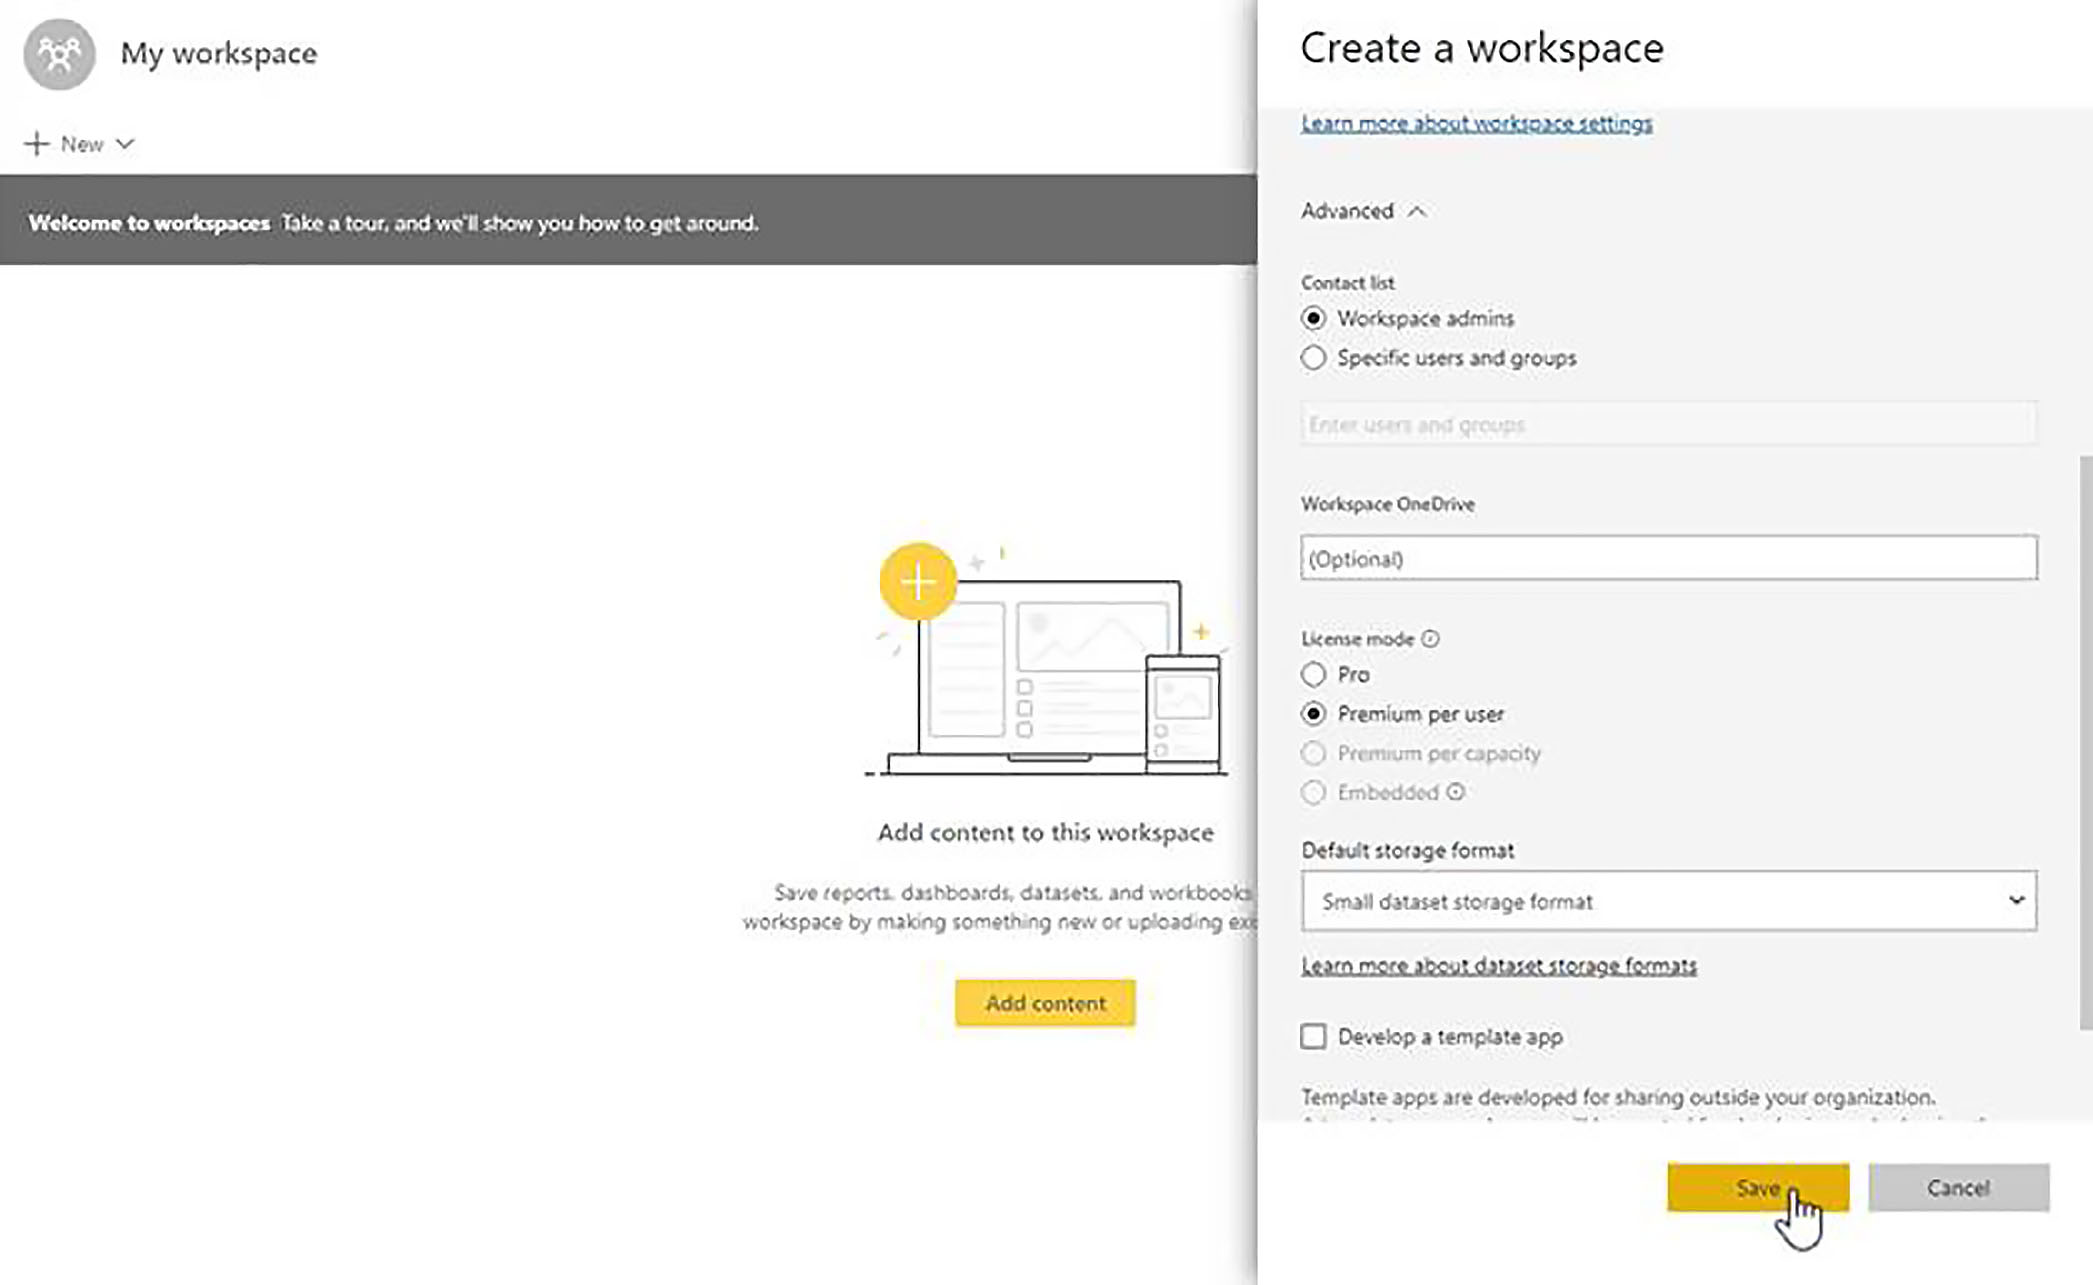
The first thing we need to do is, in the Power BI service, create a workspace that we will use to start the process. We click on Workspaces > Create a Workspace, and this will be the first part of our cycle; this will be the development stage, and the workspace we are going to create will have sales content. So, let us call it "Sales Dev". Then we expand the Advanced section, and here we can assign the workspace to a Premium per User capacity, then click on Save.
Creating a Parameter for use in the Deployment Pipeline
The next step is to upload some content into that premium workspace. However, before we do that, let us prepare our content so that it can take advantage of one of the very useful features available with deployment pipelines, the use of parameters.
We click on Transform Data, and what we can now do is to create a series of parameters, which will enable us to quickly switch from one version of our data source to another. In this example, we will just create a single parameter which will parameterize the database to which we are connecting in order to retrieve the most important data. However, in reality, you can create a whole series of parameters to twe ak exactly where your data is coming from, as it goes through the different stages in the pipeline.
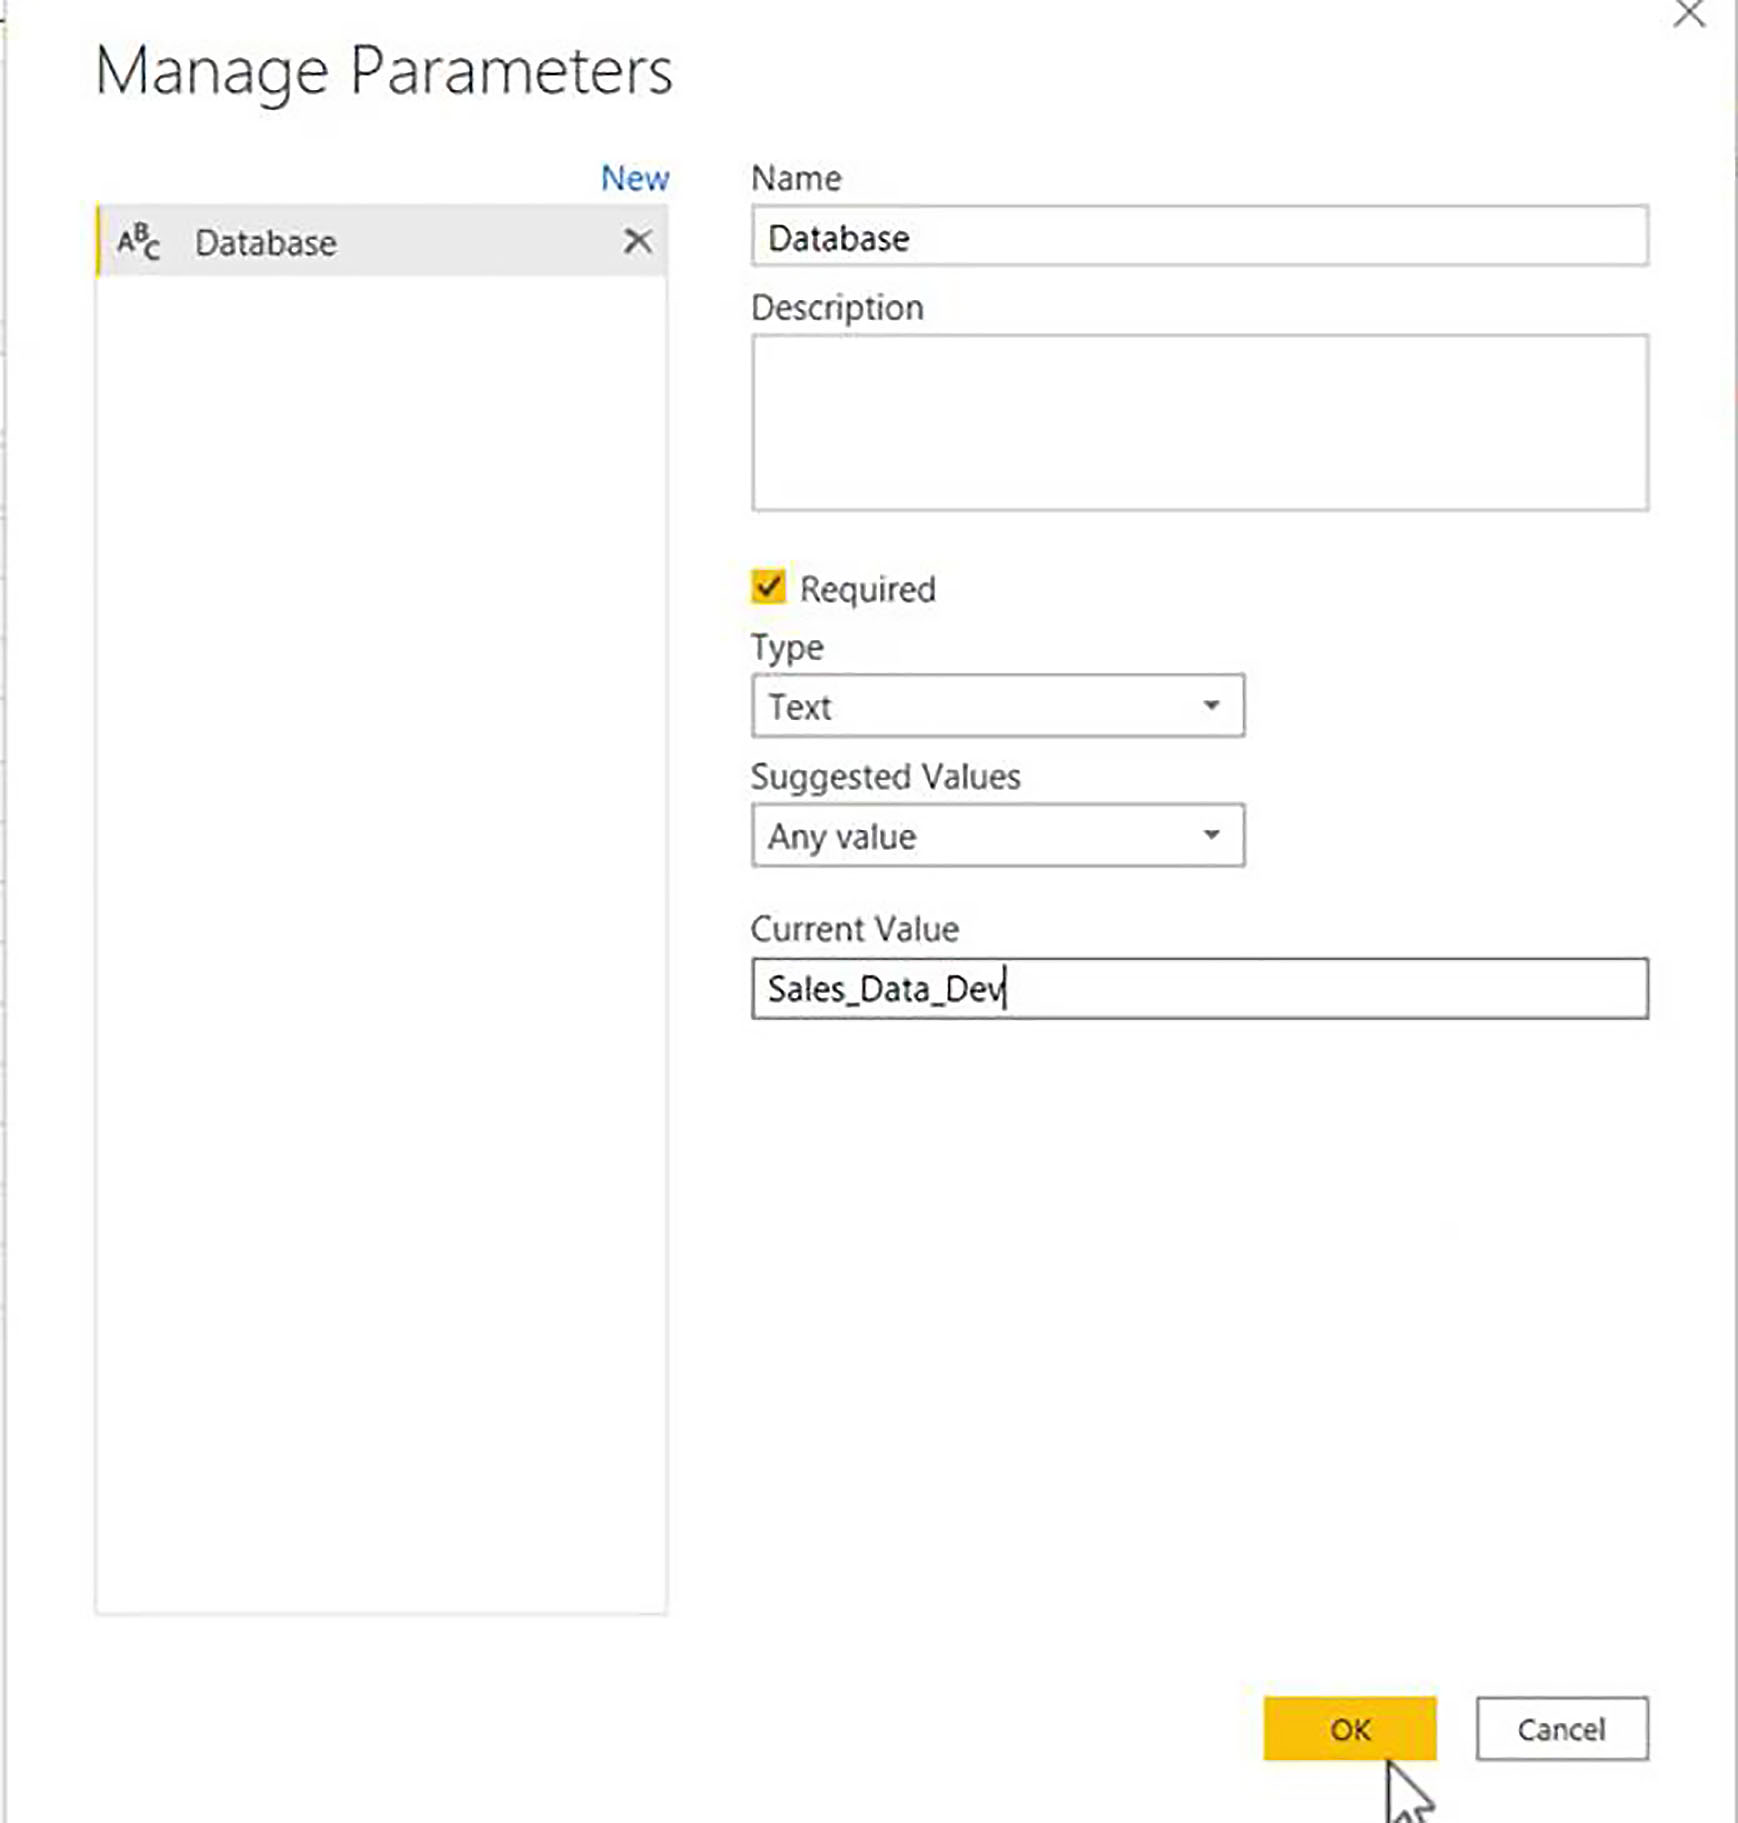
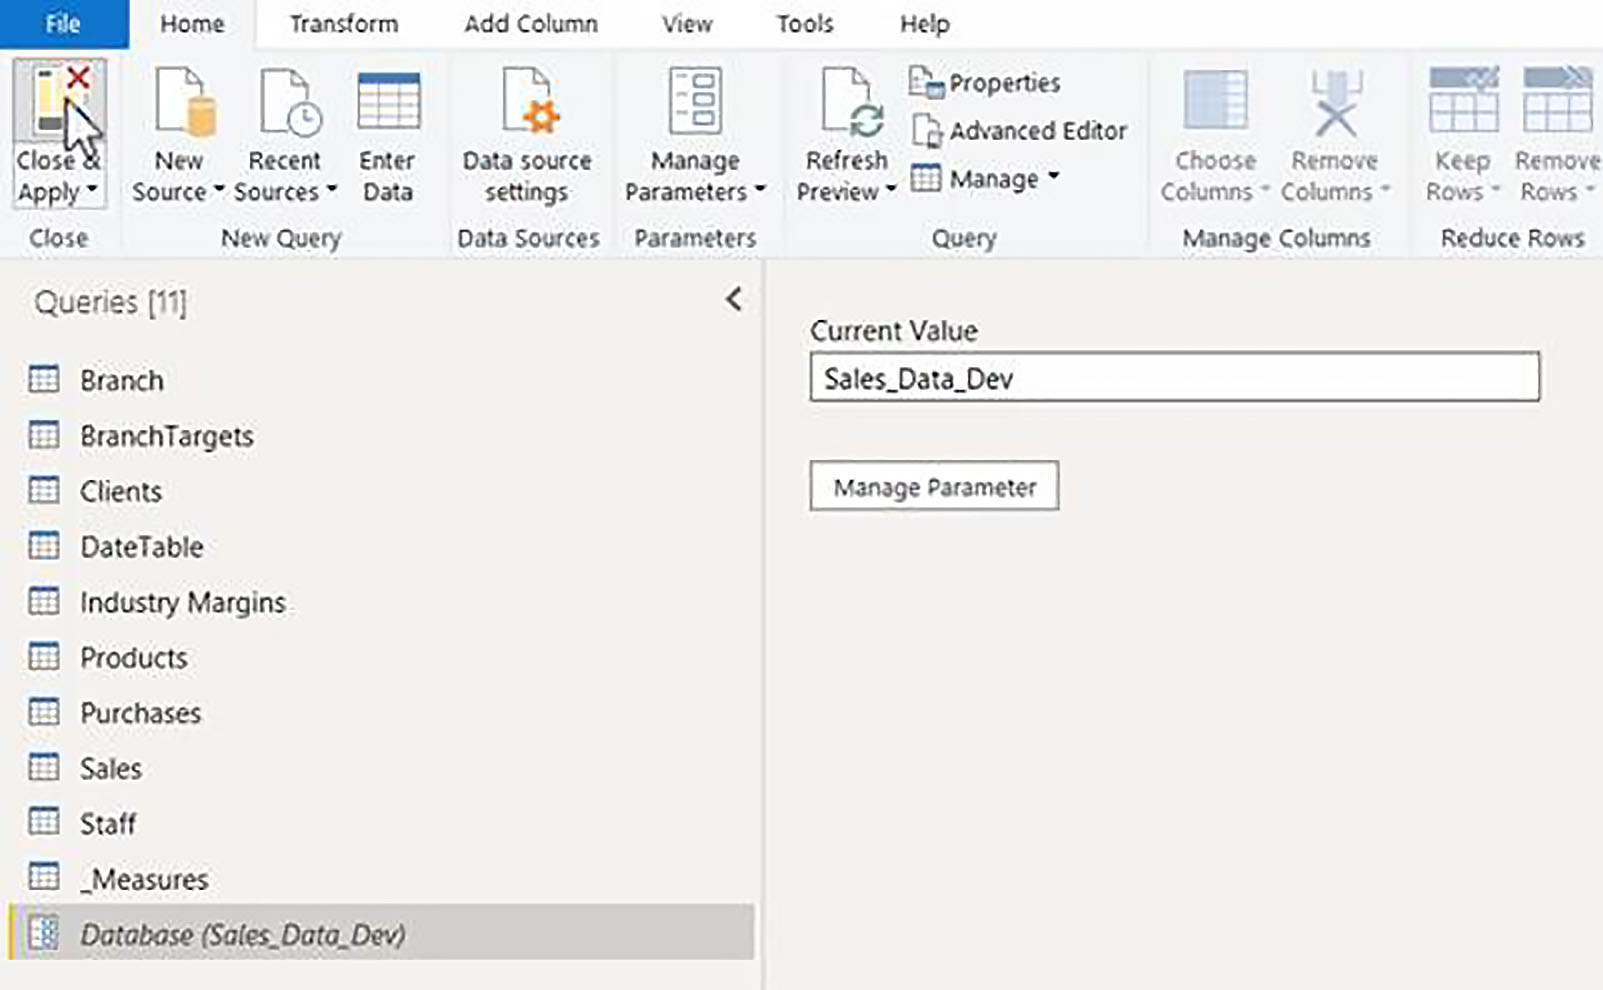
To create a parameter, we click on Manage parameters > New Parameter, and we will call our parameter Database.
Then, very importantly, we set the type of the parameter to Text. (If you accidentally leave the data type set to the default of Any, then the parameter value cannot be changed, when you publish into the Power BI service.)
We are starting at the Development stage, and the database we are using for this stage is called "Sales_Data_Dev".
If we were doing this in a real environment, we could then go on to parameterize, the server that we are connecting to, and if we had file sources, CSV files, Excel files, we could parameterize all or part of the URL that we are getting that data from.
Implementing a Parameter
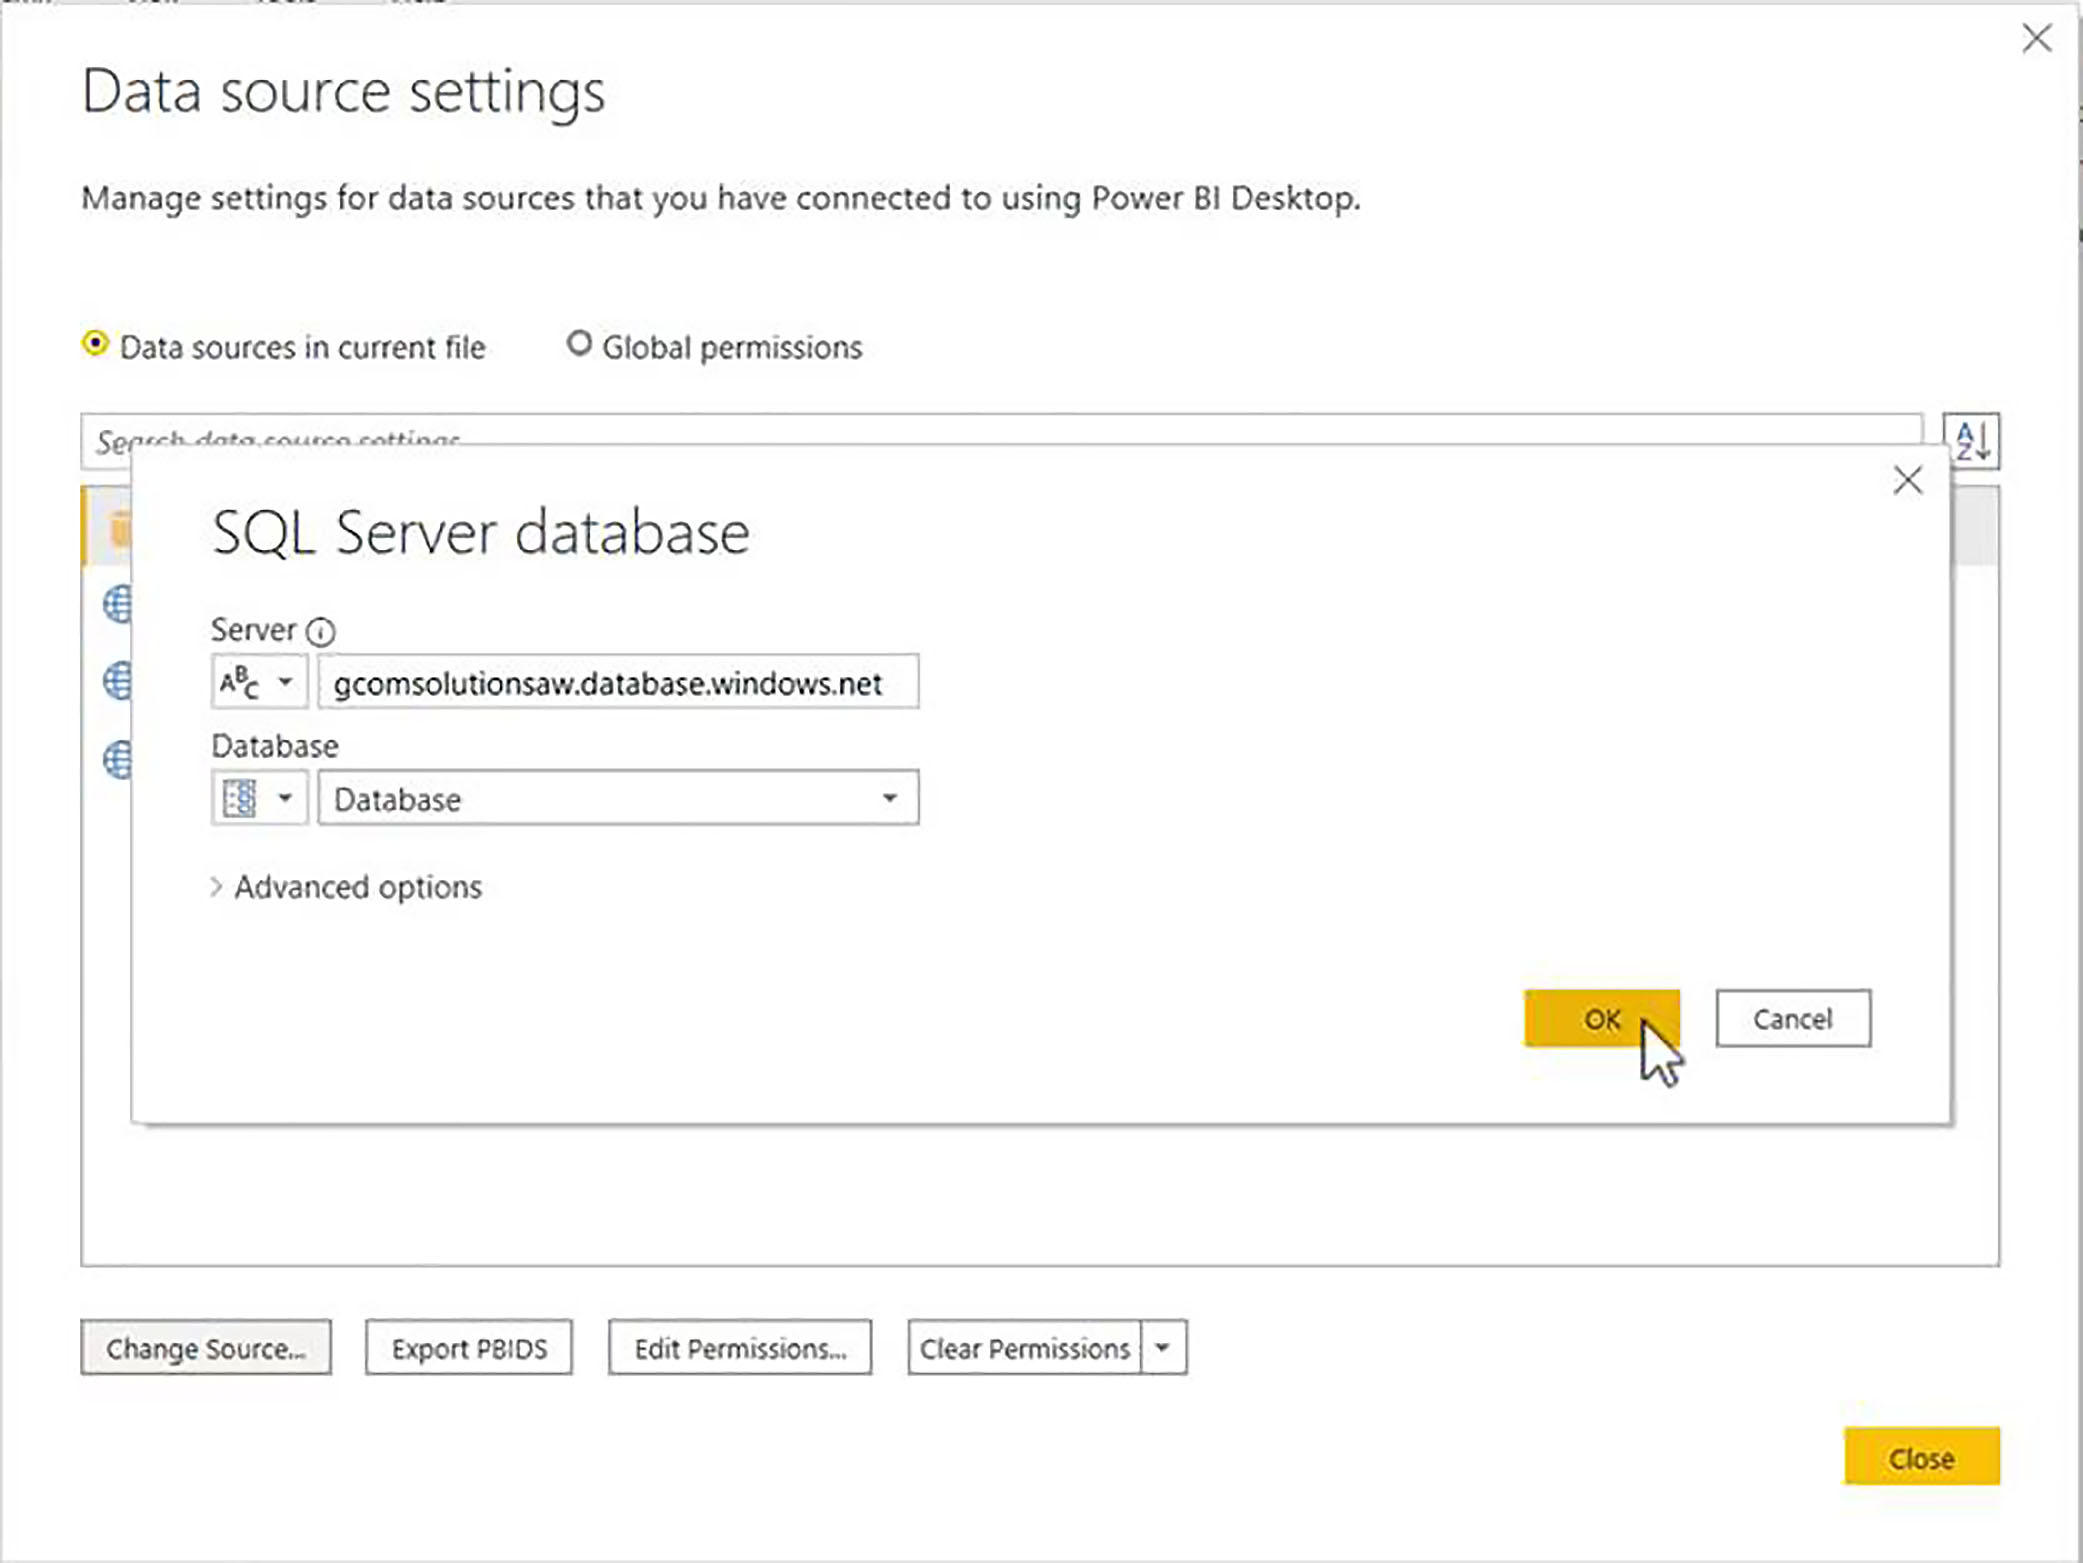
Now that we have our parameter, the next stage is to actually implement it. We could do this on a table by table basis. However, the most efficient method is to go into Home > Data Source Settings, highlight the database name and click on Change Source.
We then leave the server as is, and instead of changing the database as a string, we can now switch from Text to Parameter, and then of course, we only have one parameter to choose from which we called "Database".
So, by making that change at the data source settings level, all of the tables which are coming from that database will come from whichever database we specify as the parameter value. So, when we leave the development stage, we will go into the testing stage, and then when we leave the testing stage, we will go to the live stage, and, at each change, we will change the value of our parameter accordingly.
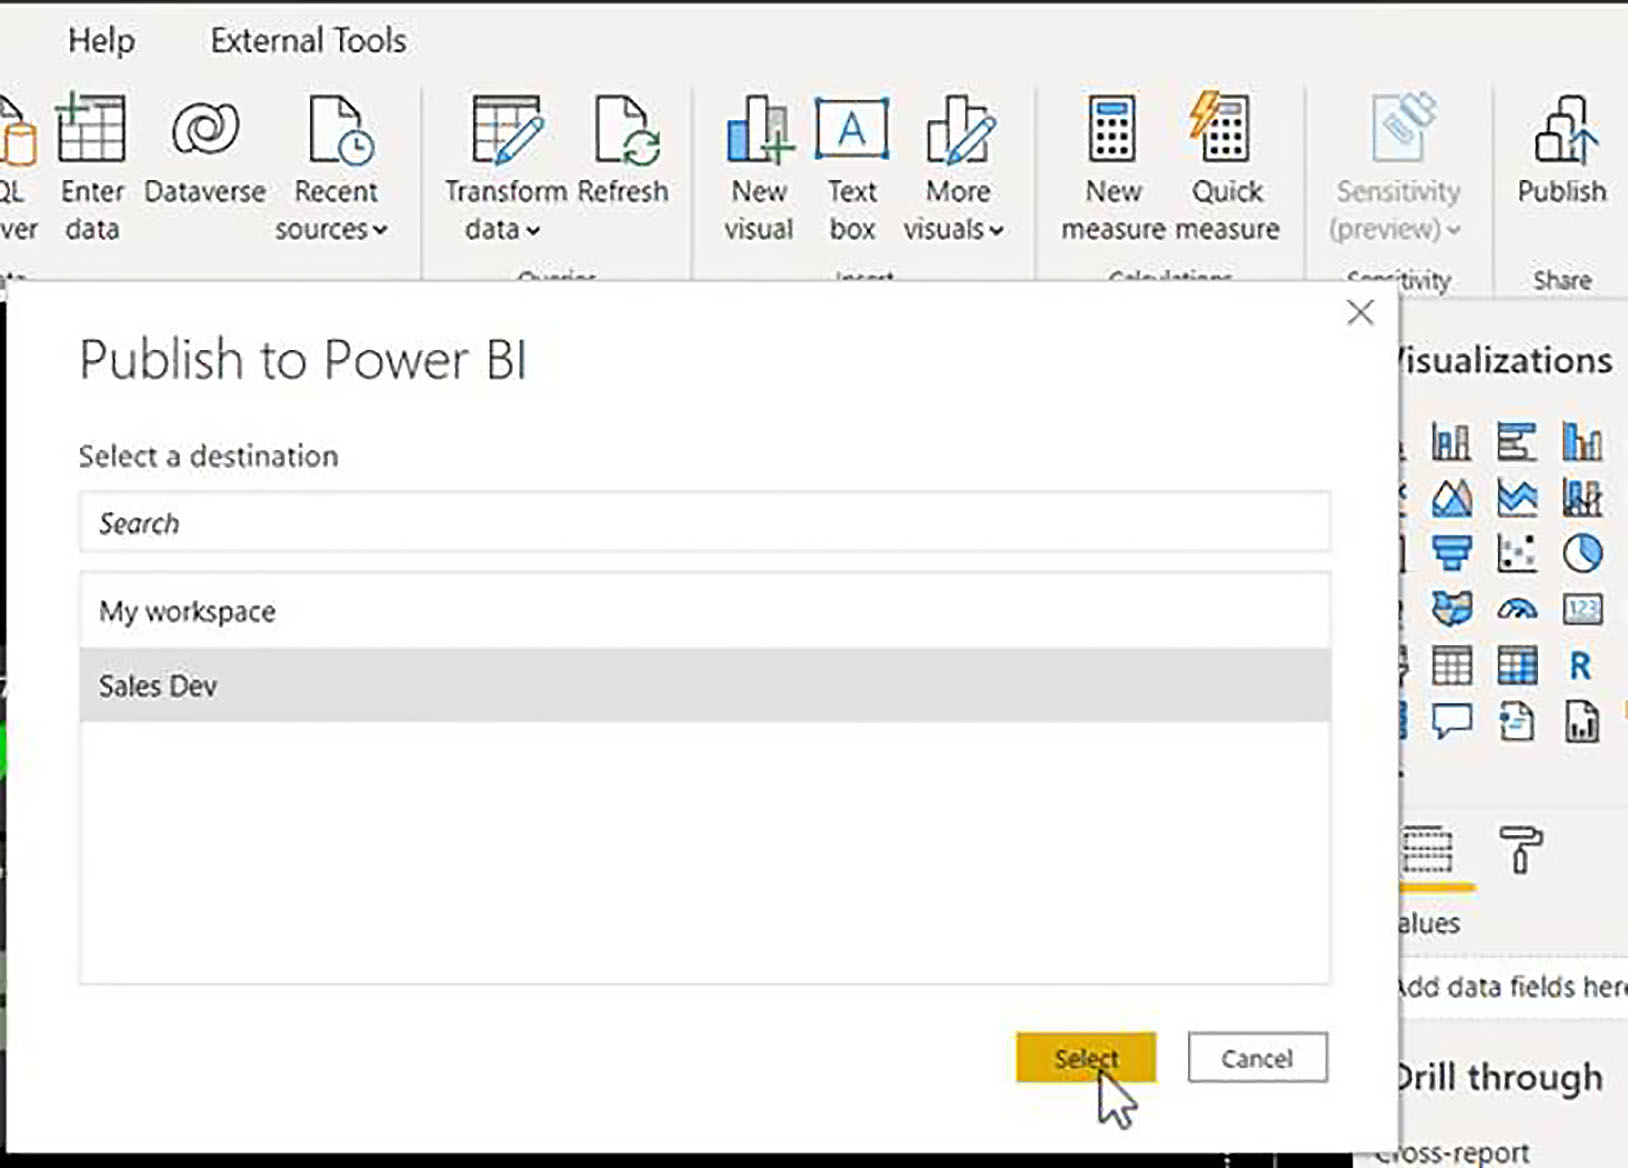
So, with that in place, we click Close & Apply, and then publish our report into the Power BI service, into our "Sales Dev" workspace.
Creating a Deployment Pipeline
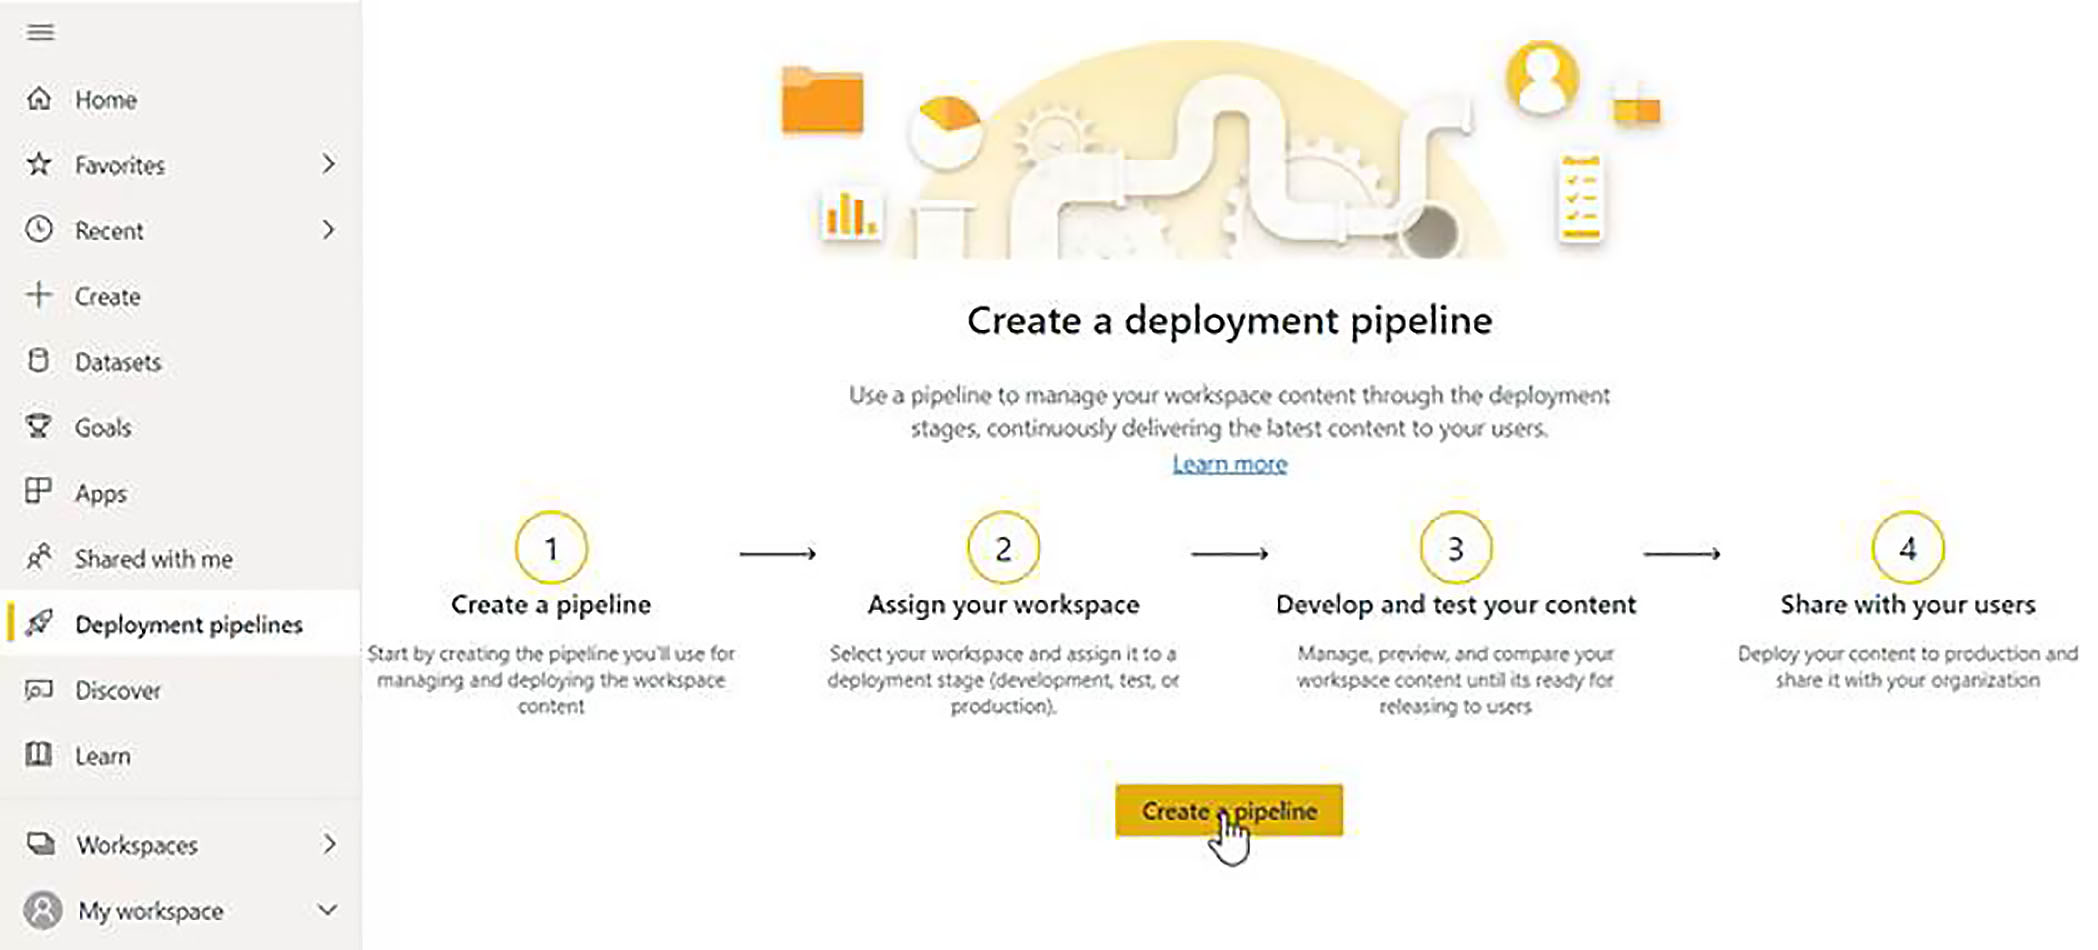
Back in the Power BI service, let us switch across to Deployment Pipelines, and click on Create a Pipeline.
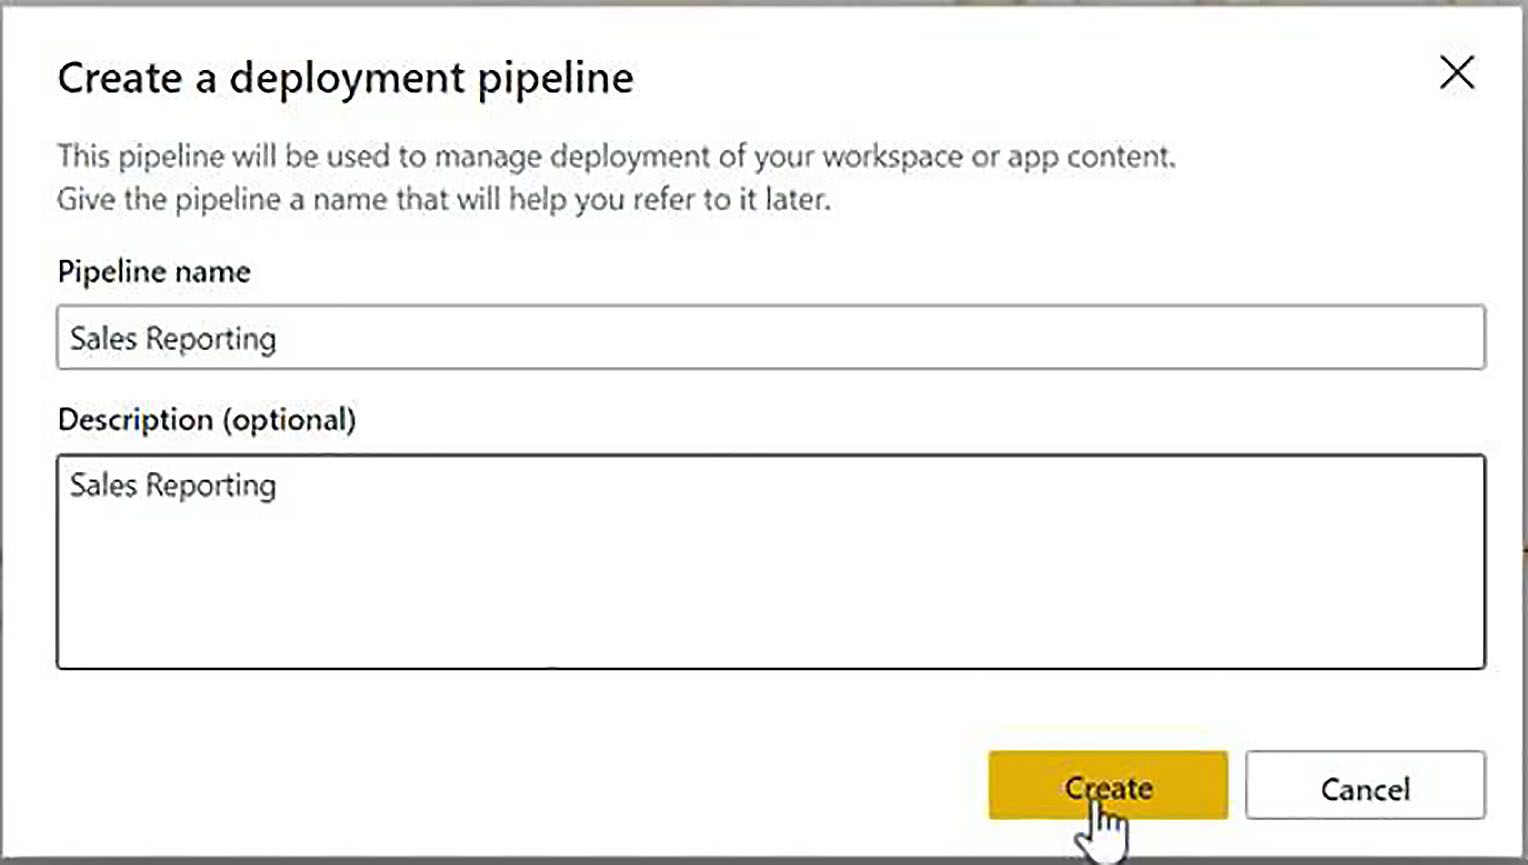
Let us call it "Sales Reporting". Then, in reality, we would type a full and detailed description of what the sales pipeline involved and what it was designed to achieve. We then click on Create to create the pipeline object.
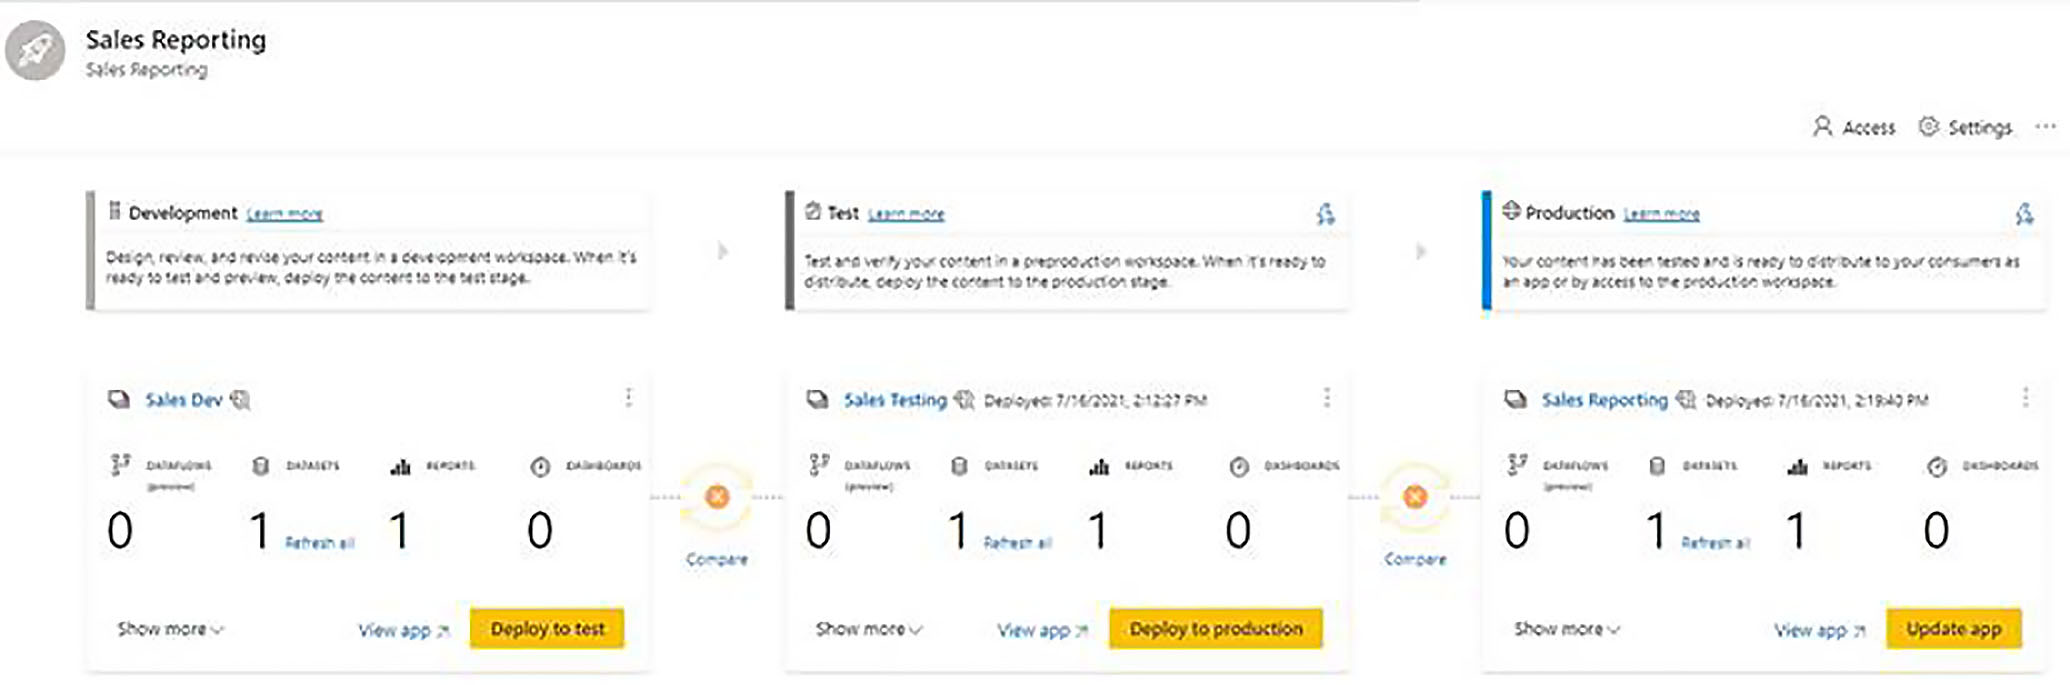
We can now see our three phases: development, test, and production; and we also have some useful links to the documentation.
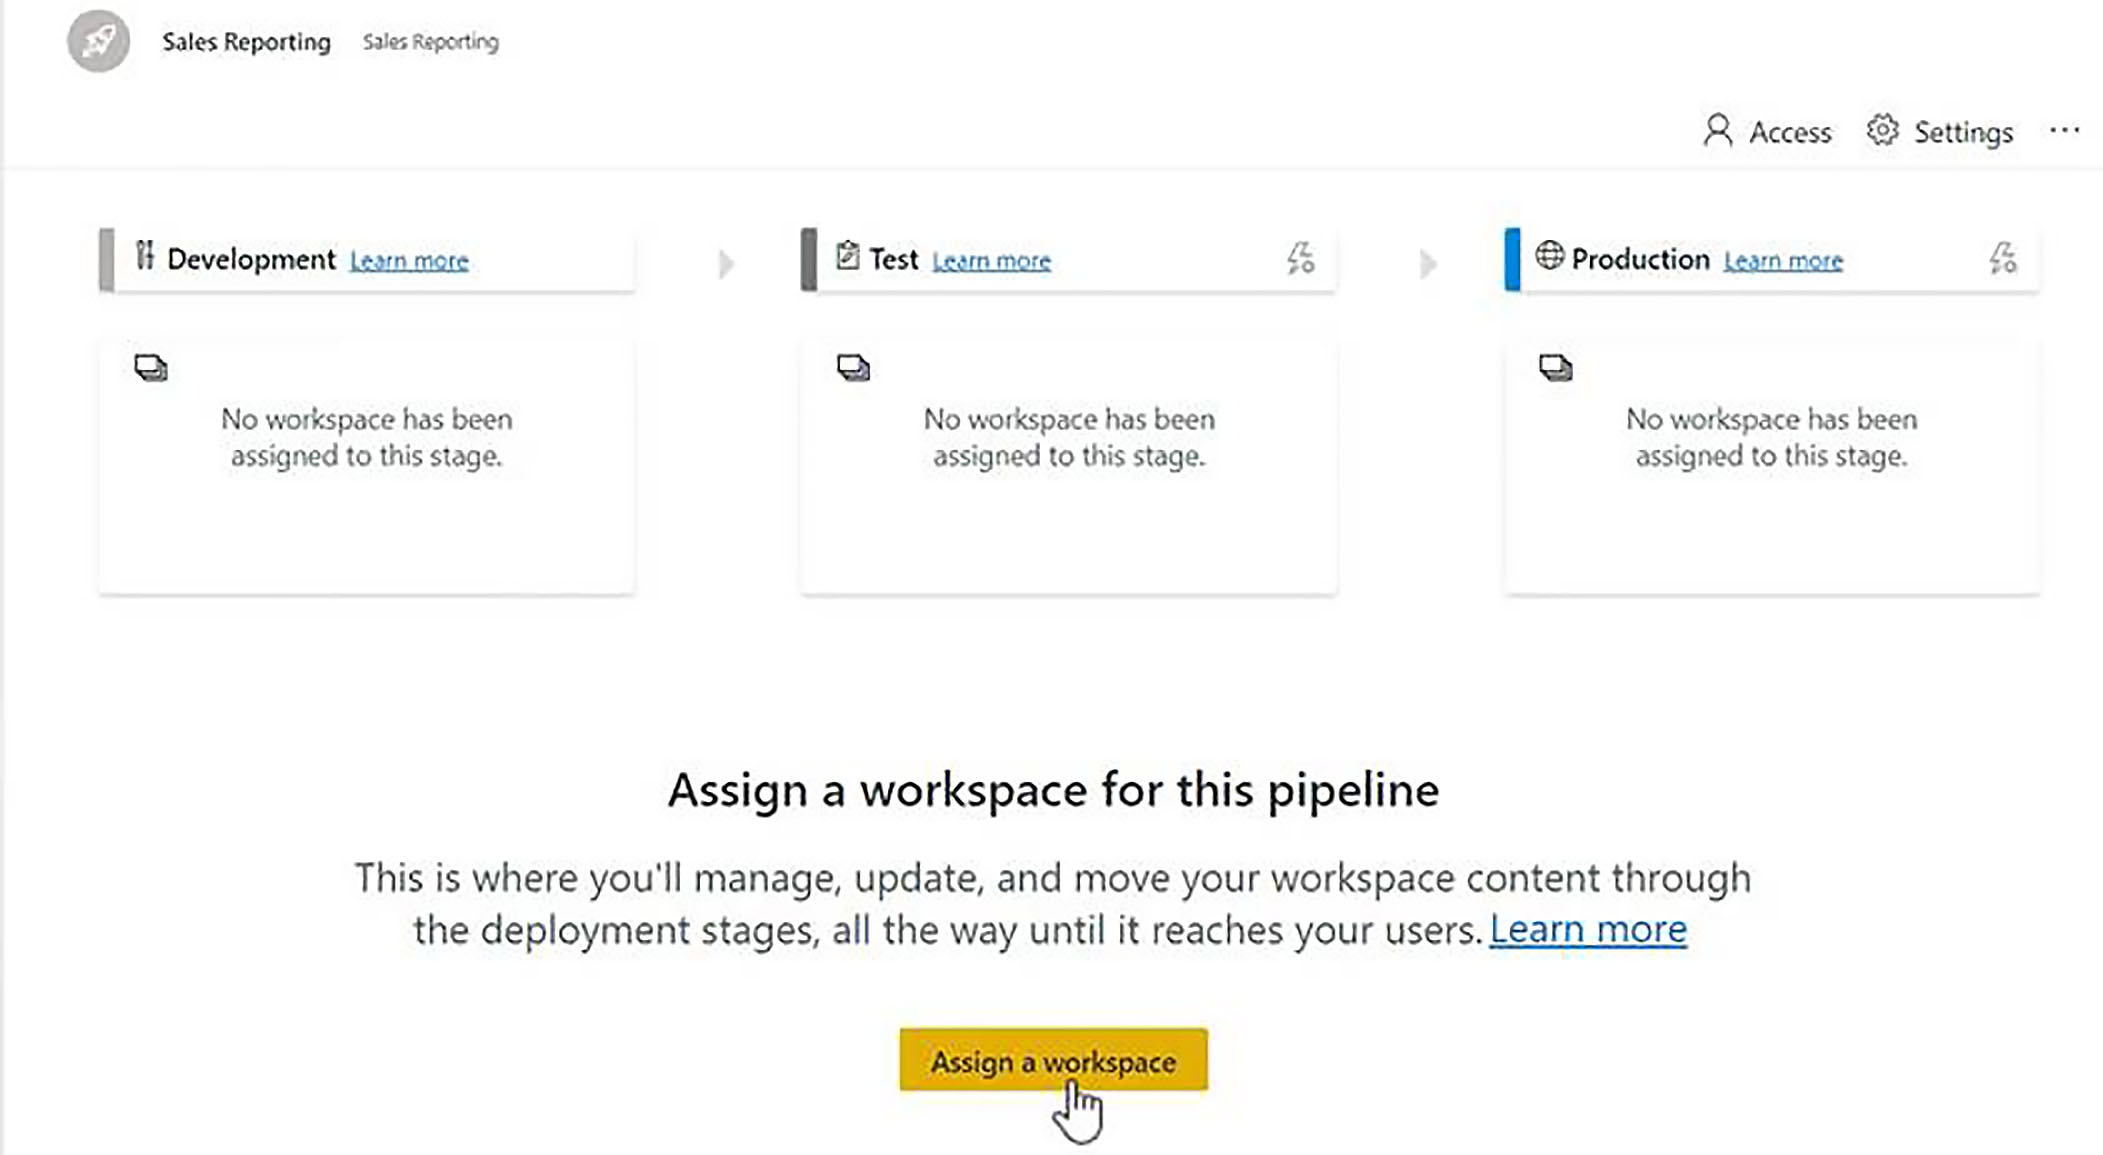
Assigning a Workspace to a Stage
Since we are starting with our development phase, we need to assign a workspace to that phase. We click on assign a workspace, select Development, and then we choose the workspace that we want to assign to that stage. (If we did not want to start on this stage, we would simply choose whatever stage that it was convenient for us to start from.).

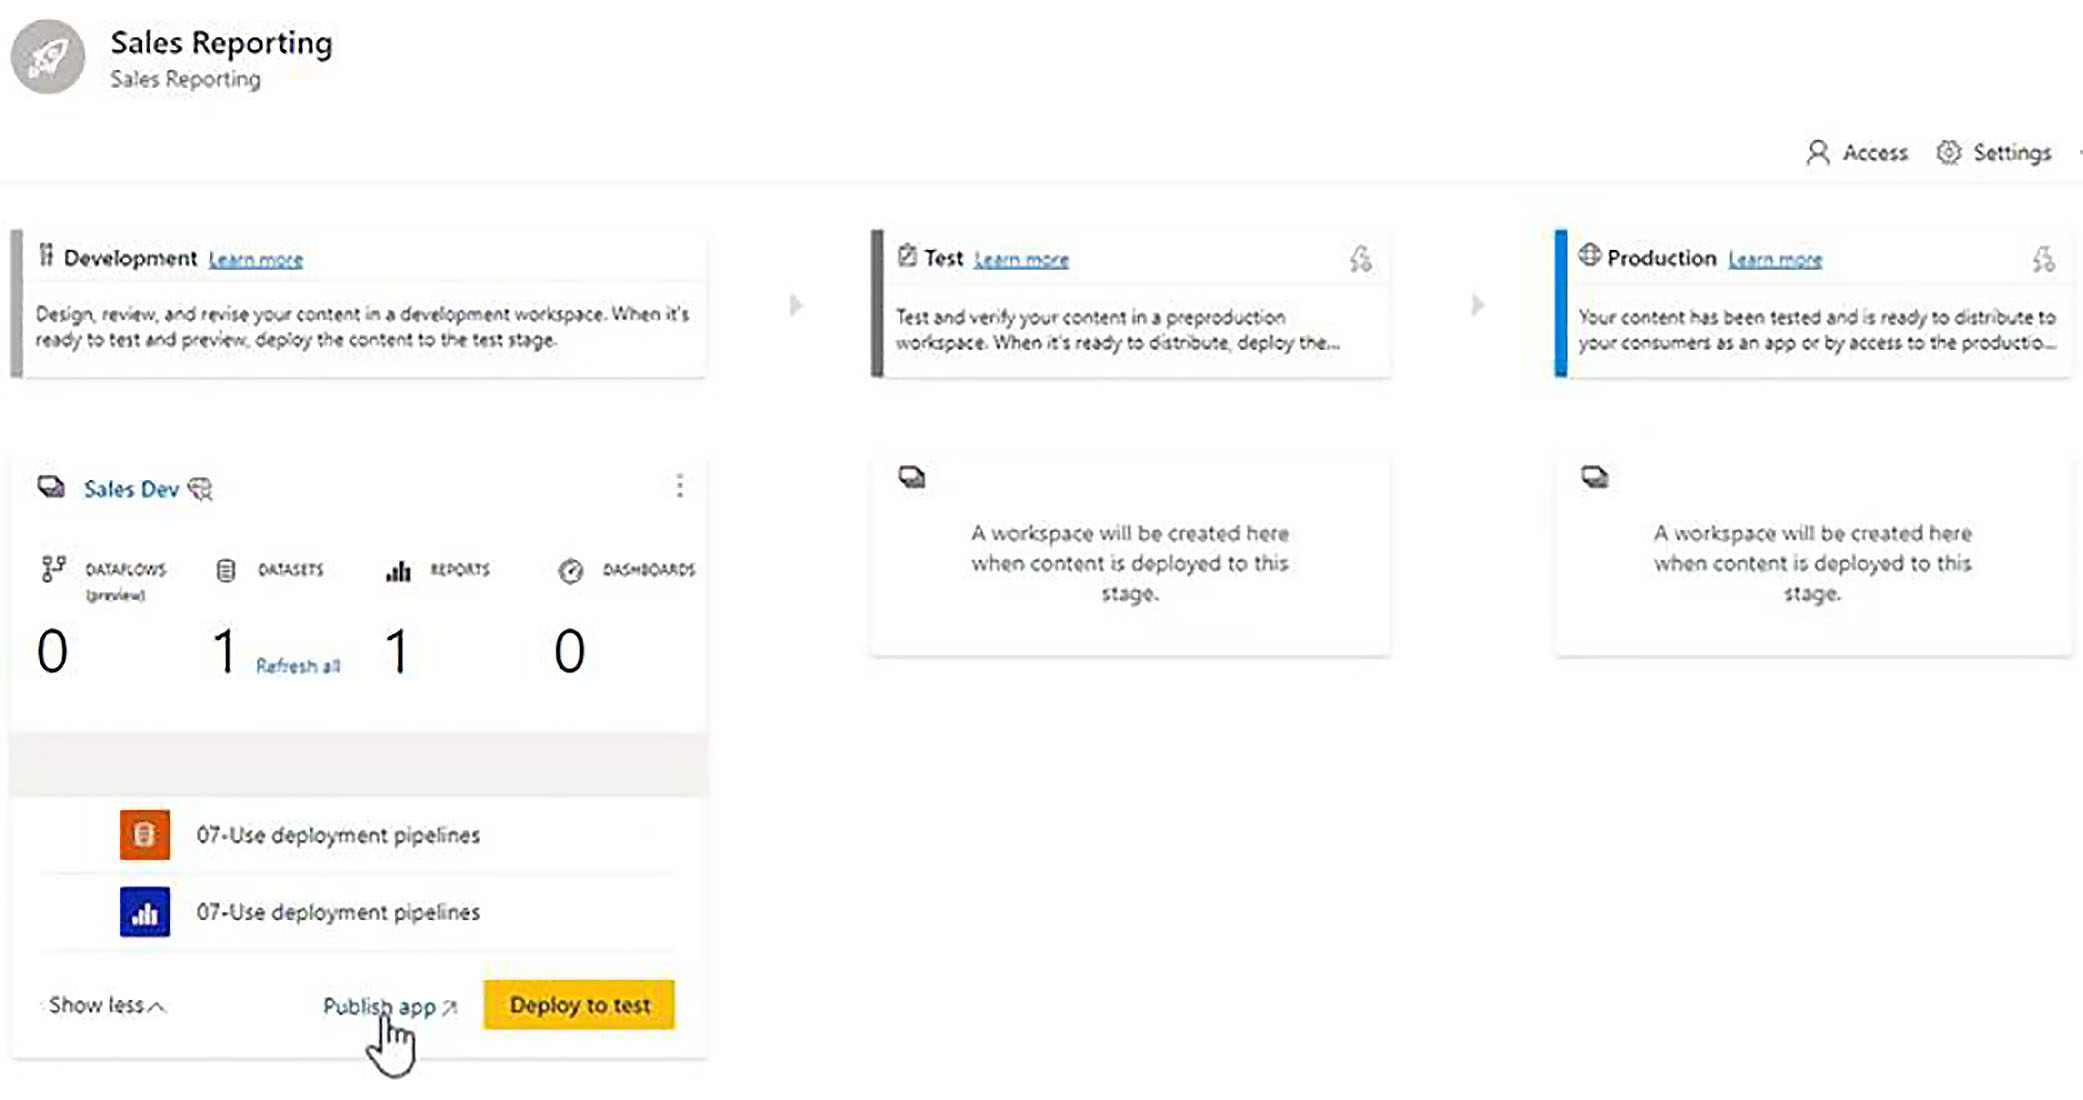
We click Assign, and our workspace is now associated with that stage. When we click on "Show More" (which then changes to "Show Less"), we can see all of the artefacts that we have in the assigned workspace.
Granting Access to the Development Workspace
We can leave our content at this stage for as long as is necessary, add more content as required, and at each stage, we can determine who has access to the workspace, and if it is useful, we can also publish the workspace as an app.
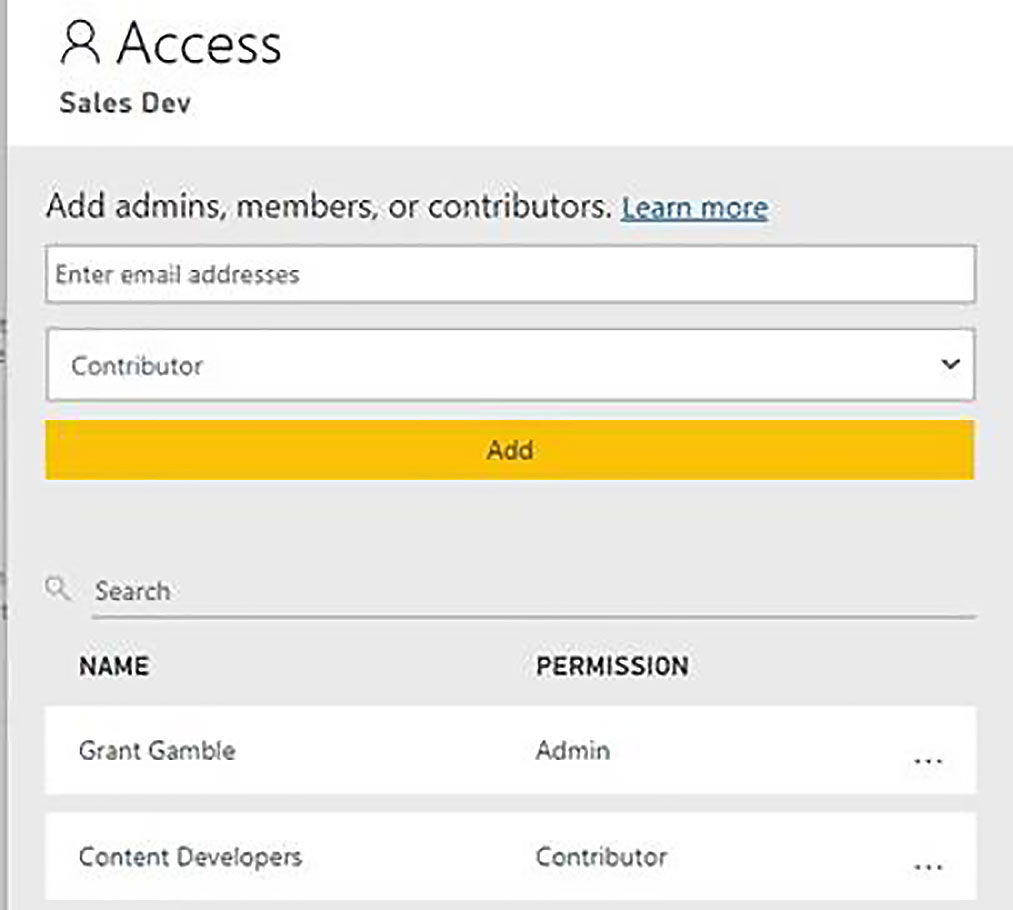
To grant access to the workspace itself, we can either use the traditional method, just click on the ellipsis menu next to the name of the workspace, or we can do the same thing from the deployment pipeline. We click on the ellipsis menu next to the name of the stage/workspace and choose Workspace Access.
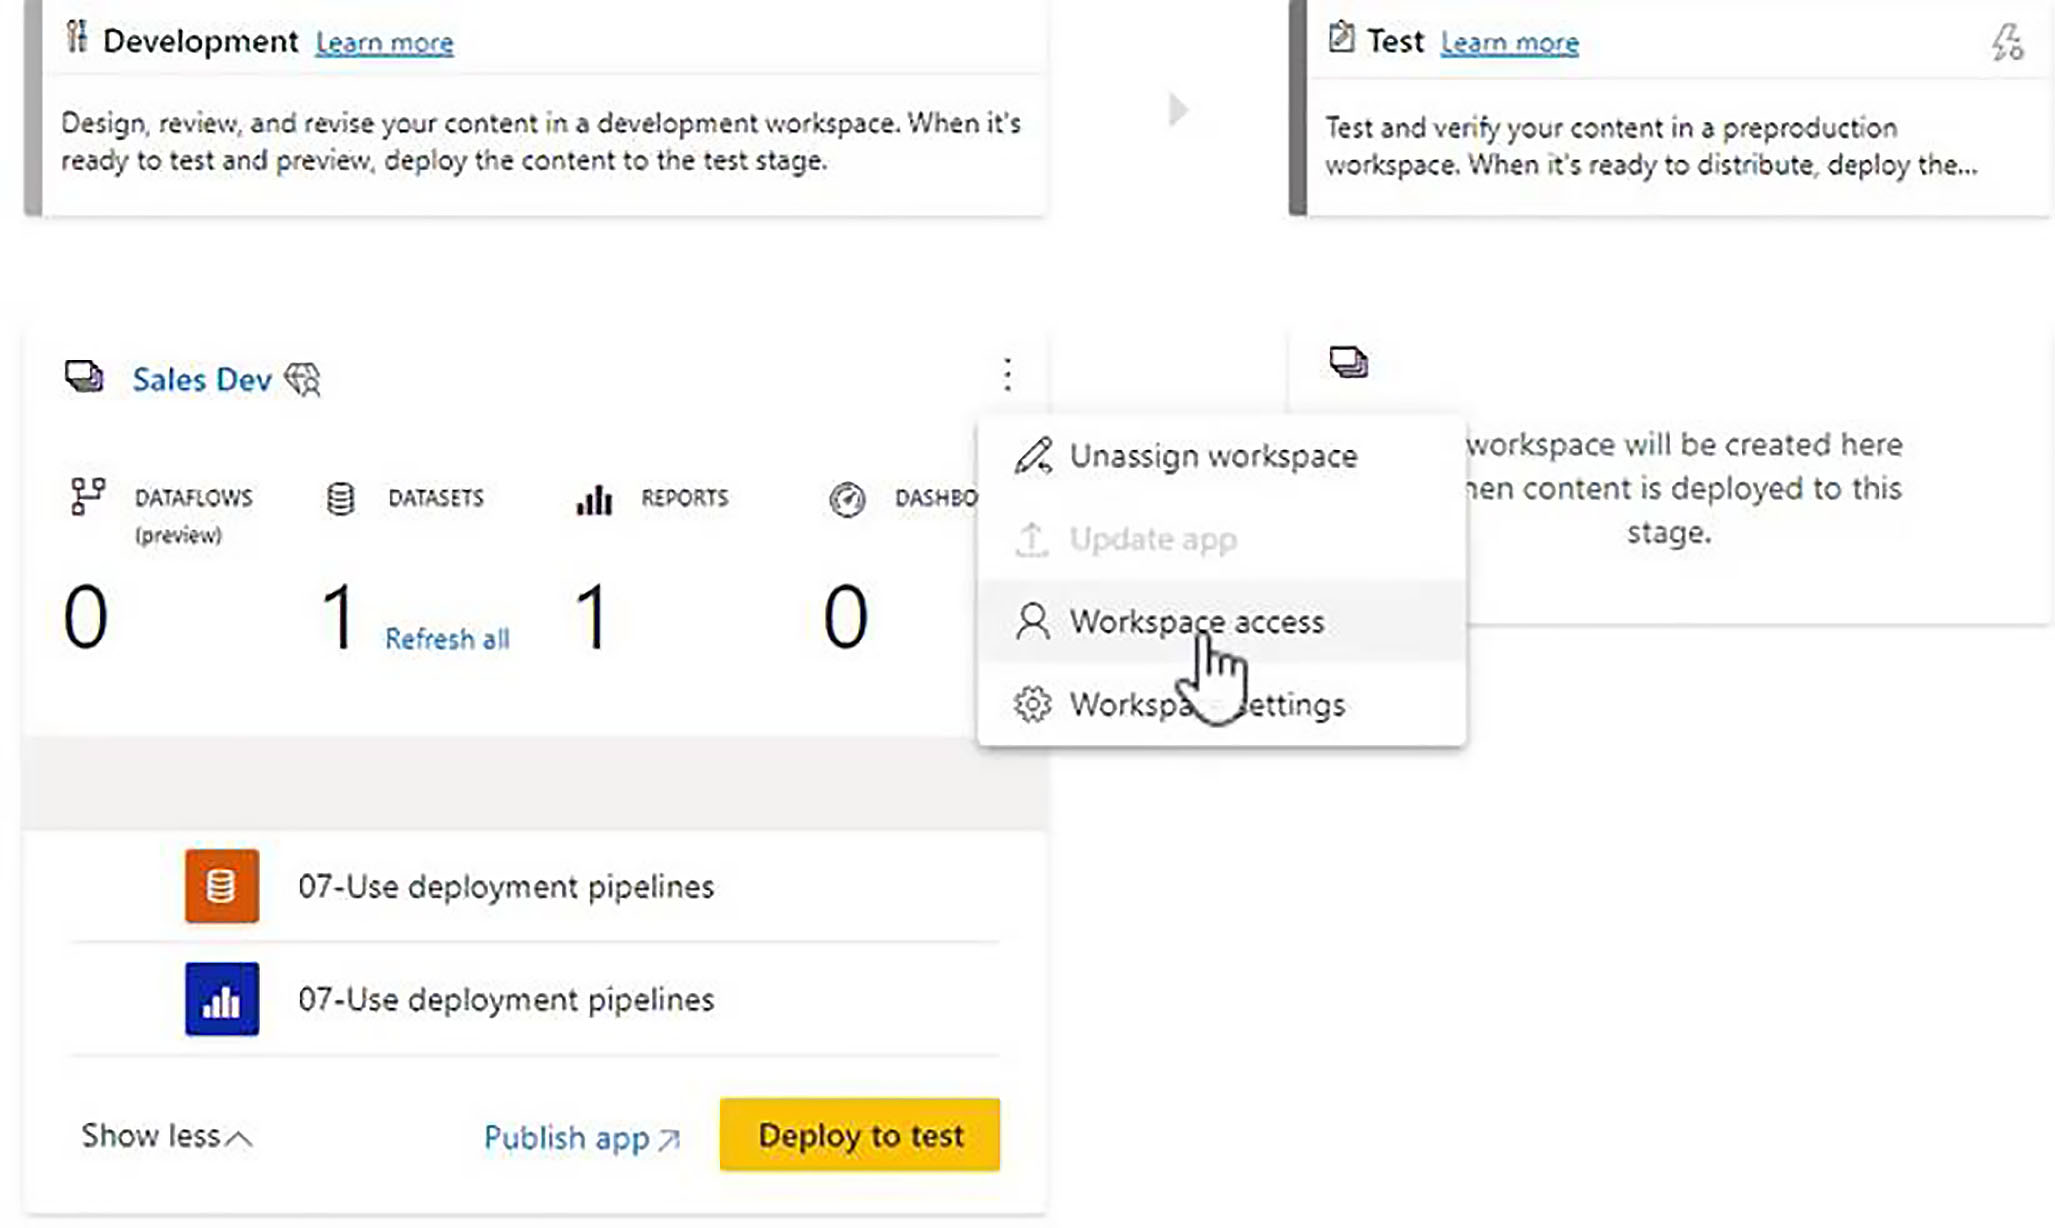
Let us say that we want to give access to our Power BI report developers. In this example, we have a group here called Content Developers. We will assign them the Contributor role, and this will give them sufficient access to work on all the content within the development workspace.
Publishing the Development Workspace as an App
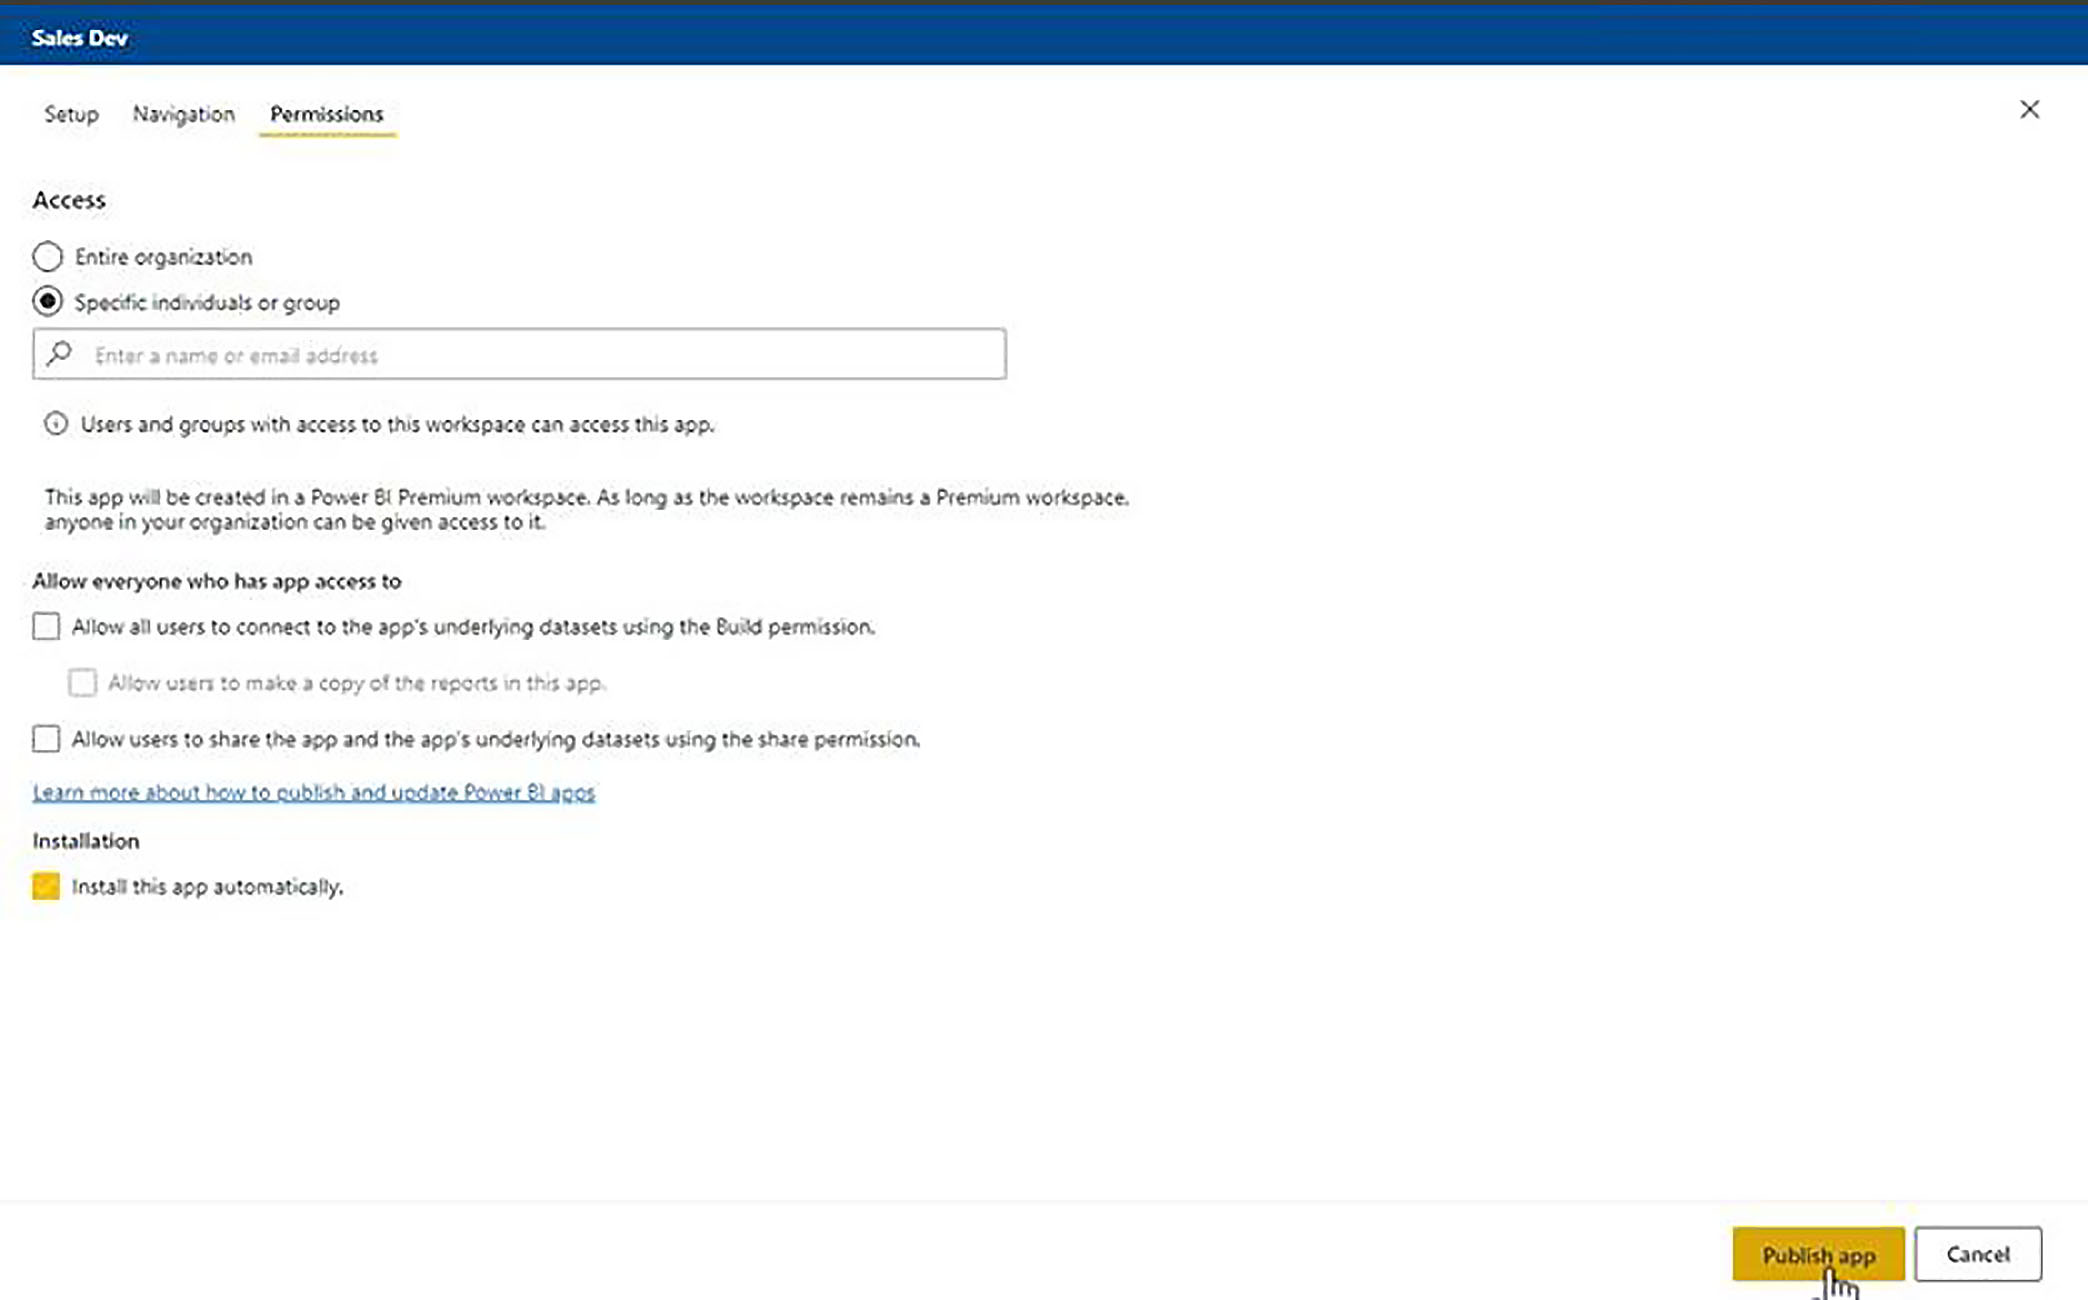
Then if we want to view the workspace as an app, we can click on Publish app, and since we are not really ready to share this with our end users as yet, we do not really need to put anyone in the Permissions box. Let us say that the developers are the only people that are going to look at the app, just to get a preview of what the user experience will be like.
Deploy to Test
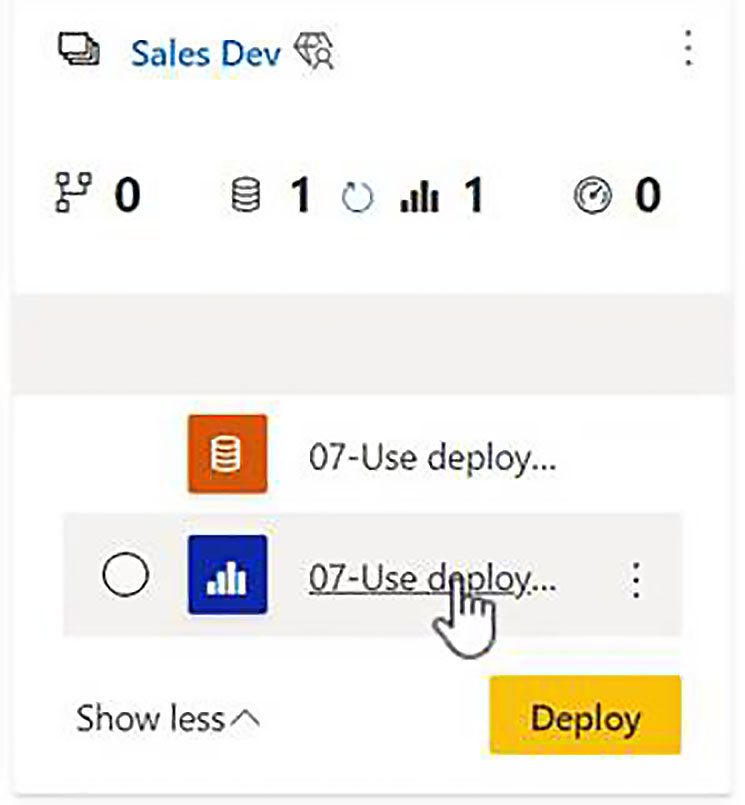
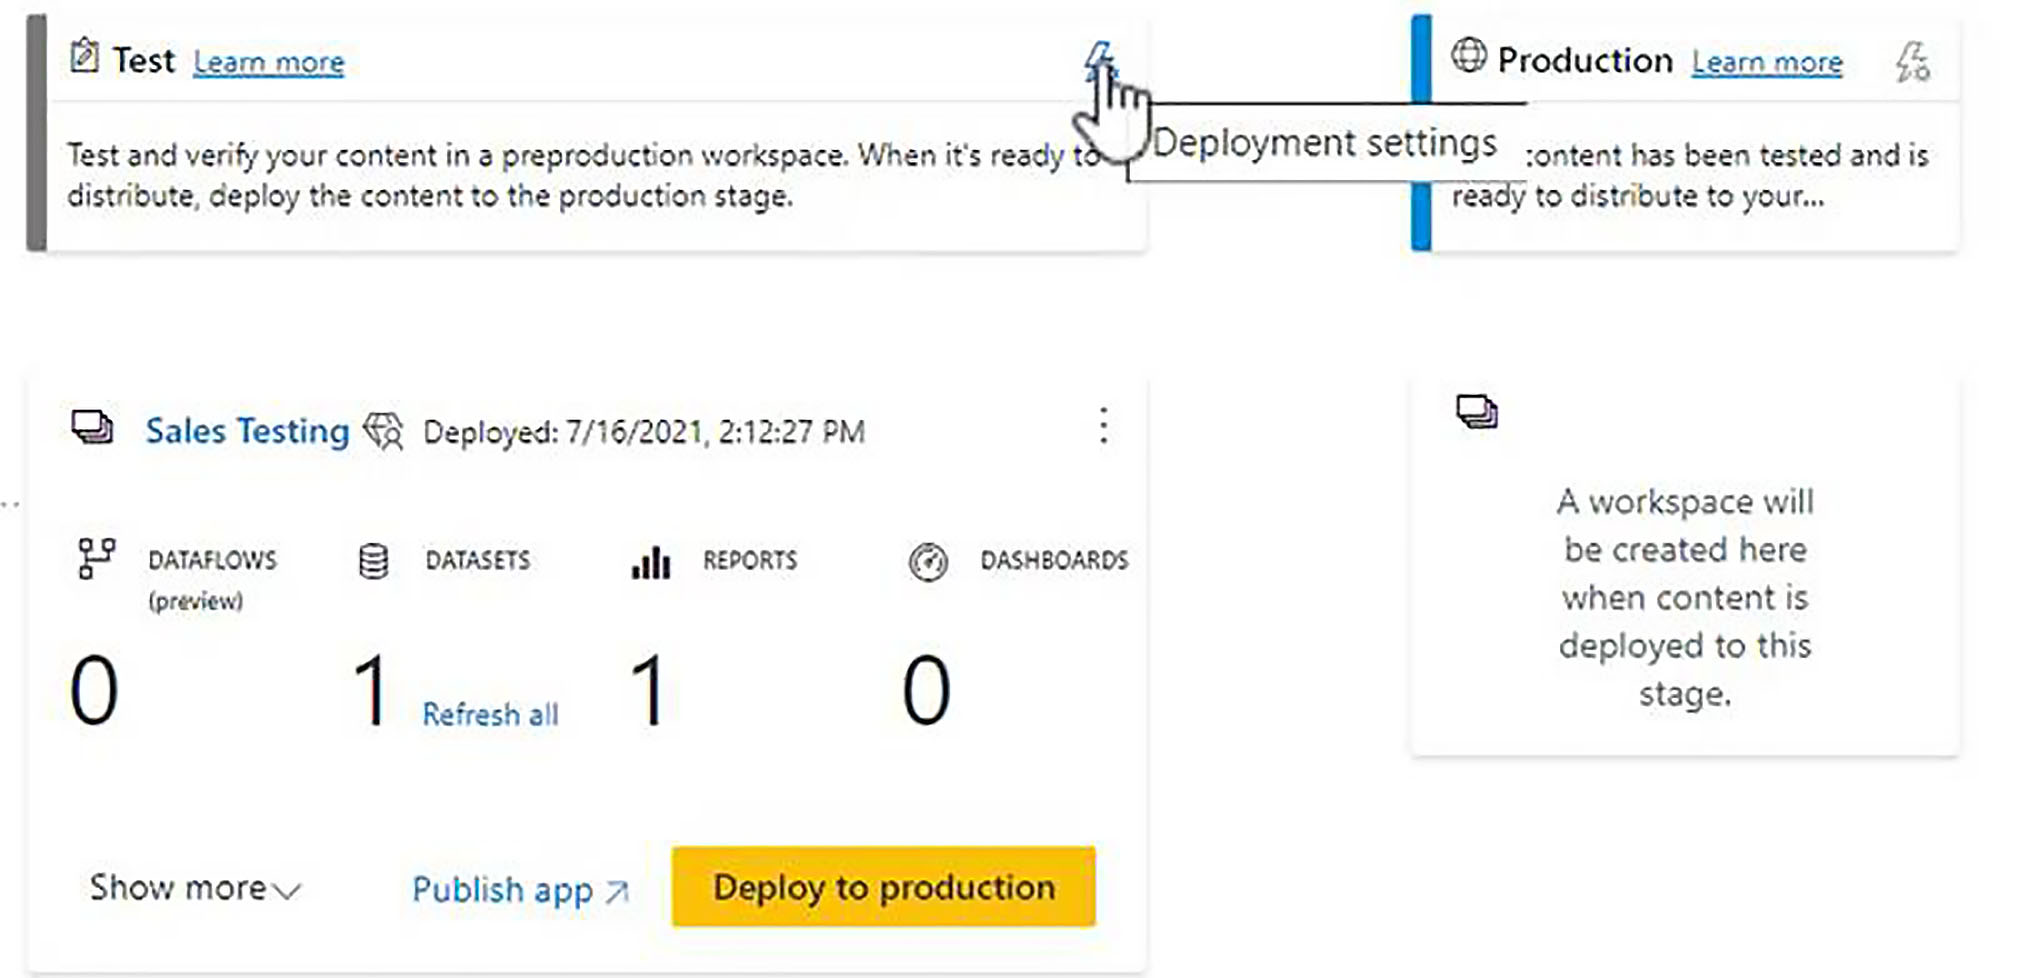
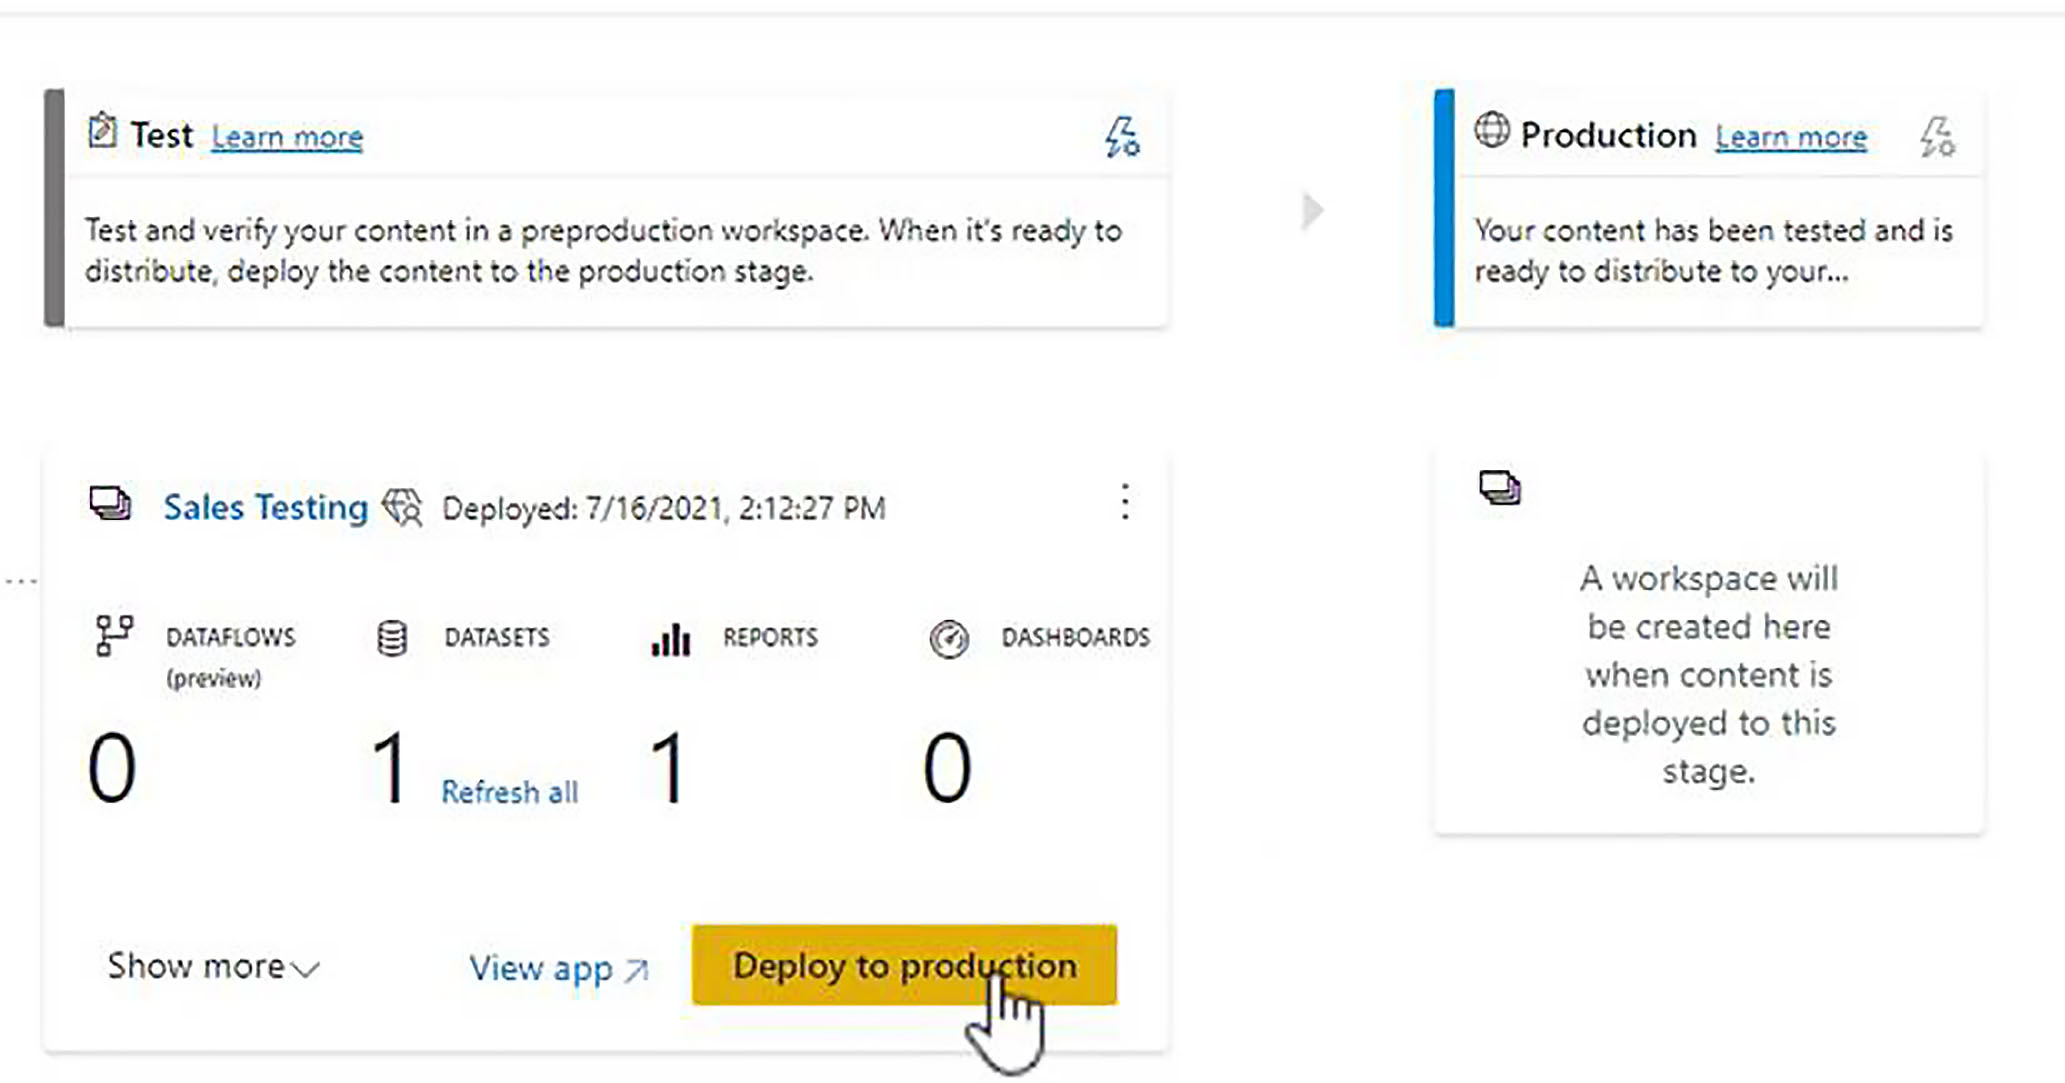
Let us return to our deployment pipeline. Now let us think about progressing beyond the development stage. When we are ready to do that, we click on Deploy to Test.
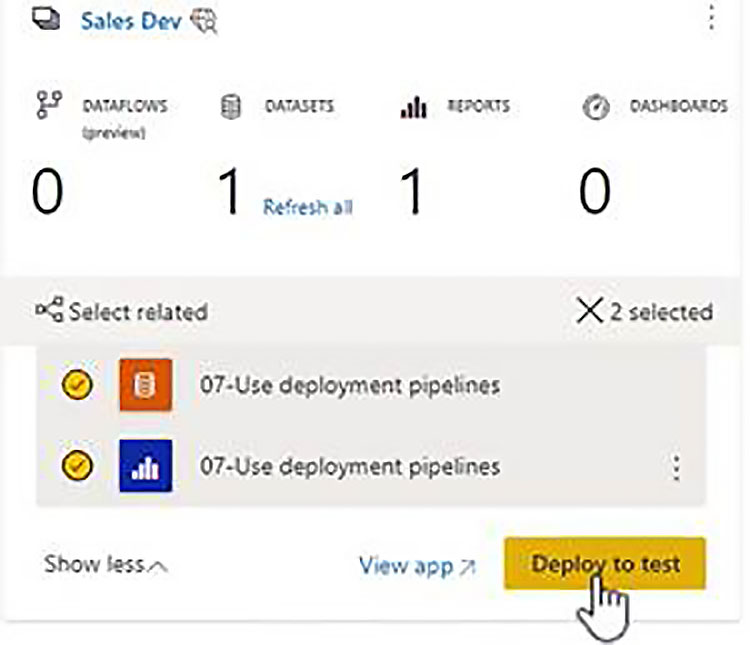
Before we do, we can specify the content which we want to be deployed. So, anything that is not quite ready, we can leave deactivated and just activate the items which we are happy to deploy on to the next stage. So, we click Deploy to test. Power BI then creates a second workspace and assigns it to the second stage the test stage.
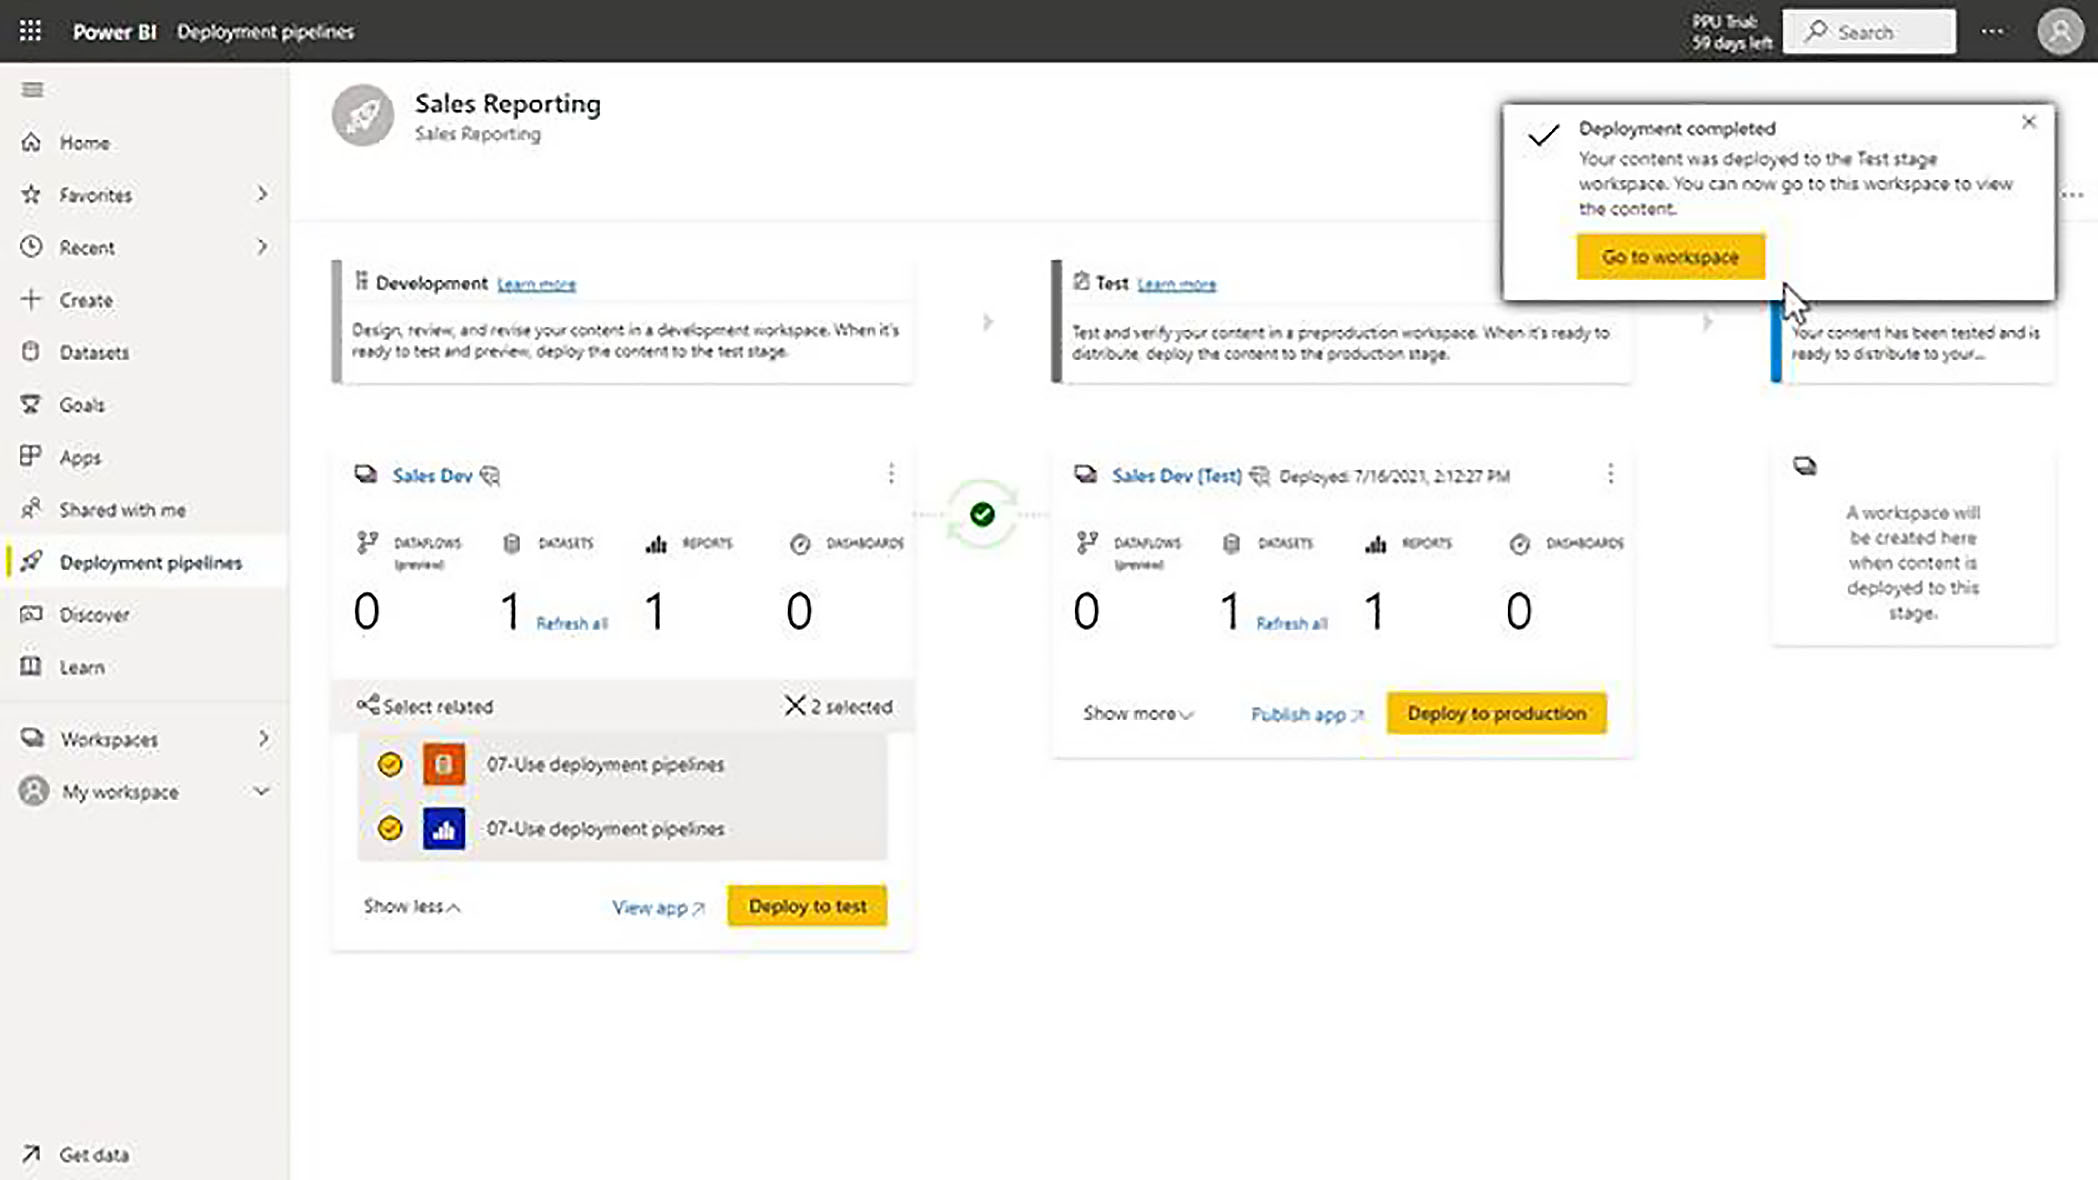
Renaming the Test Workspace
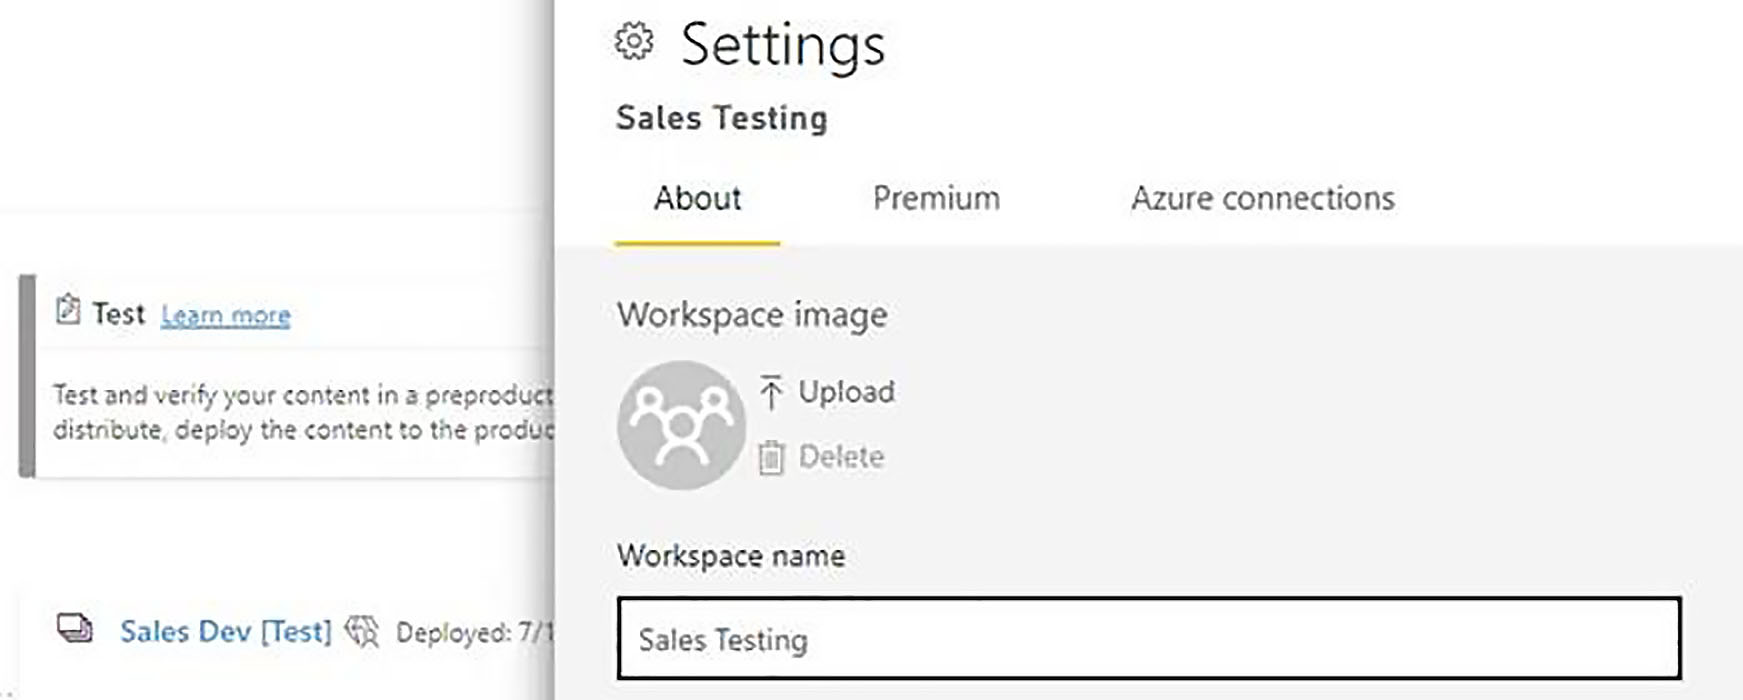
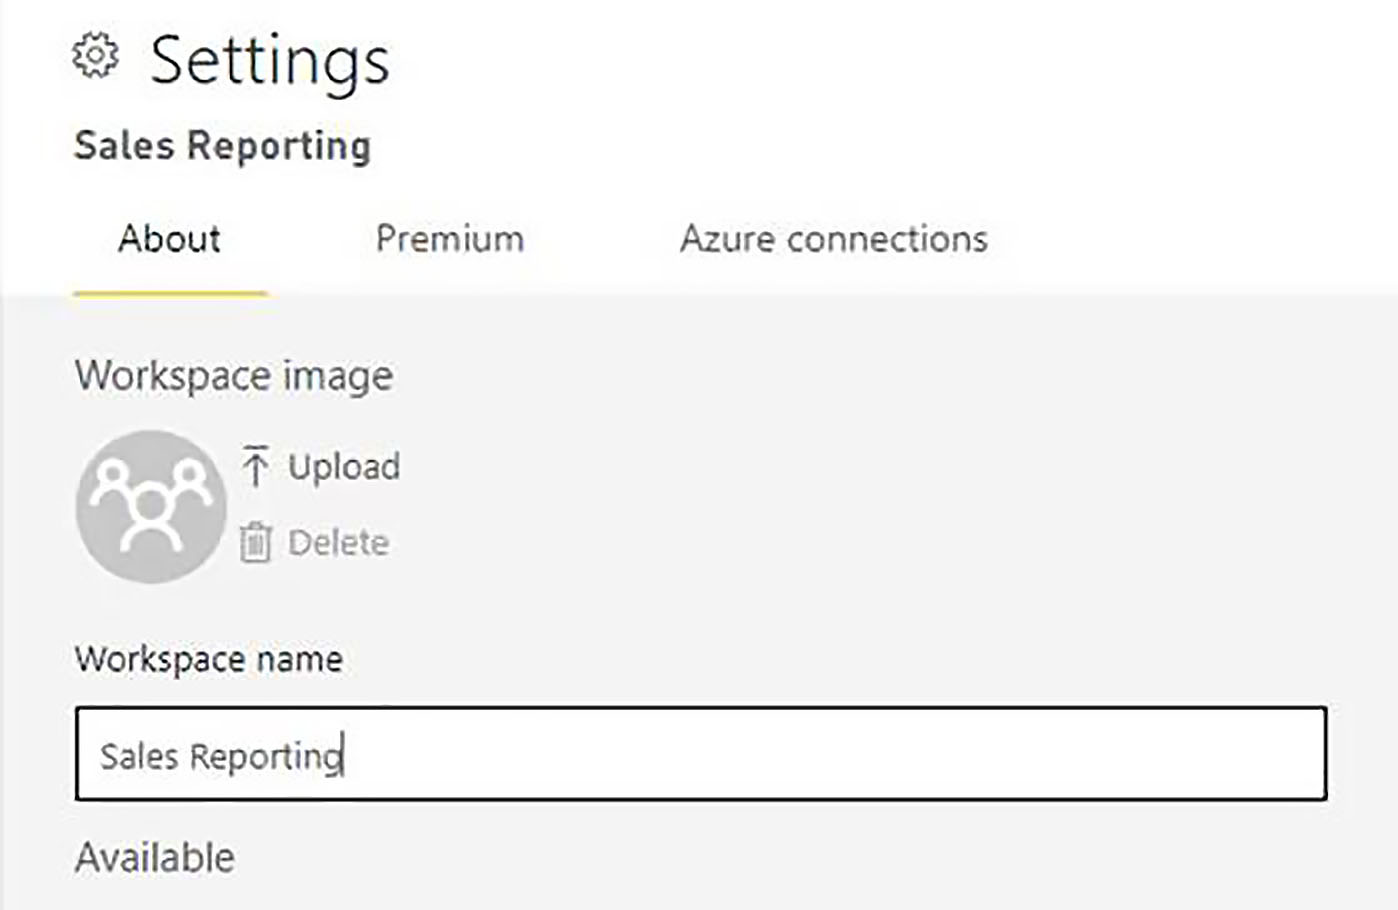
The workspace is automatically created, and Power BI gives it a default name, which consists of the name of the development workspace, followed by the word "[Test]" in square brackets. Since the name of the original workspace had the word "Dev" in it, this default name is not accurate. So, to change it, we will just need to go into workspaces, click on the ellipsis menu next to the name of the workspace, and go into Workspace Settings, and here, we can just use the name "Sales Testing".
Changing the Parameter Value for the Test Stage
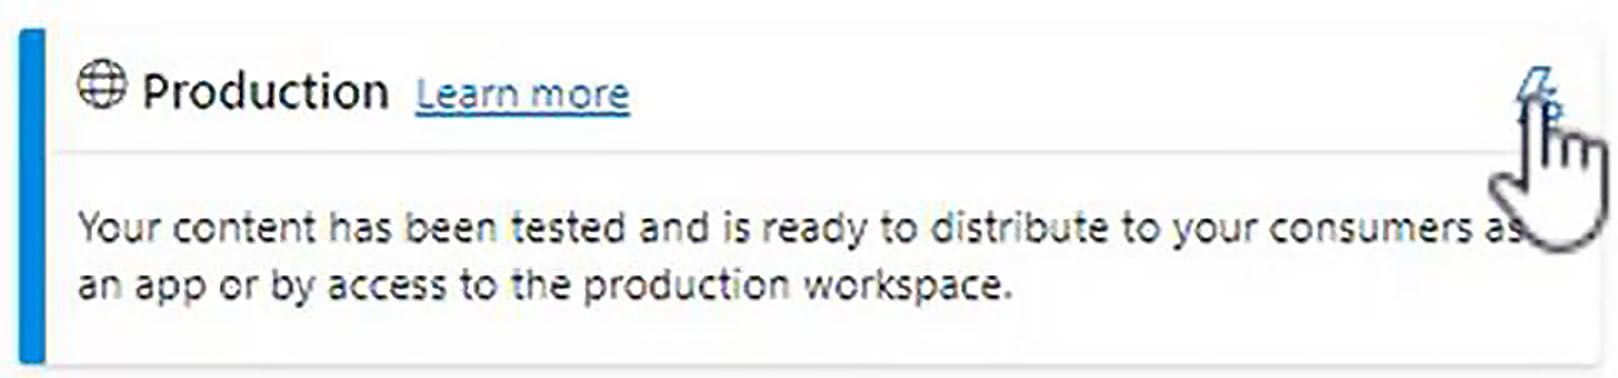
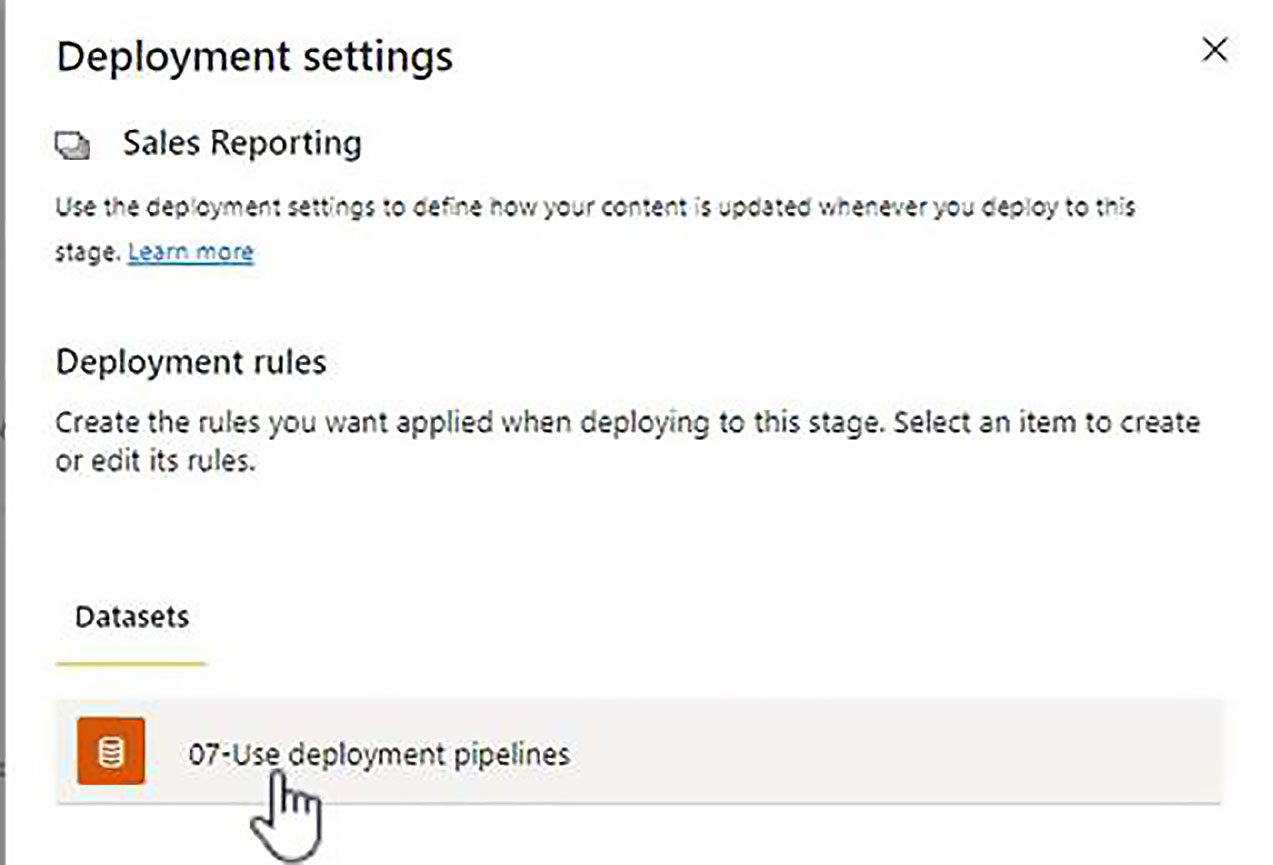
Next, we can think about our parameters. To access the parameters, we can click on Deployment Settings.
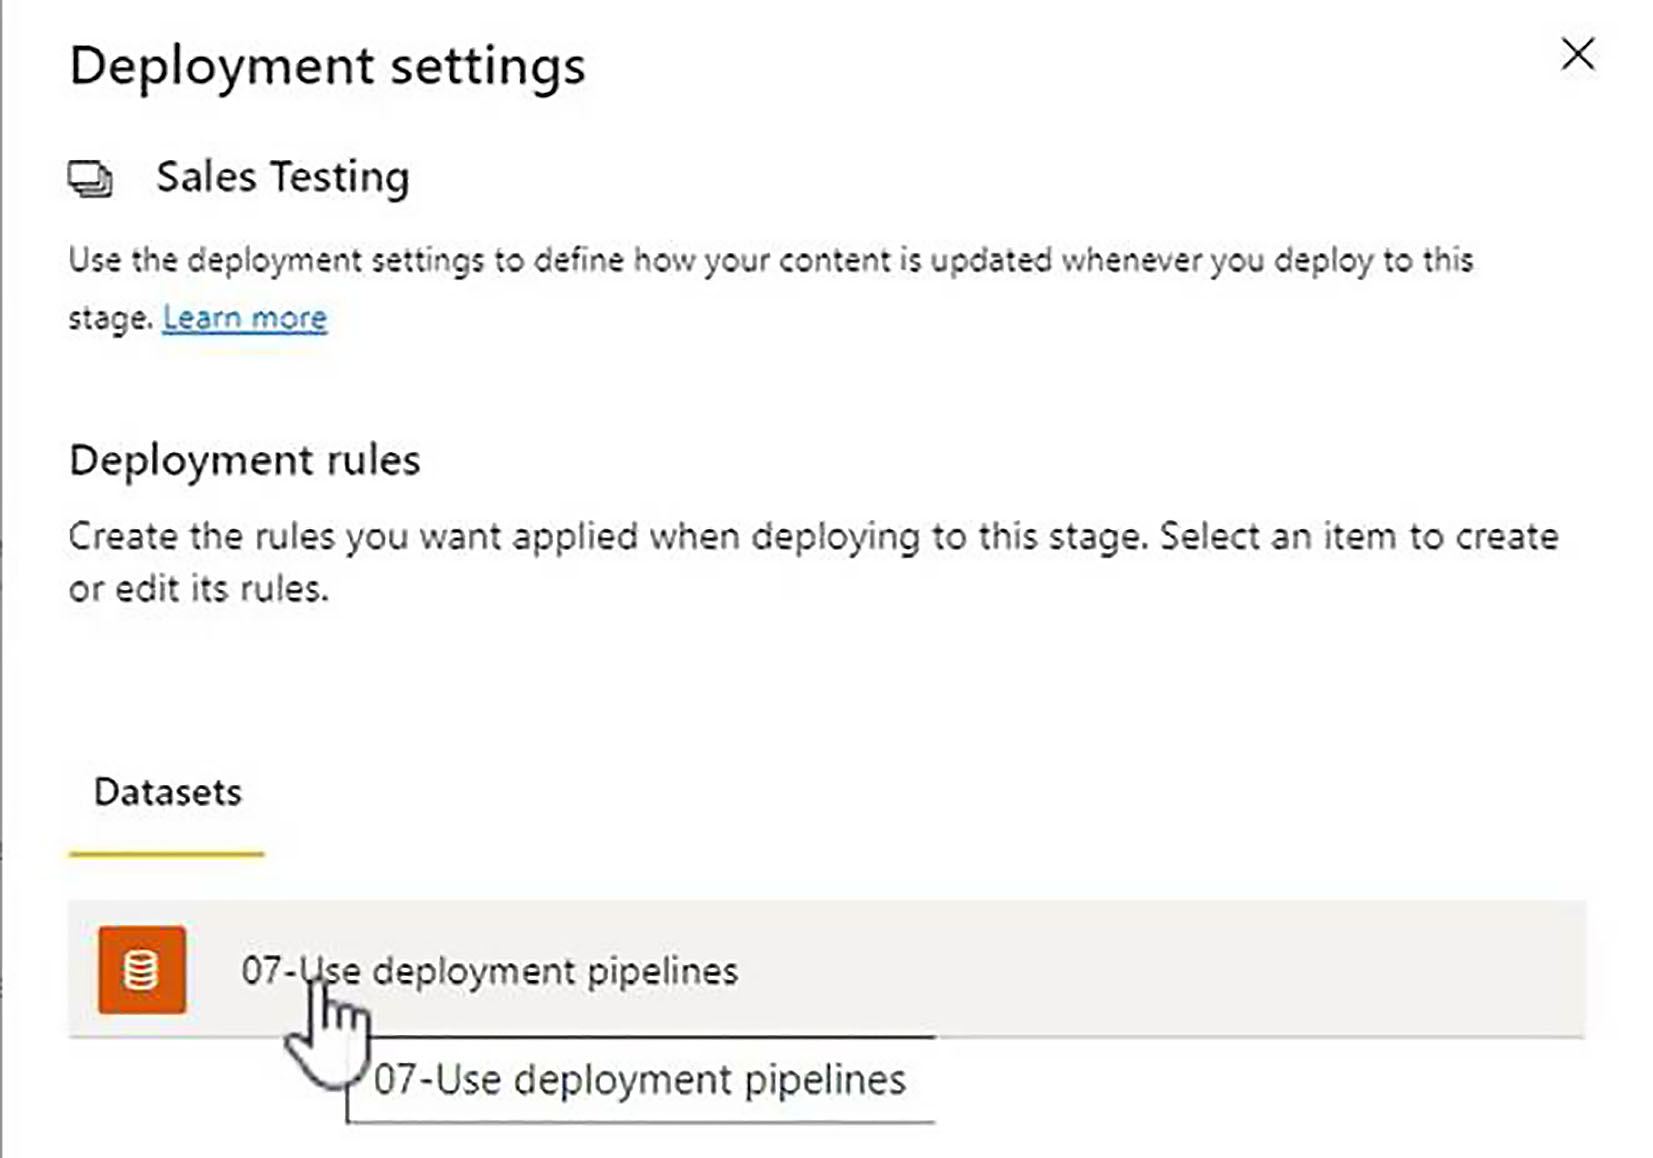
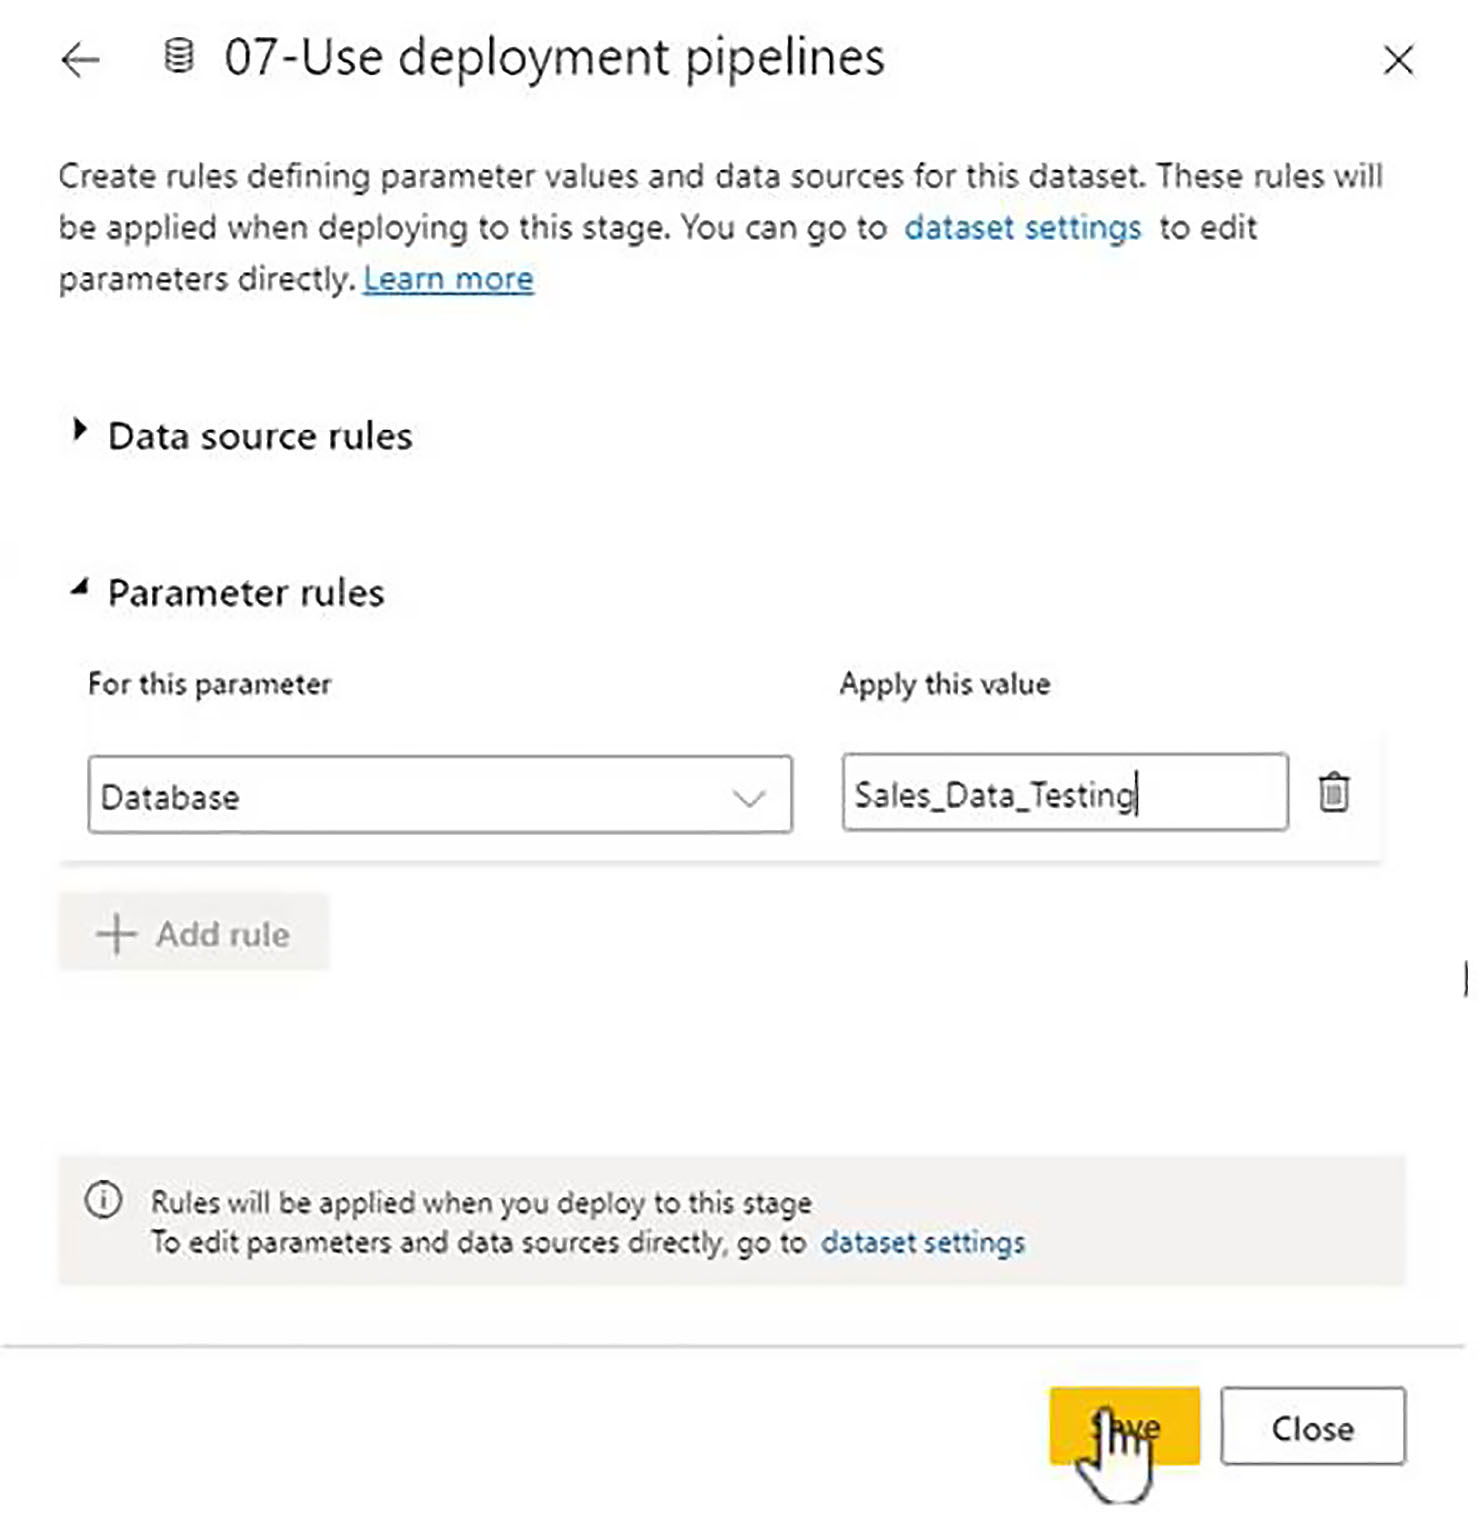
This brings up the Deployment Rules dialog which lists the datasets in the test workspace. We only have the one dataset uploaded, "07-Use deployment pipelines"; so, we click on this dataset.
Creating Rules for the Test Stage
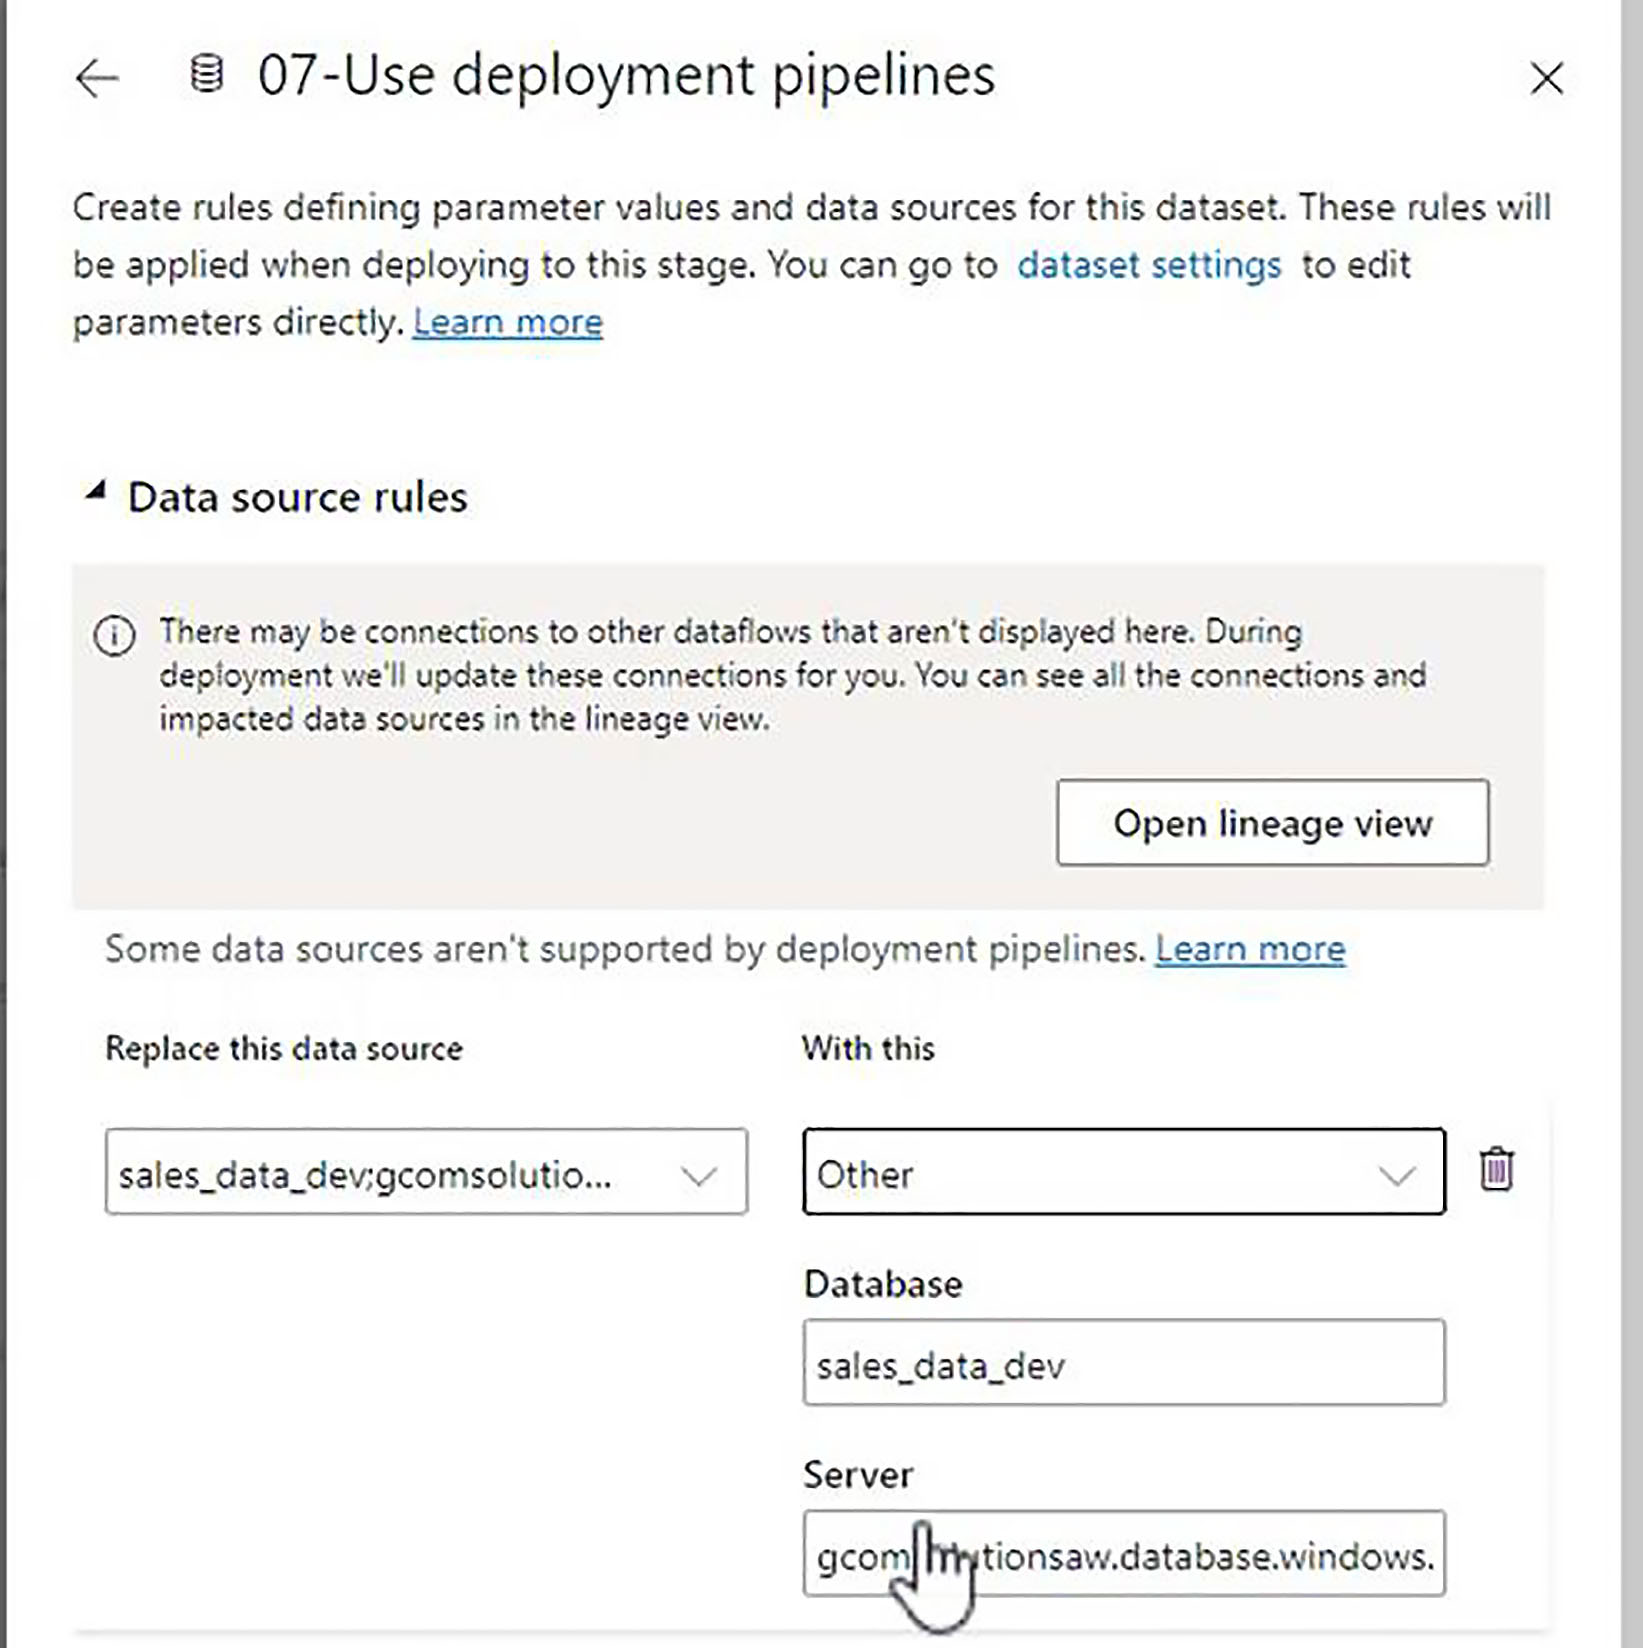
We can then apply rules either at the Data Source level, or the Parameter Level.
Creating Data Source Rules
If you are working at the data source level, you will do something like choosing the name of the data source from the "Replace this data source" dropdown and replacing the database and server names manually.
Creating Parameter Rules
In our case, we want to create a parameter rule. So, we go to parameter rules and click Add Rule. We have one parameter to choose from, which is our database parameter, and the name that we have assigned to the testing database is "Sales_Data_Testing". Having changed the value, we click on Save, then we can close deployment settings.
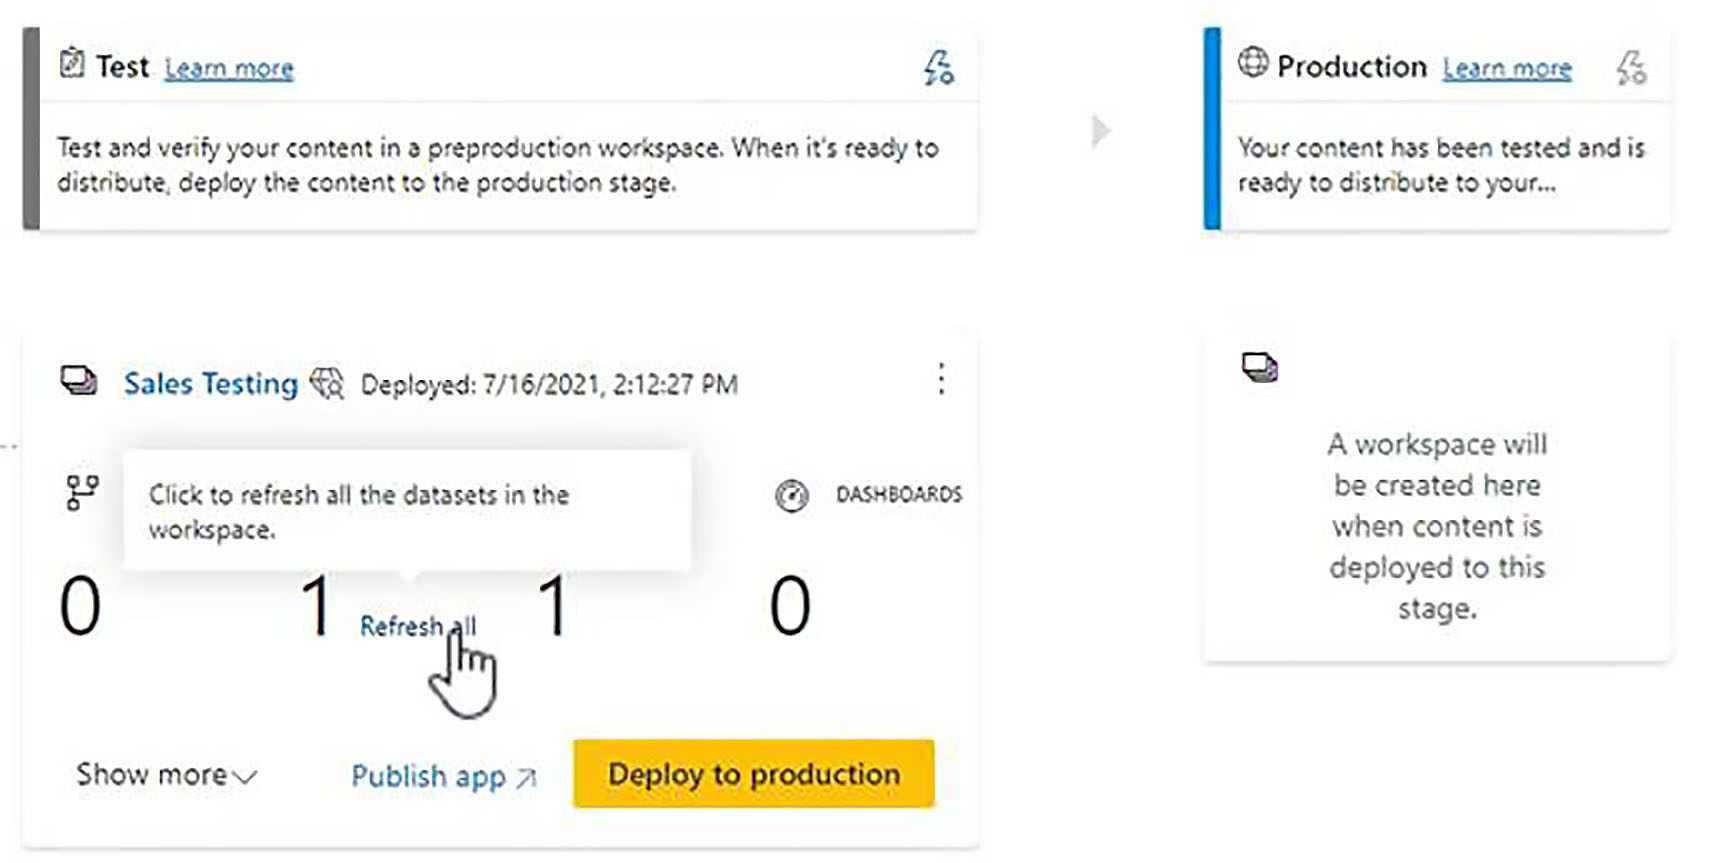
At this stage, we would click Refresh All to pull in data from the testing database, and of course, this implies that if we are using a data gateway, we have gone into Manage Gateways, and added each of the data sources that we want to work with to our gateway cluster.
Granting Access to the Test Workspace
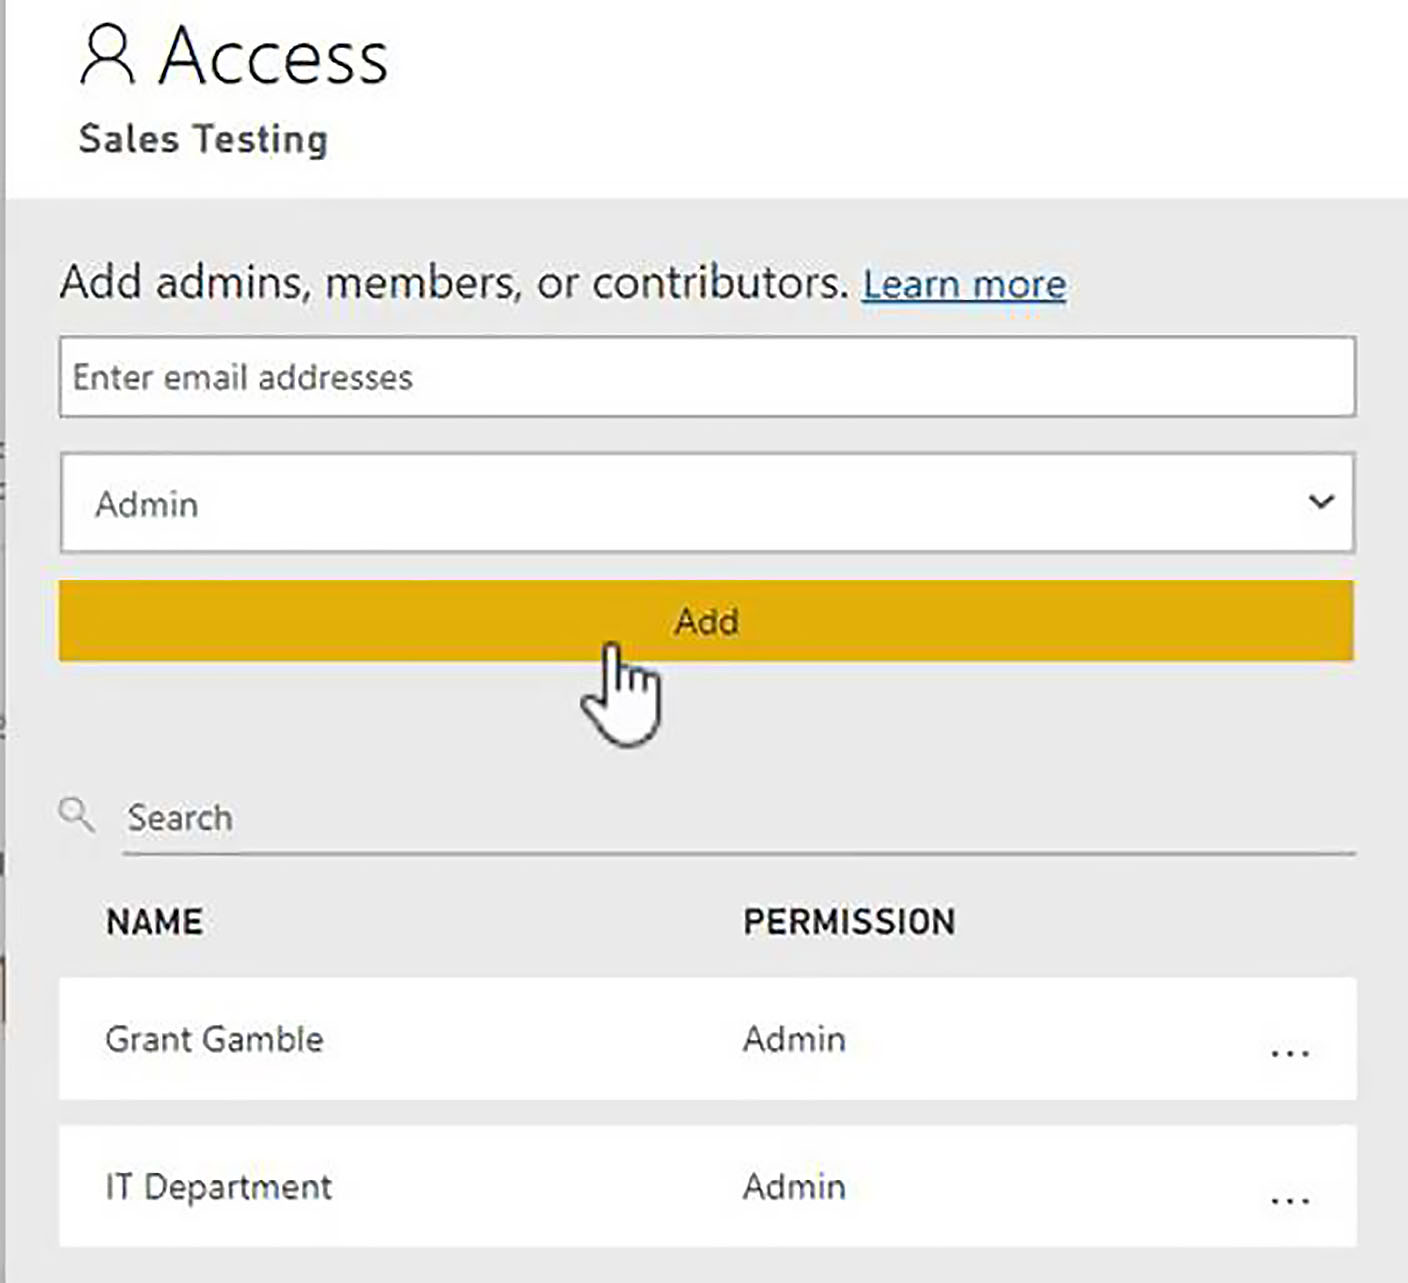
Again, we would think about workspace access. First, let us say in this example, that our IT department need administrative access. In our tenant, we have an "IT Department" group; so, we will add them as admins.
Publishing the Development Workspace as an App
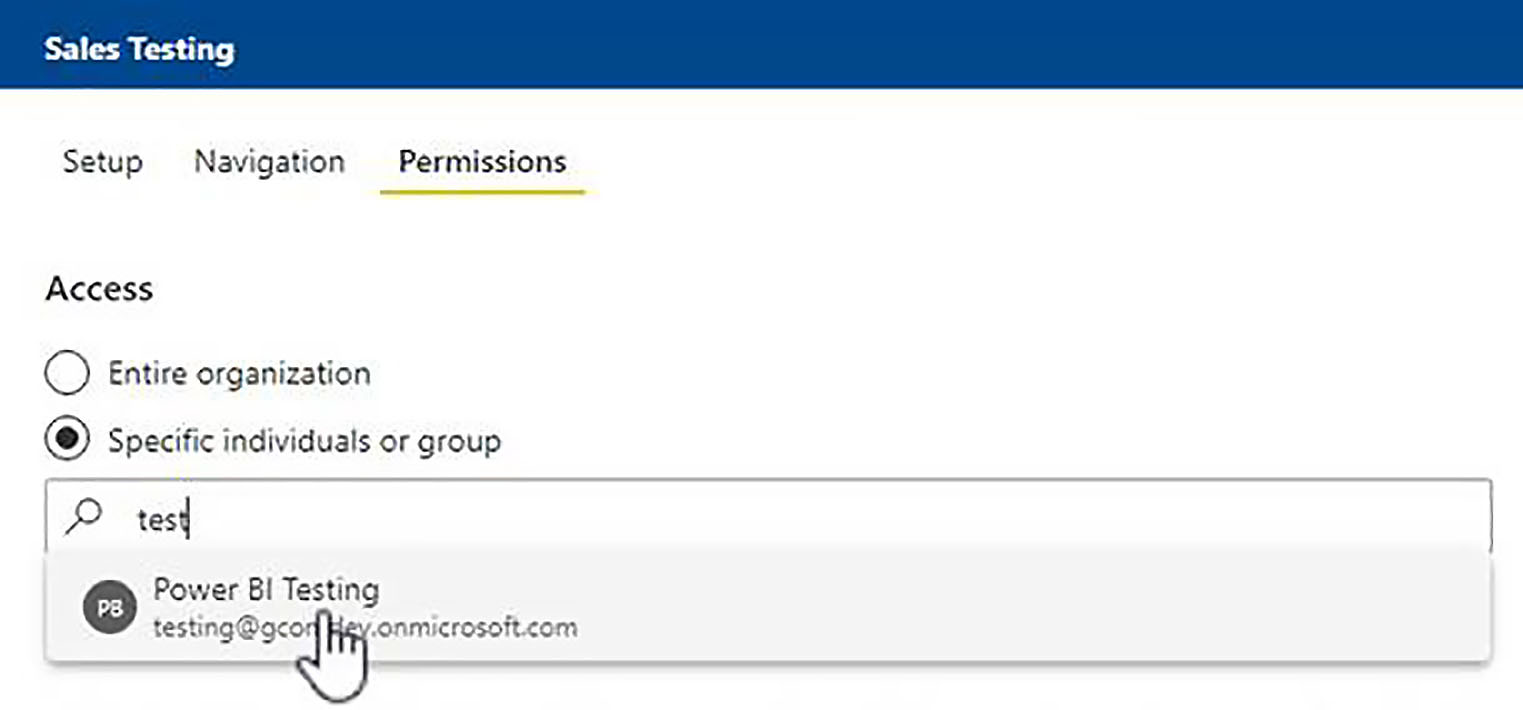
Then for our testers, we will publish the workspace as an app, and then we will enter the name of our testing group. In this tenant, we have a group here called "Power BI testing"; so, we give them access and publish the app.
We will stay at the Test phase for as long as necessary, and then when we are ready, we will think about deploying to production.
So, deployment is completed, and again, we can perhaps rename our workspace from the misleading default "Sales Testing [Production]".
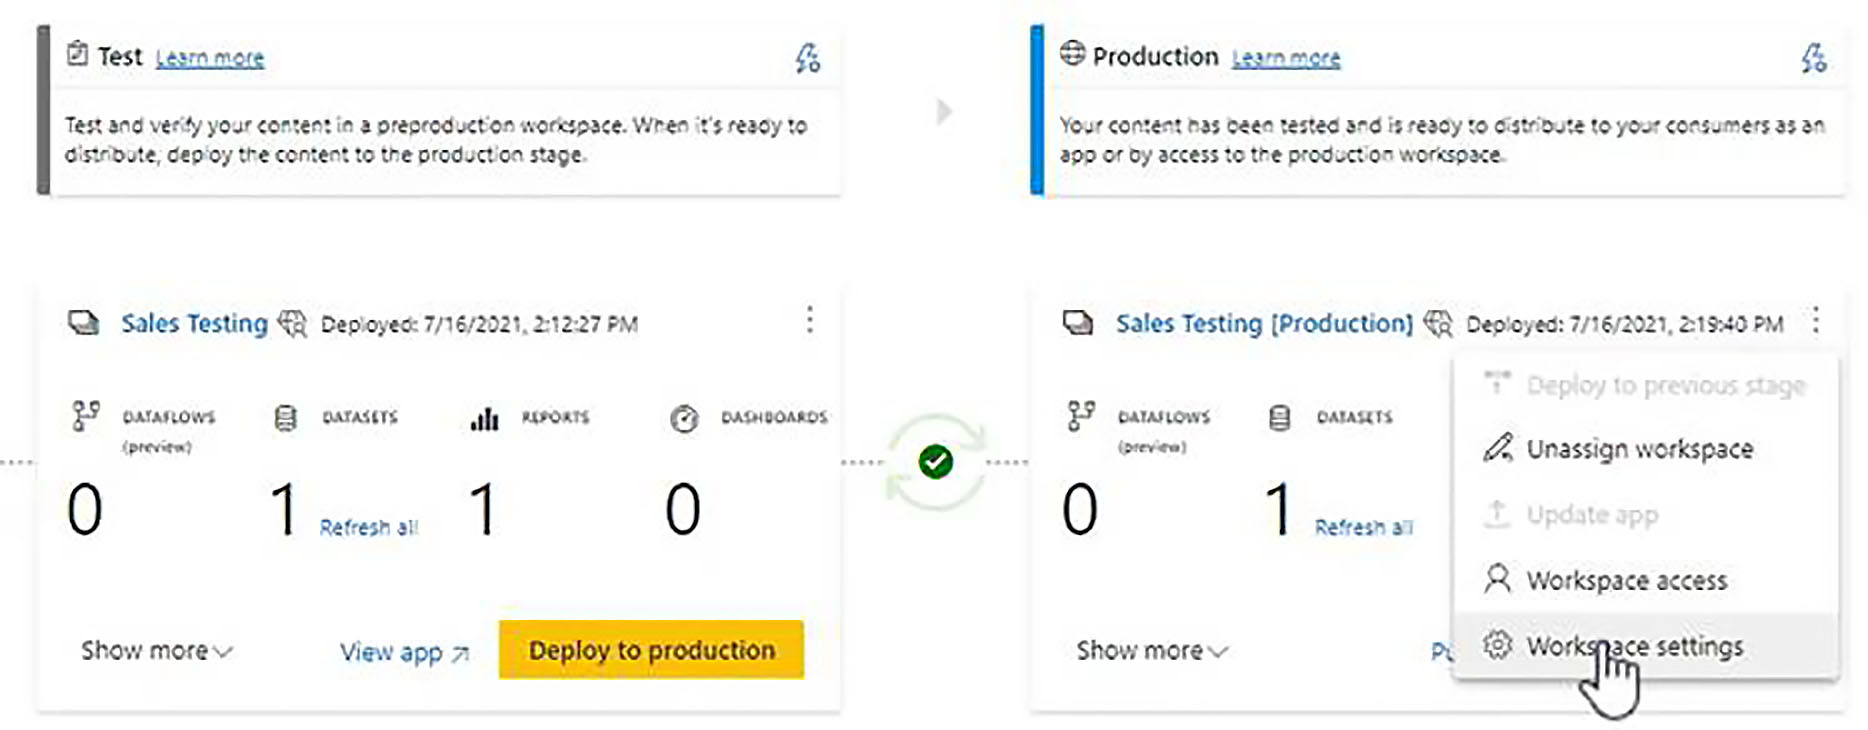
Let us change the name of this final stage workspace to "Sales Reporting".
Creating Rules for the Production Stage
When we need to think about changing our Database parameter value. To do this, first we click on the Deployment Settings button.
Then, in the Deployment Settings dialog, we click on our dataset, "07-Use deployment pipelines".
We then expand parameter rules and click the Add Rule button. Again, we will add a single rule, choose our database parameter, and our final production database is simply called "Sales_Data".

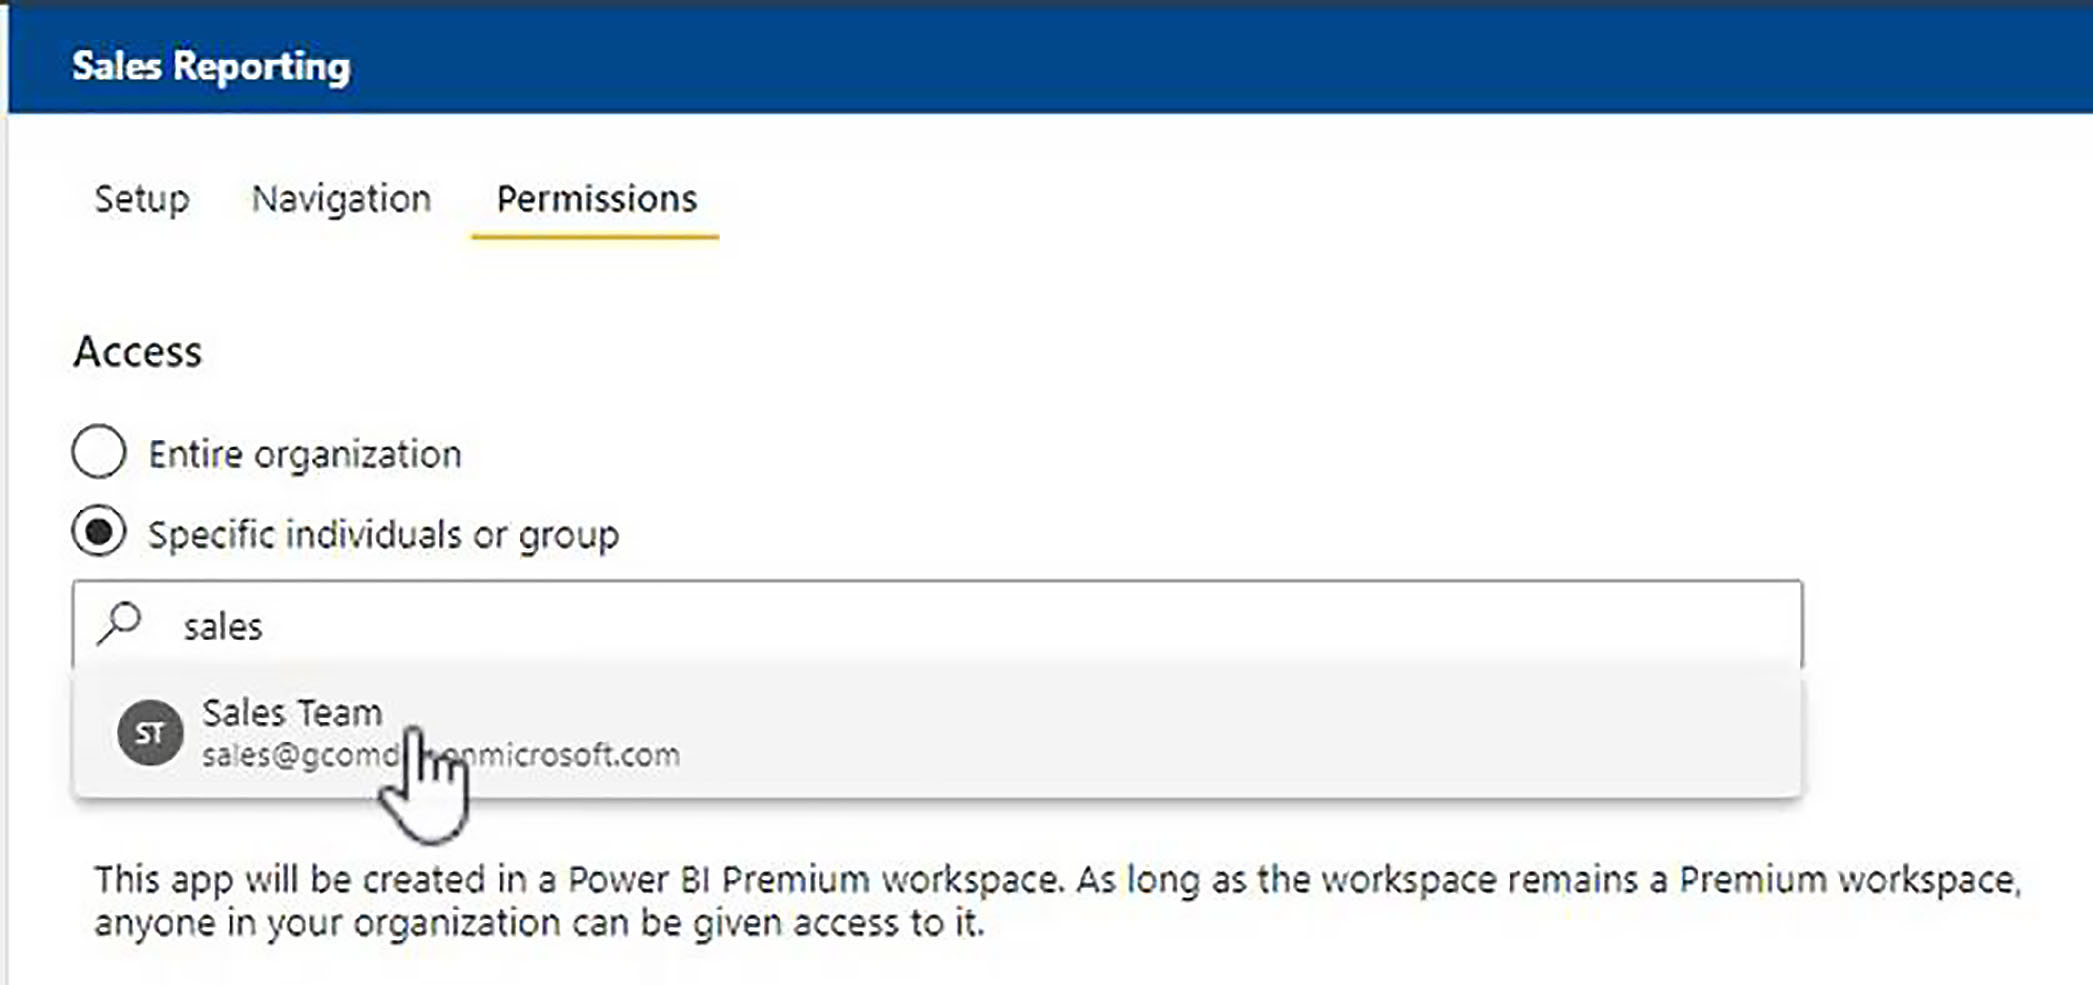
We will then need to refresh our data to pull in the values from our live production database, and then we are ready to publish the app to our final end users. This time, we are sharing with a group called "Sales Team".
Rinse and Repeat
Of course, this is not just a one off operation.
As our content changes and, as new content comes along, we can repeat the process of uploading objects into the Development workspace; deploying it to the Test stage; getting it past our administrators and our testers; and then deploying it to Production and updating our app.