- You are here:
- Home »
- Blog »
- Power BI »
- Using Power BI Dataflows to Centralize Data Preparation
Using Power BI Dataflows to Centralize Data Preparation
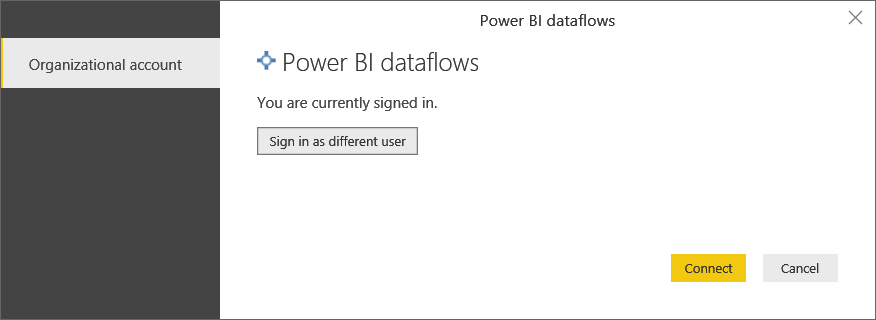
Power BI’s new dataflows allow the centralization of data cleansing and transformation operations, greatly reducing inconsistencies and duplication of effort across organizations. Instead of connecting to data sources from within a Power BI Desktop PBIX file, organizations will now be able to carry out all of their Power Query data connection and transformation centrally in the Power BI service.
Since each dataflow must be created inside of a specific app workspace, the only real way to centralize their use is to create an app workspace (or several if necessary) dedicated to storing dataflows and not designed to be published as an app. Report creators can then be given member access to these dataflow-only app workspaces.
Centralization of data can then be achieved simply by ensuring that all report creators base their reports on dataflows. That way, for each new report created, if a suitable dataflow already exists, it can simply be used; if one does not exist, it can be created and reused in the future.
The following diagram shows how two dataflows might be used to centralize reports created for a manufacturing and sales department, using on-premises data sources. The diagram shows two types of app workspaces: dataflow and content. However, these types are created purely by organizational design; in reality, there is only one type of app workspace in Power BI.
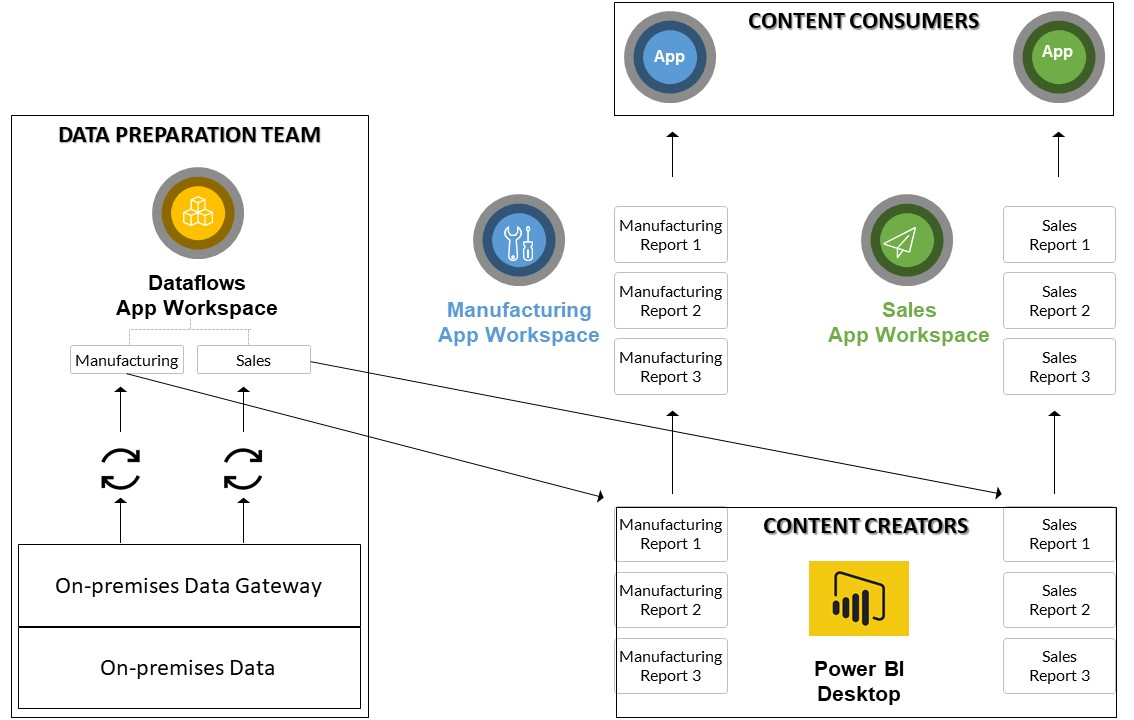
By design, an organization can decide that dataflow workspaces will contain only dataflows: no dashboards, reports, workbooks, or datasets. Since they contain no reports or dashboards, this means that these app workspaces can never be published as apps; either deliberately or accidentally.
Let’s look at how we might create a sales report, working within the framework shown in the diagram above. Let’s say that our organization uses a departmental model in creating app workspaces: one for each organizational department. Thus, we already have a “Sales” app workspace. And let’s also say that we have a workspace called “Organizational Dataflows”, in which we plan to create all our dataflows, and nothing else. Finally, let’s assume that we have an on-premises data gateway installed and configured.
Data Preparation
Firstly, a member of our data preparation team creates a Sales data flow inside the “Organizational Dataflows” app workspace, using the key steps shown below.
In the Power BI service, click Workspaces > Organizational Dataflows > Dataflows.
Click Create > Dataflow.

This creates a new, unsaved dataflow. Next, click on the Add new Entities button. (An entity is any element within an organization about which one needs to store data. Each entity will be represented as a table within the data model.)
You will then be given access to all of the data sources to which you can connect. All of the data sources available within Power BI Desktop will eventually be available as data sources for Power BI dataflows.

In this example, we will use Excel as our data source. When we click the Excel button, the Power Query Connection Settings screen appears; and, since the Excel file is stored on a local drive, we are forced to choose an on-premises gateway and enter our credentials.
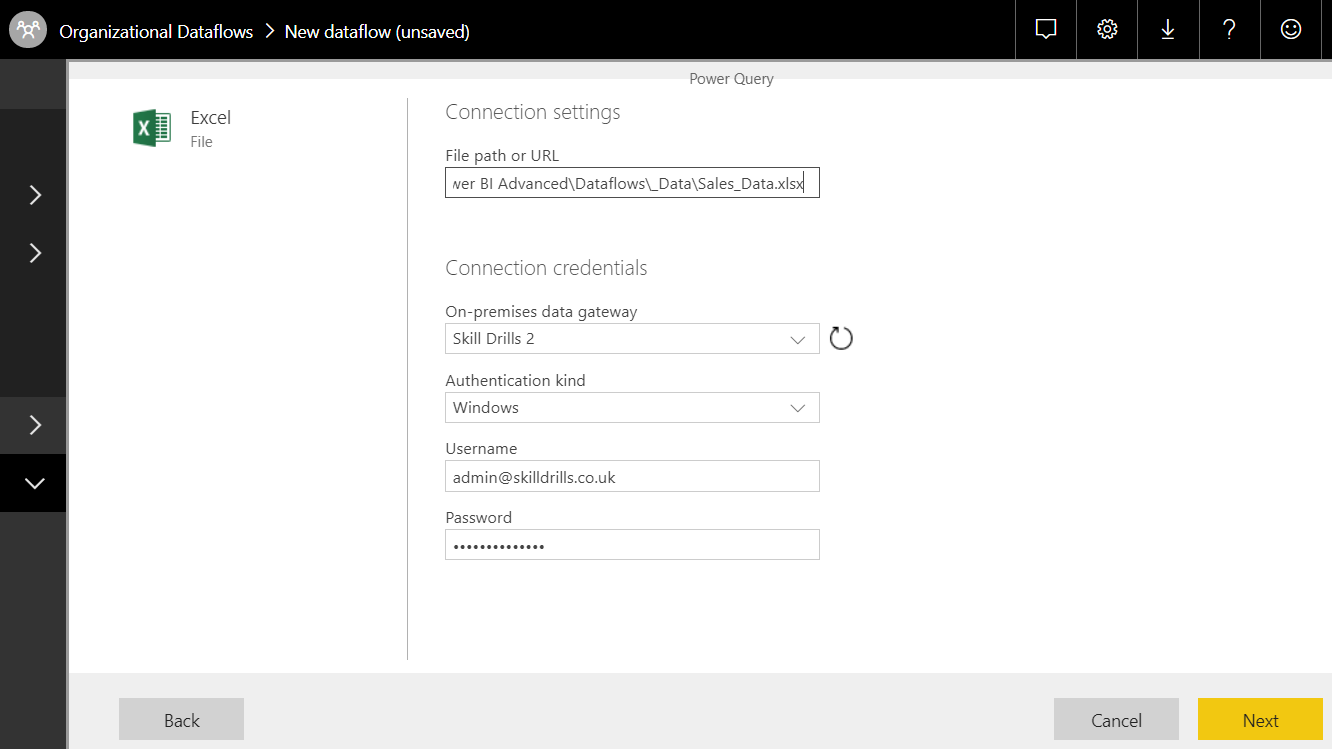
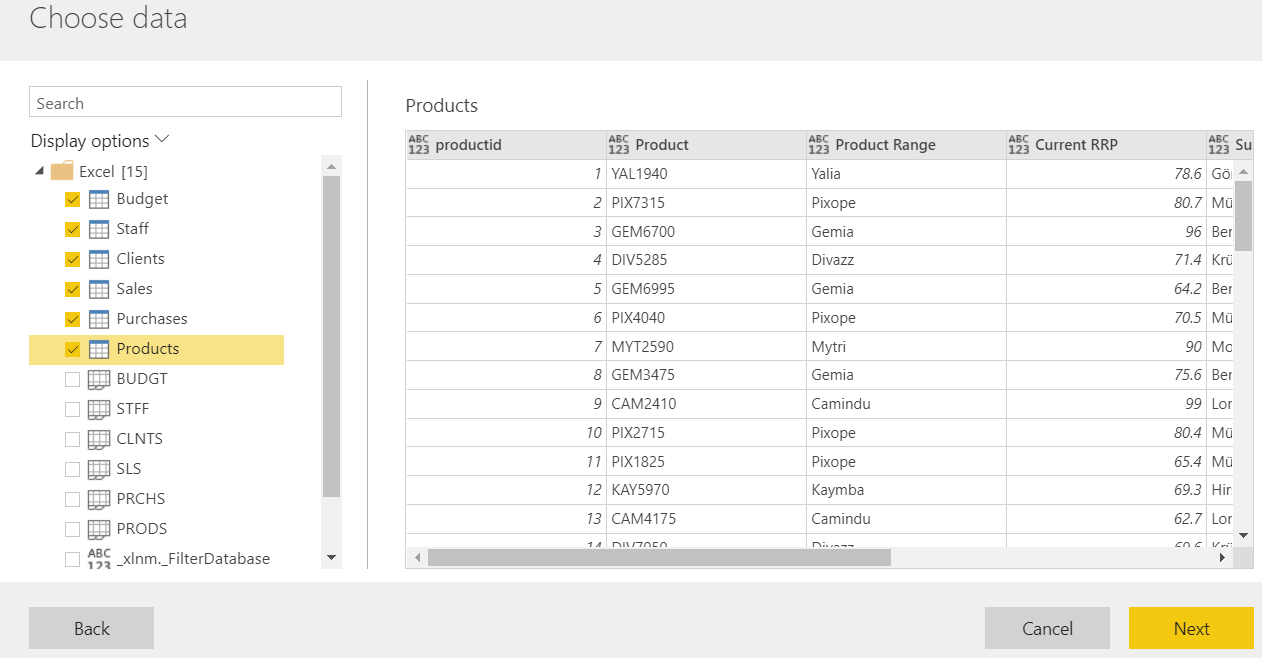
When we click the Next button, we are given a preview of the available data and allowed to choose the objects we wish to import. In the case of Excel, as in Power BI Desktop, we can import data from tables, worksheets and named ranges.
Clicking the Next button takes us into the online Query Editor which we can assume will be functionally identical to the Power BI Desktop Query Editor when the product is fully developed.
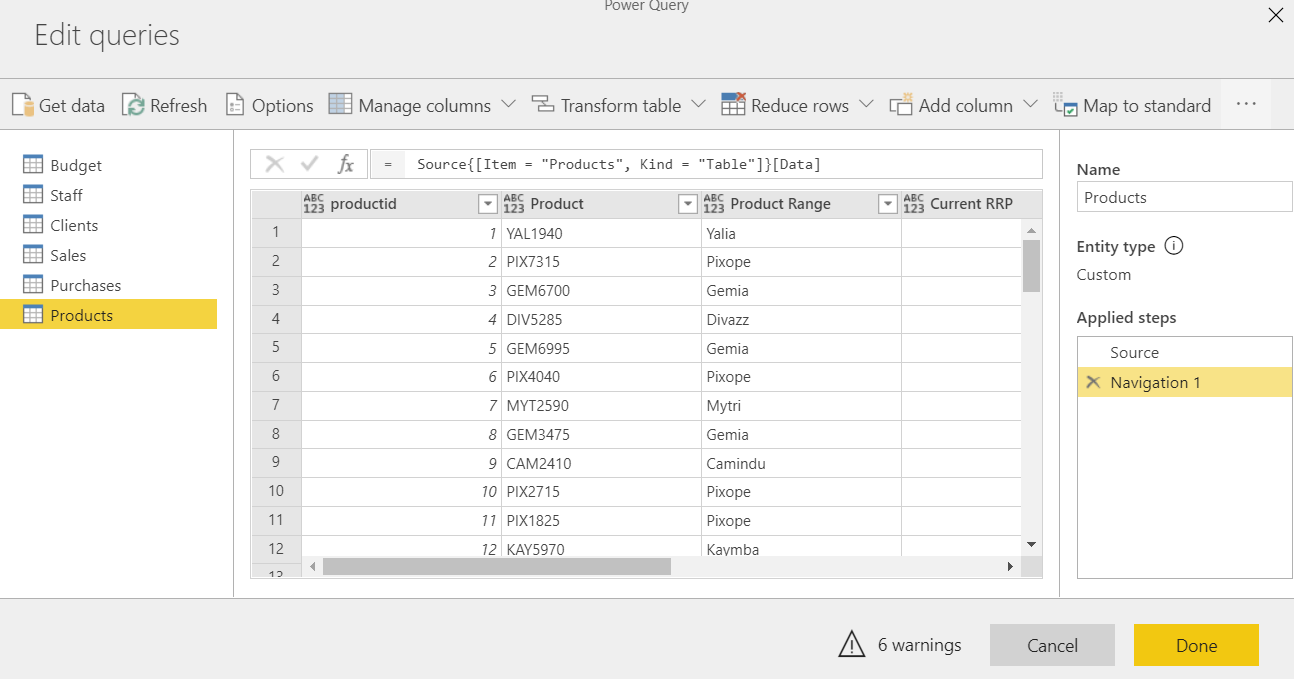
Here, we perform our data cleansing and transformation using a combination of visual commands and M language coding. When we are finished and click the Done button, we are presented with a list of all the entities we have created.
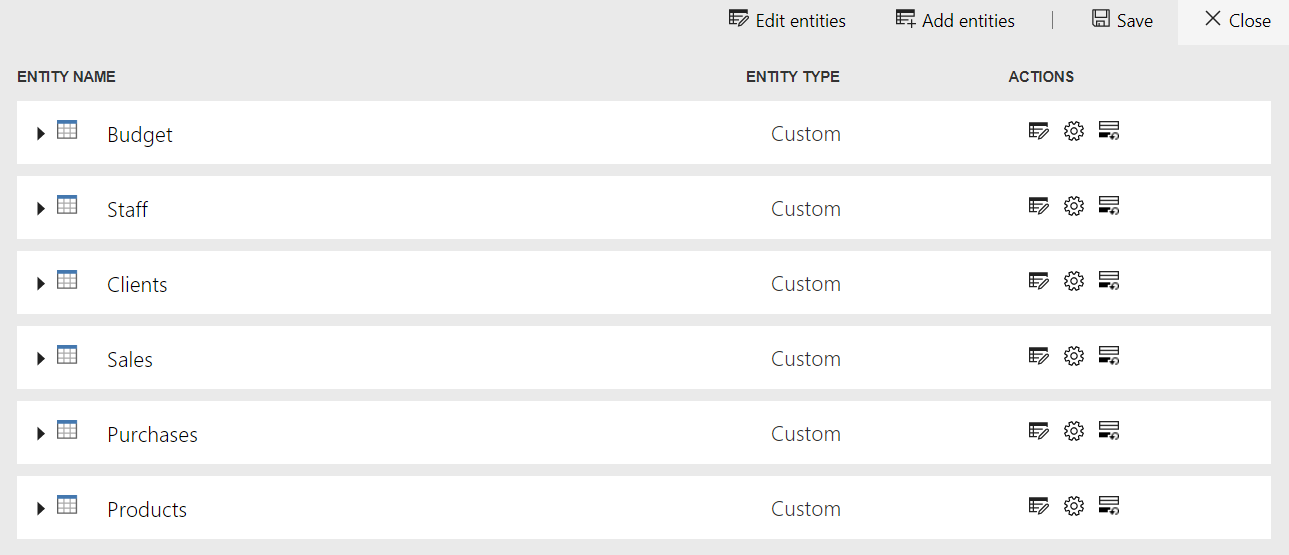
On the right of the name of each entitiy, we have three Action buttons: Edit Entity, Properties and Incremental Refresh. The Edit Entities button allows you to reenter the Query Editor and make further changes. The Properties button allows you to enter metadata about the dataflow, such as a description.
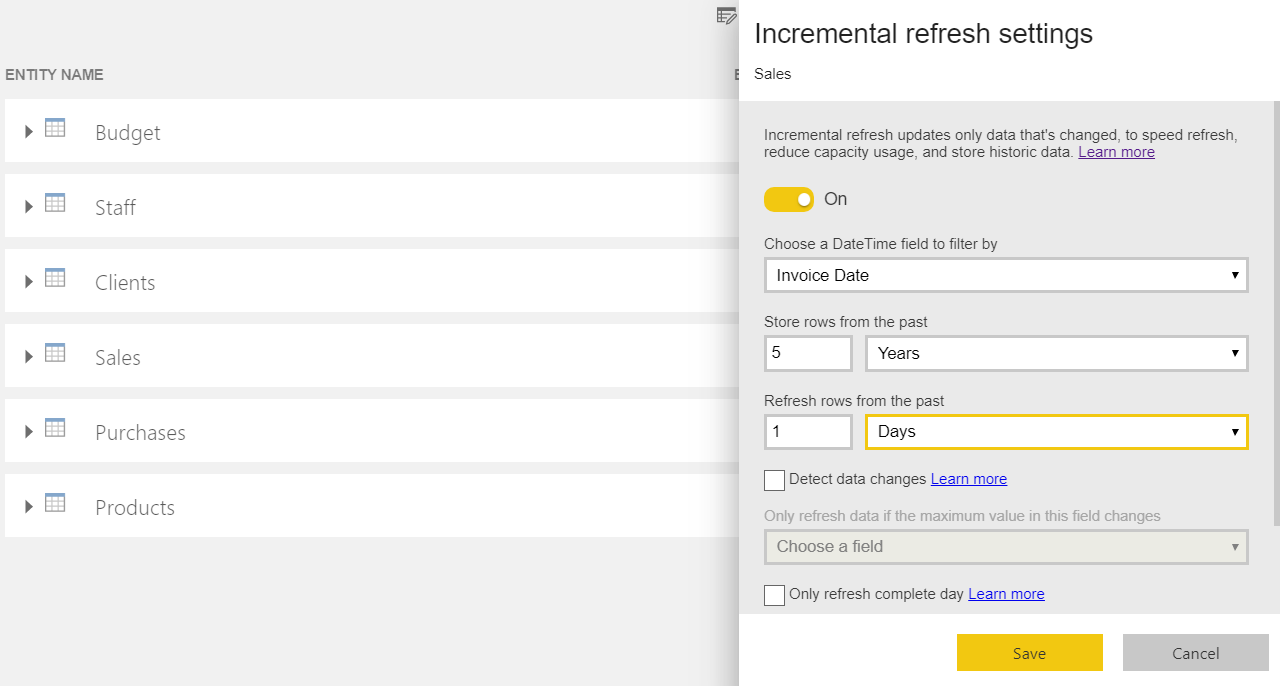
The Incremental Refresh button allows you to force the refresh of an individual entity (the feature works at the entity, not the dataflow, level). It requires that the entity contain a datetime field and that the app workspace containing the dataflow is in premium capacity. This feature can be used to speed up the refresh times of large tables in which only a small proportion of rows are modified between refreshes.
The final step is to save all the changes you have made to the dataflow by clicking the Save button in the top right of the screen and entering a name and description.
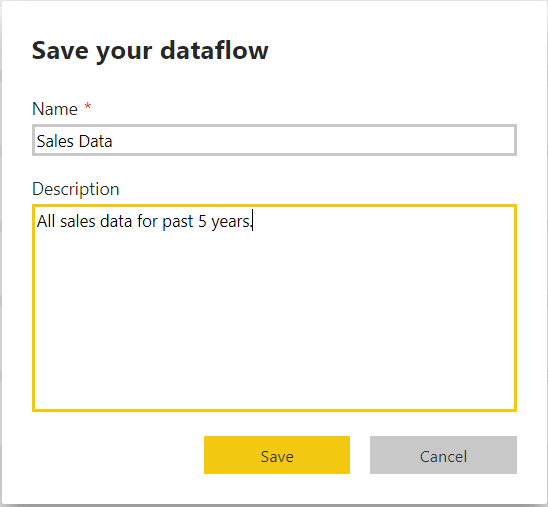
If the dataflow contains on-premises data, you will be given the opportunity of setting a refresh schedule using the on-premises data gateway.

You can also perform this step manually at any time by clicking on Settings (the cog icon) > Settings > DataFlows and activating the Scheduled Refresh option.
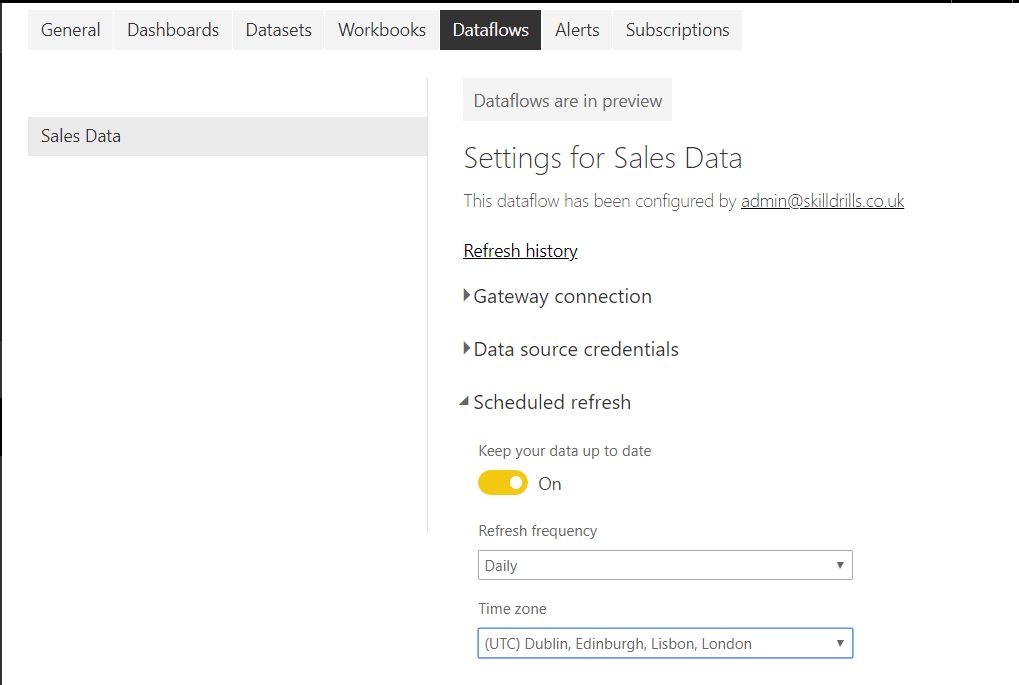
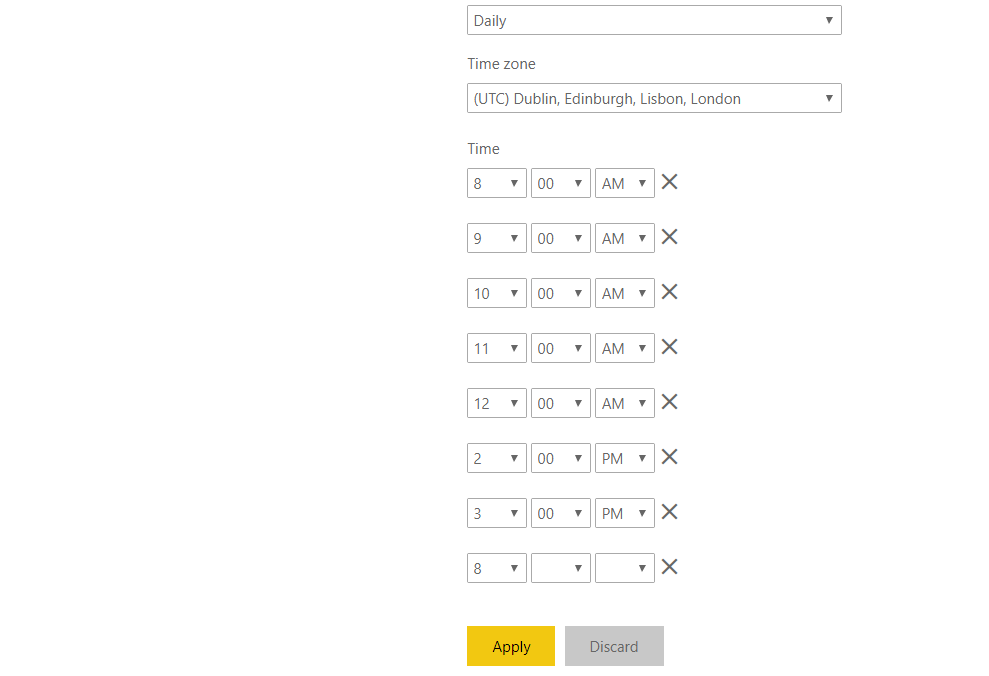
In a Power BI Pro capacity app workspace, you can schedule up to 8 refreshes per day; if the app workspace is in premium capacity, you can schedule up to 48 refreshes per day.
Using a Dataflow as a Data Source
In Power BI Desktop, this dataflow can now be used repeatedly, as a definitive data source when building sales reports. At the time of writing, Power BI Desktop is the only viable option, since the Power BI service offers no data modelling or DAX capabilities.
Click Home > Get Data > Power BI dataflows; sign in, if necessary; and click the Connect button.

Unlike the experience of connecting to a Power BI dataset, connecting to a Power BI dataflow is not an all-or-nothing experience. You are able to specify the entities to which you want to connect.
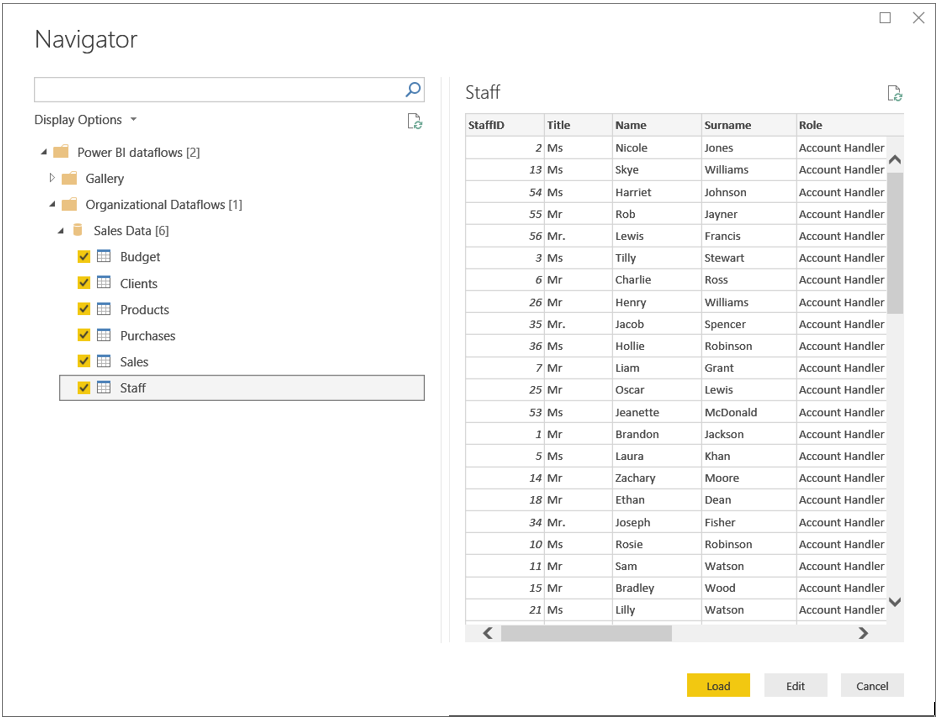
You can also connect to additional data sources within the same report and perform data modelling operations as normal.
In short, Power BI dataflows provide a really useful mechanism for standardizing data preparation and preventing inconsistencies and duplication of effort in organizational reporting.
In this blog post, we have only touched on the use of dataflows with on-premises data.
Check out the following Microsoft blog post and video for a broader introduction to this great new feature.
https://powerbi.microsoft.com/en-us/blog/introducing-power-bi-data-prep-wtih-dataflows/
Infographic
